13_Syntopia Digital Human Third-Party Platform Livestream Tutorial
Syntopia Digital Human Third-Party Platform Livestream Tutorial
The Syntopia Digital Human livestream client can use the livestream tools provided by third-party platforms to push the digital human's video and audio to the corresponding livestream platform, allowing users to go live on that third-party platform |
1. How the Digital Human Goes Live on Third-Party Platforms
(1) Livestream Methods
Syntopia Digital Human offers two livestream methods for users to choose from: ① Virtual Camera livestream; ② Window Capture. If Virtual Camera is selected in the Syntopia Digital Human client, the third-party livestream tool must also be set to camera livestream accordingly; if Window Capture is selected in the Syntopia Digital Human client, the third-party livestream tool must also be set to window capture accordingly.
(2) Installing the Camera
Open the installer, double-click to install the camera, and on the page that opens, follow the prompt to press any key on the computer — installation will then succeed.
Notes:
1. Installing the virtual camera requires administrator privileges;
2. If you are not an administrator and the camera installation fails, download OBS, enable its virtual camera, then close OBS. Select "OBS Virtual Camera" for the livestream, then open the livestream control console;
3. Be sure to install OBS, not "OBS Recording Master" — if both are installed, delete Recording Master, otherwise it will occupy the camera and prevent it from being used.
2. Required Software for Going Live on Third-Party Platforms
- WeChat Channels: WeChat client, https://weixin.qq.com/
- Tmall/Taobao: Taobao Live Host Workbench, https://taolive.taobao.com/
- JD.com: JD Live Tool, https://nlive.jd.com/download.html
- Douyin: Livestream Companion, https://streamingtool.douyin.com/
- Kuaishou: Kuaishou Livestream Companion, https://live.kuaishou.com/live-partner
- tiktok:https://www.tiktok.com/studio/download
- Xiaohongshu (RED): Xiaohongshu Livestream Assistant, https://www.xiaohongshu.com/zhibo/robs?source=official
3. Filling in the Interaction Link for Third-Party Livestreams
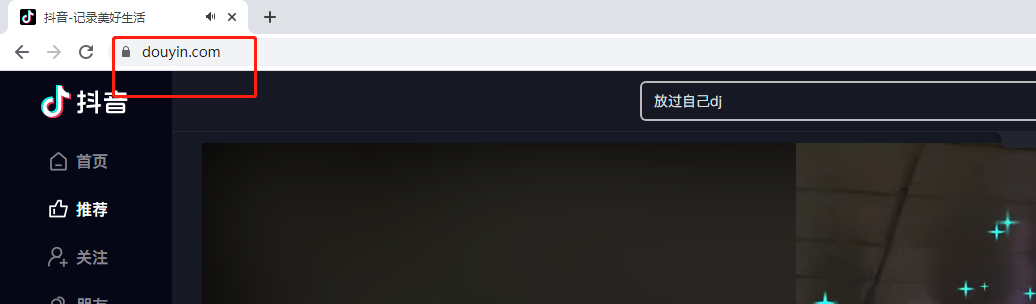
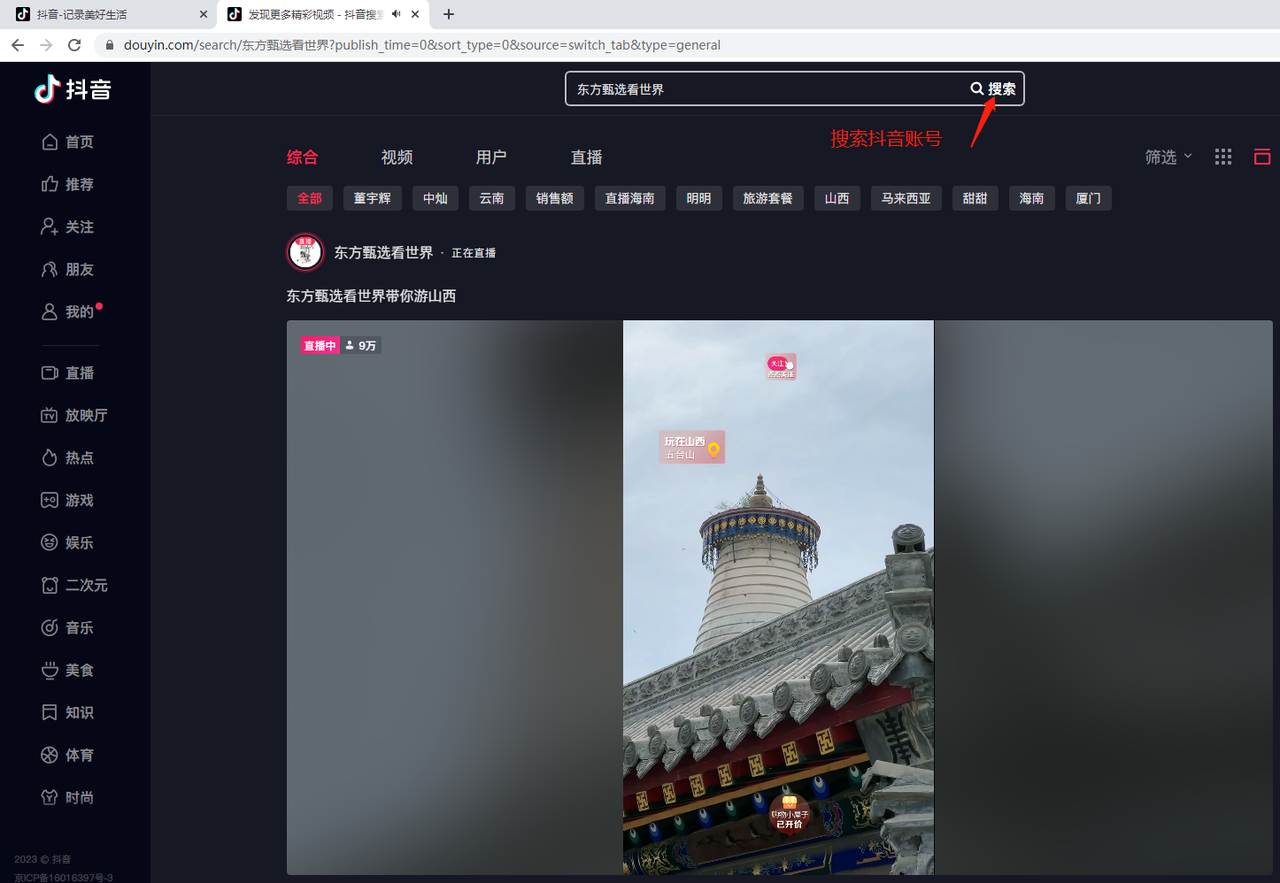
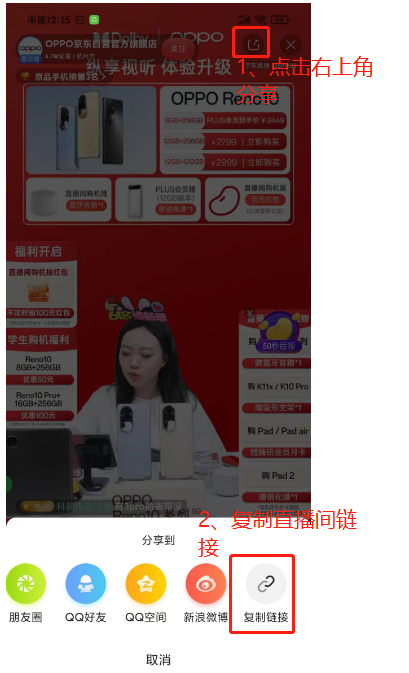
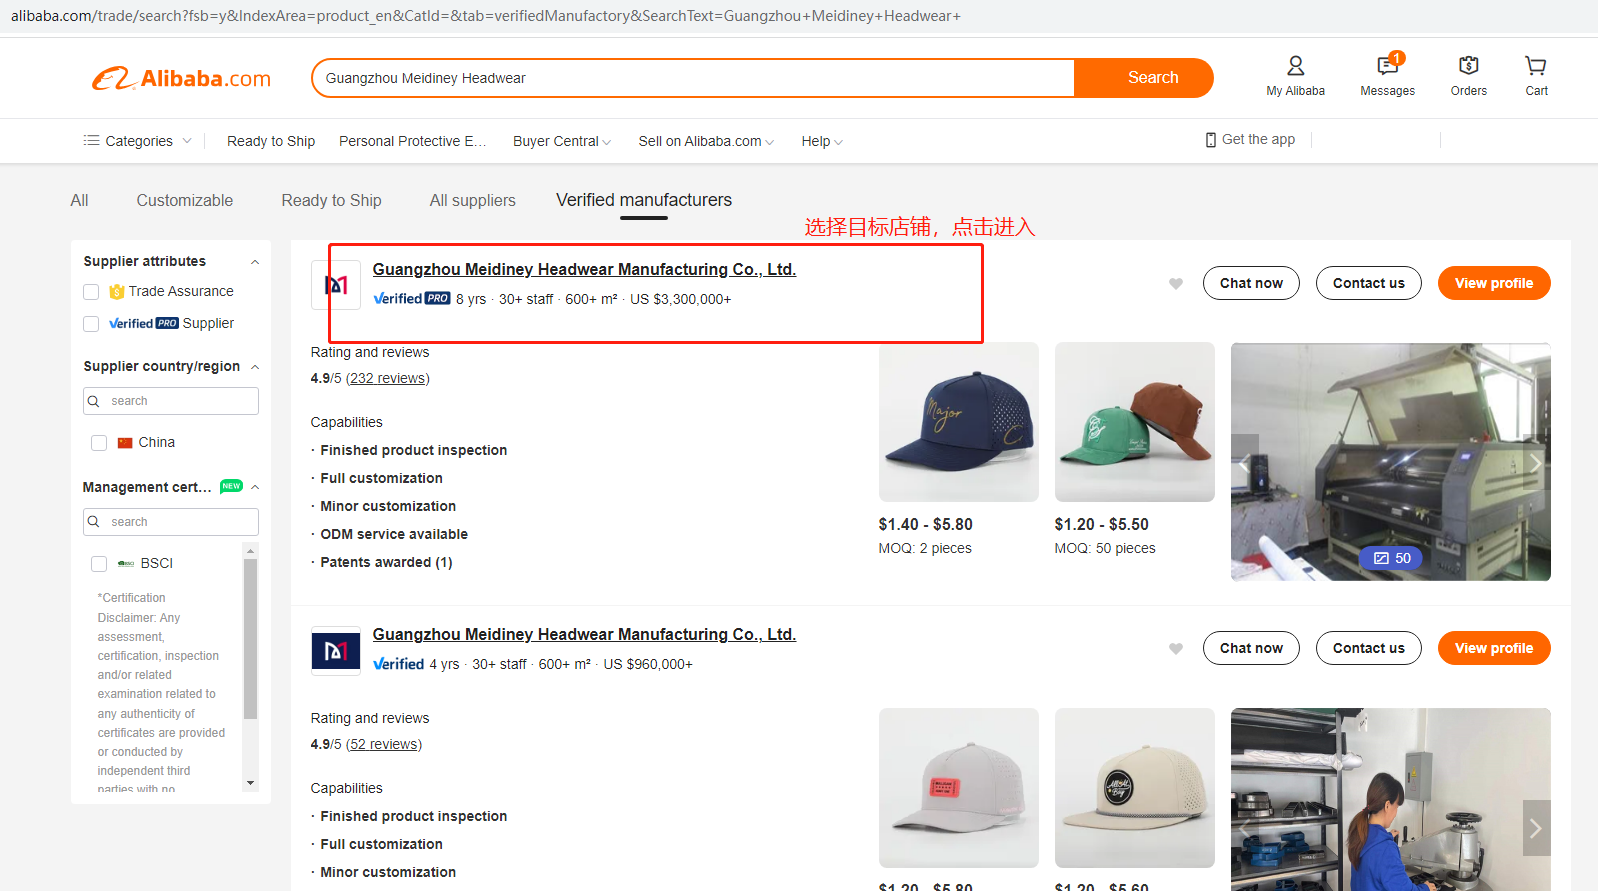
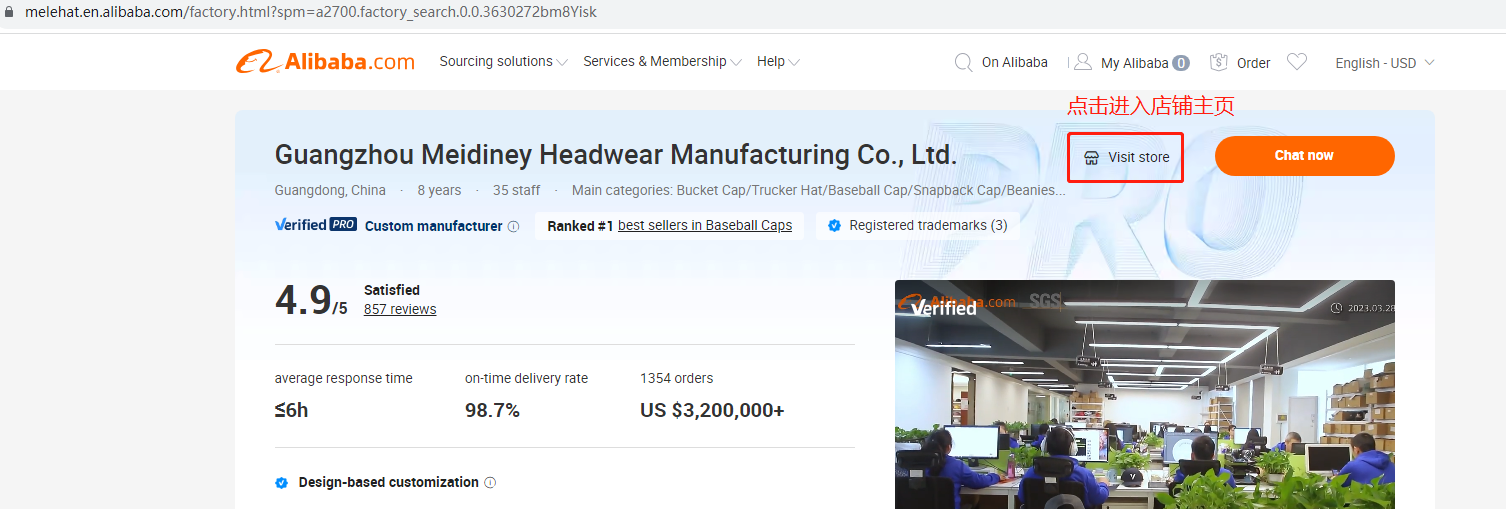
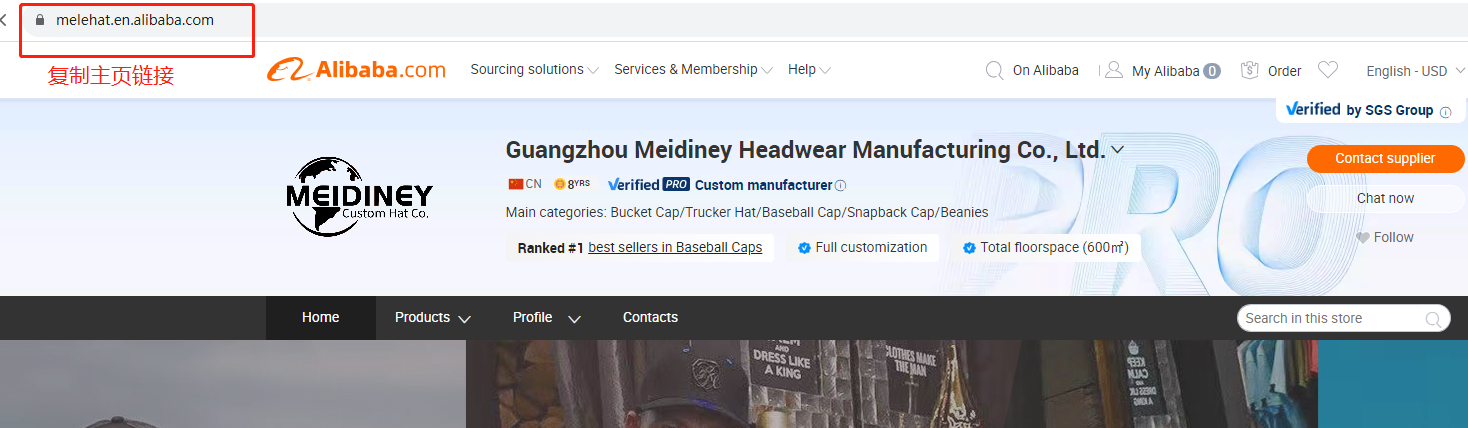
After going live, you can fill in the livestream room's link to interact with viewers; see Attachment 1 for the detailed guide: How to Obtain Third-Party Platform Q&A Interaction Link
4. Third-Party Livestream Operation Tutorials
4.1 Going Live on WeChat Channels
4.1.1 Going Live Using the Virtual Camera
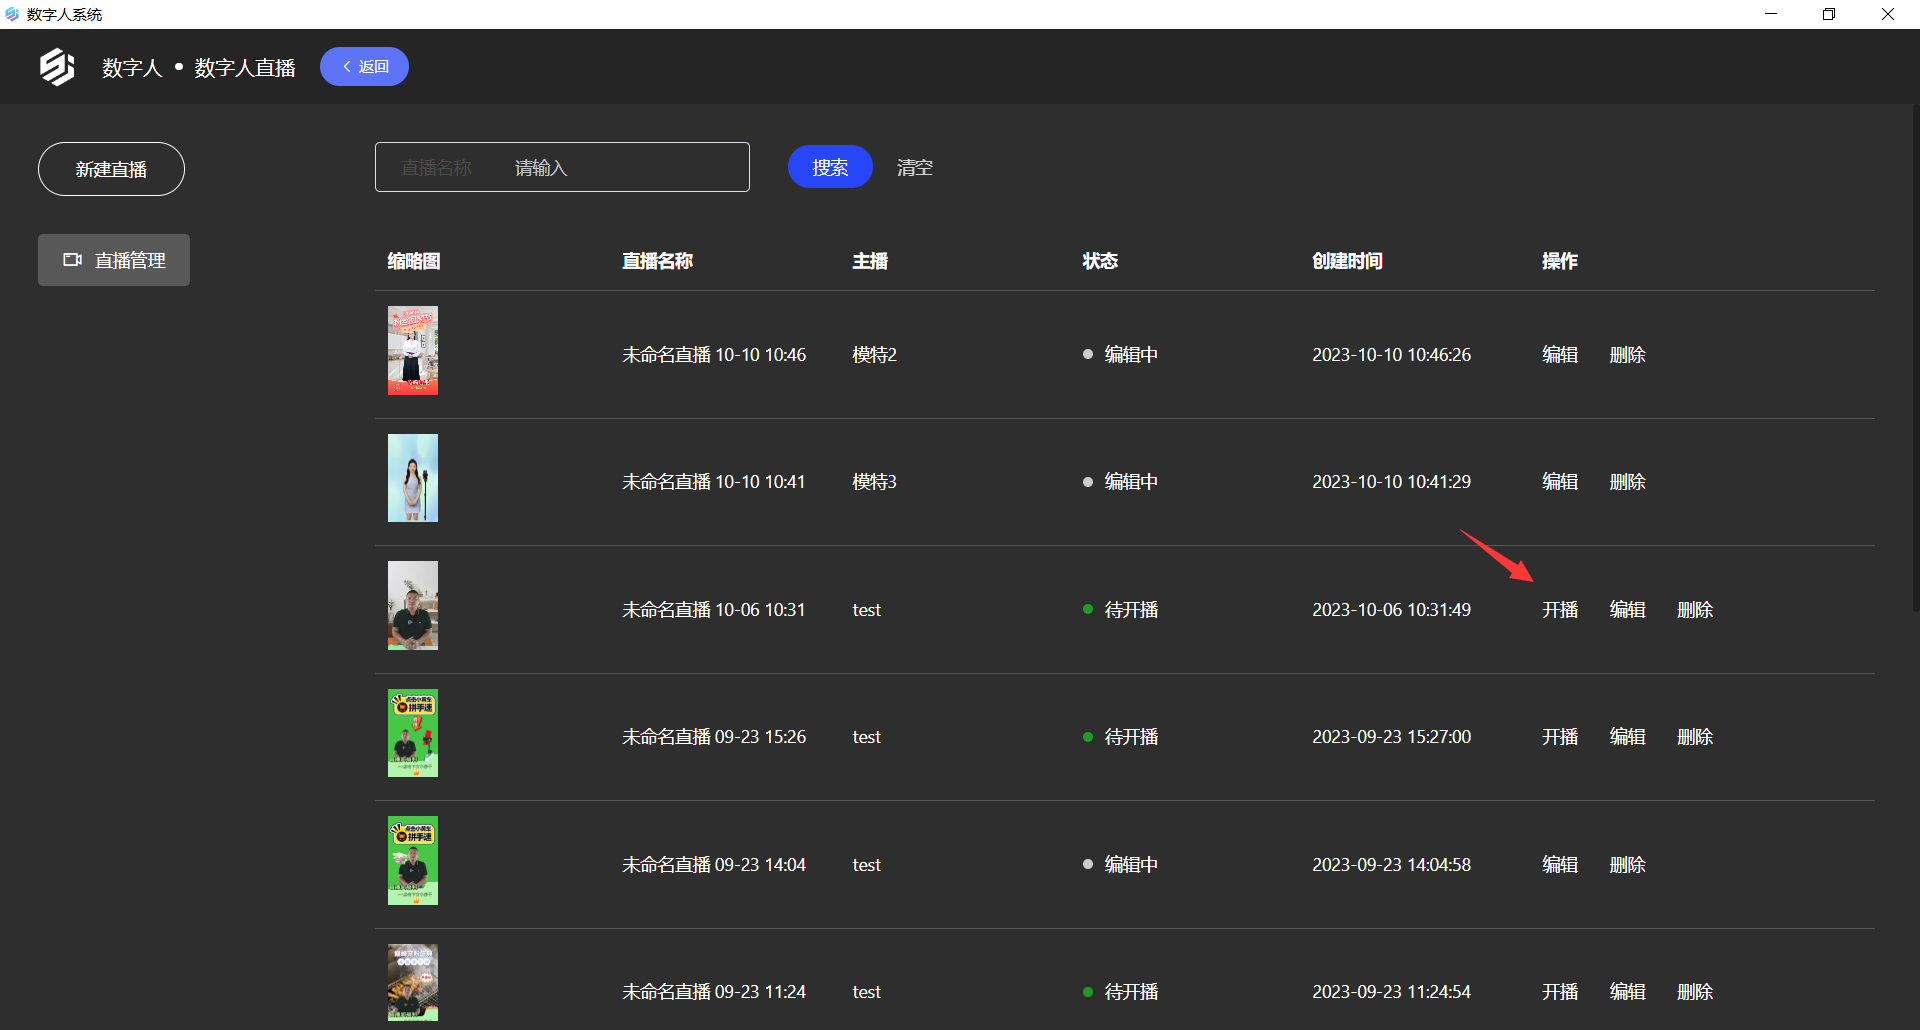
(1) In Syntopia Digital Human, find the project to go live with and click Go Live
(2) Virtual Camera livestream is the default; click Start Livestream to get the digital human's livestream video and audio
(3) Log in to WeChat for PC, click the button in the bottom-left corner, select [Channels Livestream Tool], and enter the Channels workbench


(4) Click Add Camera, find the livestream video provided by Syntopia Digital Human, set the resolution to 1080×1920, and click Confirm — the video provided by Syntopia Digital Human will be successfully captured by the Channels livestream tool
(5) Click Start to go live. If the microphone is enabled, it will record the ambient sound or voices in the room, which will be pushed to the livestream room via the livestream tool, potentially resulting in noisy ambient sound or voices in the room — turn the microphone off or on based on your actual needs
4.2 Going Live on Tmall/Taobao
4.2.1 Going Live Using the Virtual Camera
(1) Syntopia Digital Human's default livestream mode is Virtual Camera
(2) Download the [Taobao Host] app on your phone and complete host identity verification; download and install [Taobao Live Host Workbench] on your computer, and scan the QR code with the Taobao mobile app to log in
(3) In the Taobao Live Host Workbench, click "I Want to Go Live"
(4) The Taobao Live tool will determine whether 1080p HD livestreaming can be enabled based on the specs of the computer going live
(5) Click the top-left corner, Add Element, click Camera, name it, and click Confirm — the camera settings will pop up

(6) For the camera, select "HD Camera" (the digital human video and audio provided by Syntopia Digital Human), set the input resolution to 1080×1920, and configure other parameters as needed — the video provided by Syntopia Digital Human will be successfully captured by the Taobao Live tool
(7) Close the camera settings, click to select the session, and you can then create and go live in the Taobao livestream room. If the microphone is enabled, it will record the ambient sound or voices in the room, which will be pushed to the livestream room via the livestream tool, potentially resulting in noisy ambient sound or voices in the room — turn the microphone off or on based on your actual needs
4.2.2 Going Live Using Window Capture (Not Recommended)
Because Taobao Livestream Companion's window capture tool has issues where the captured image can show a black screen (this is not limited to Syntopia Digital Human's window — capturing other windows can also produce a black screen), using window capture to go live is not currently recommended — using the virtual camera is recommended instead
4.3.1 Going Live Using the Virtual Camera
(1) In the Syntopia Digital Human backend, click Go Live — Virtual Camera livestream is the default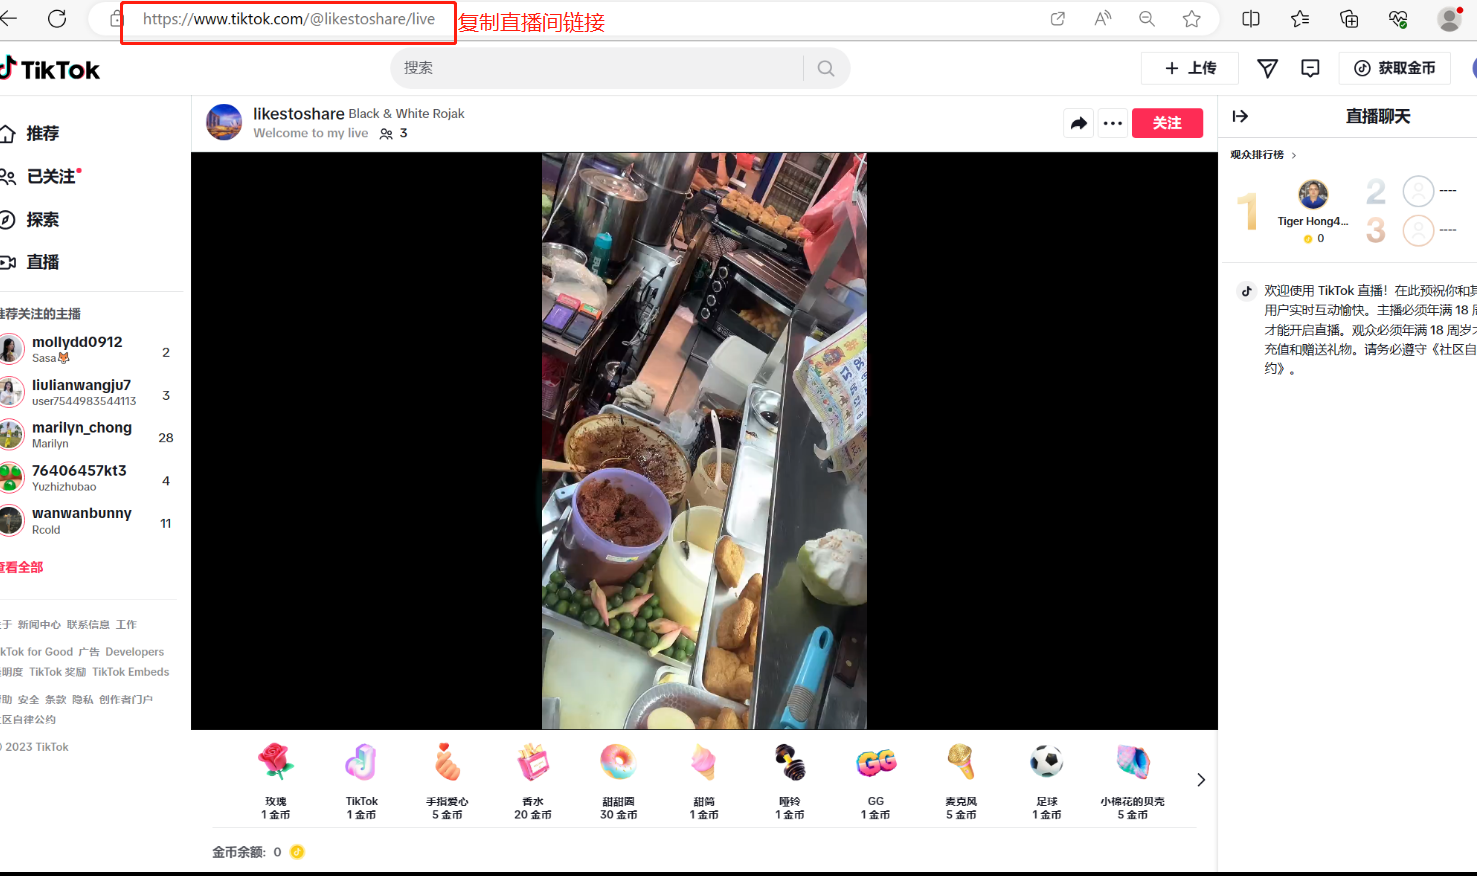
(2) Log in to the JD Live admin backend (https://jlive.jd.com/index), click Create Livestream, and the newly created room will appear in the livestream list
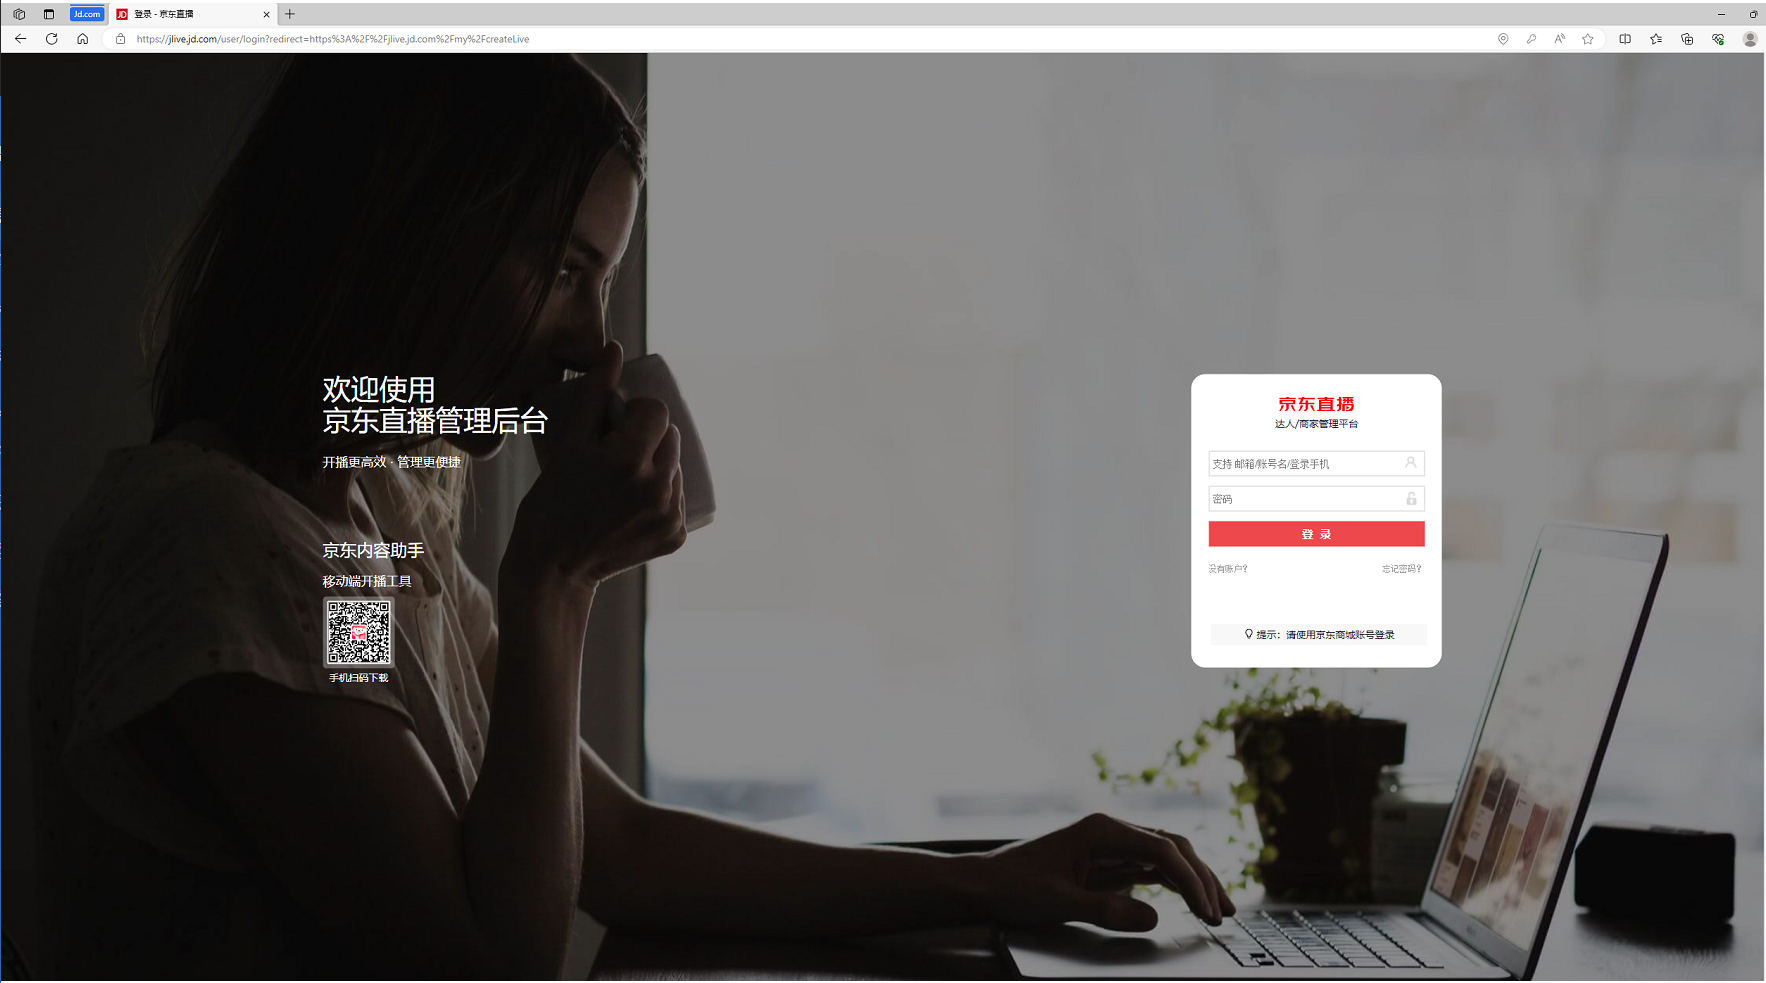
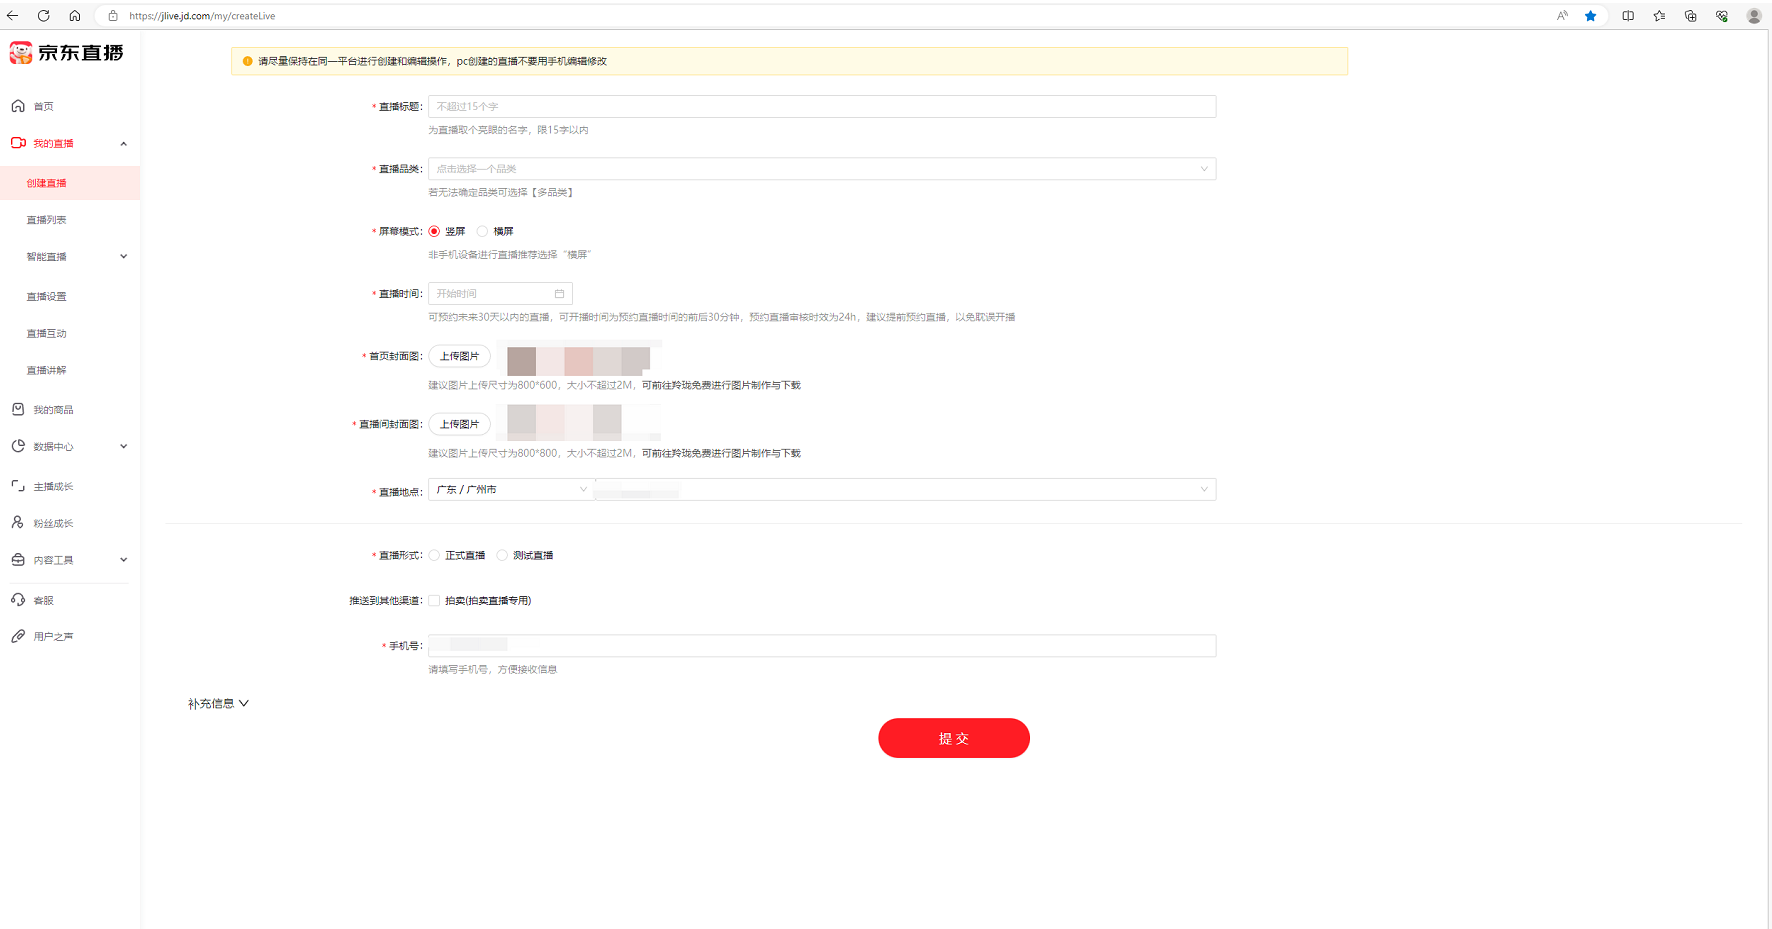
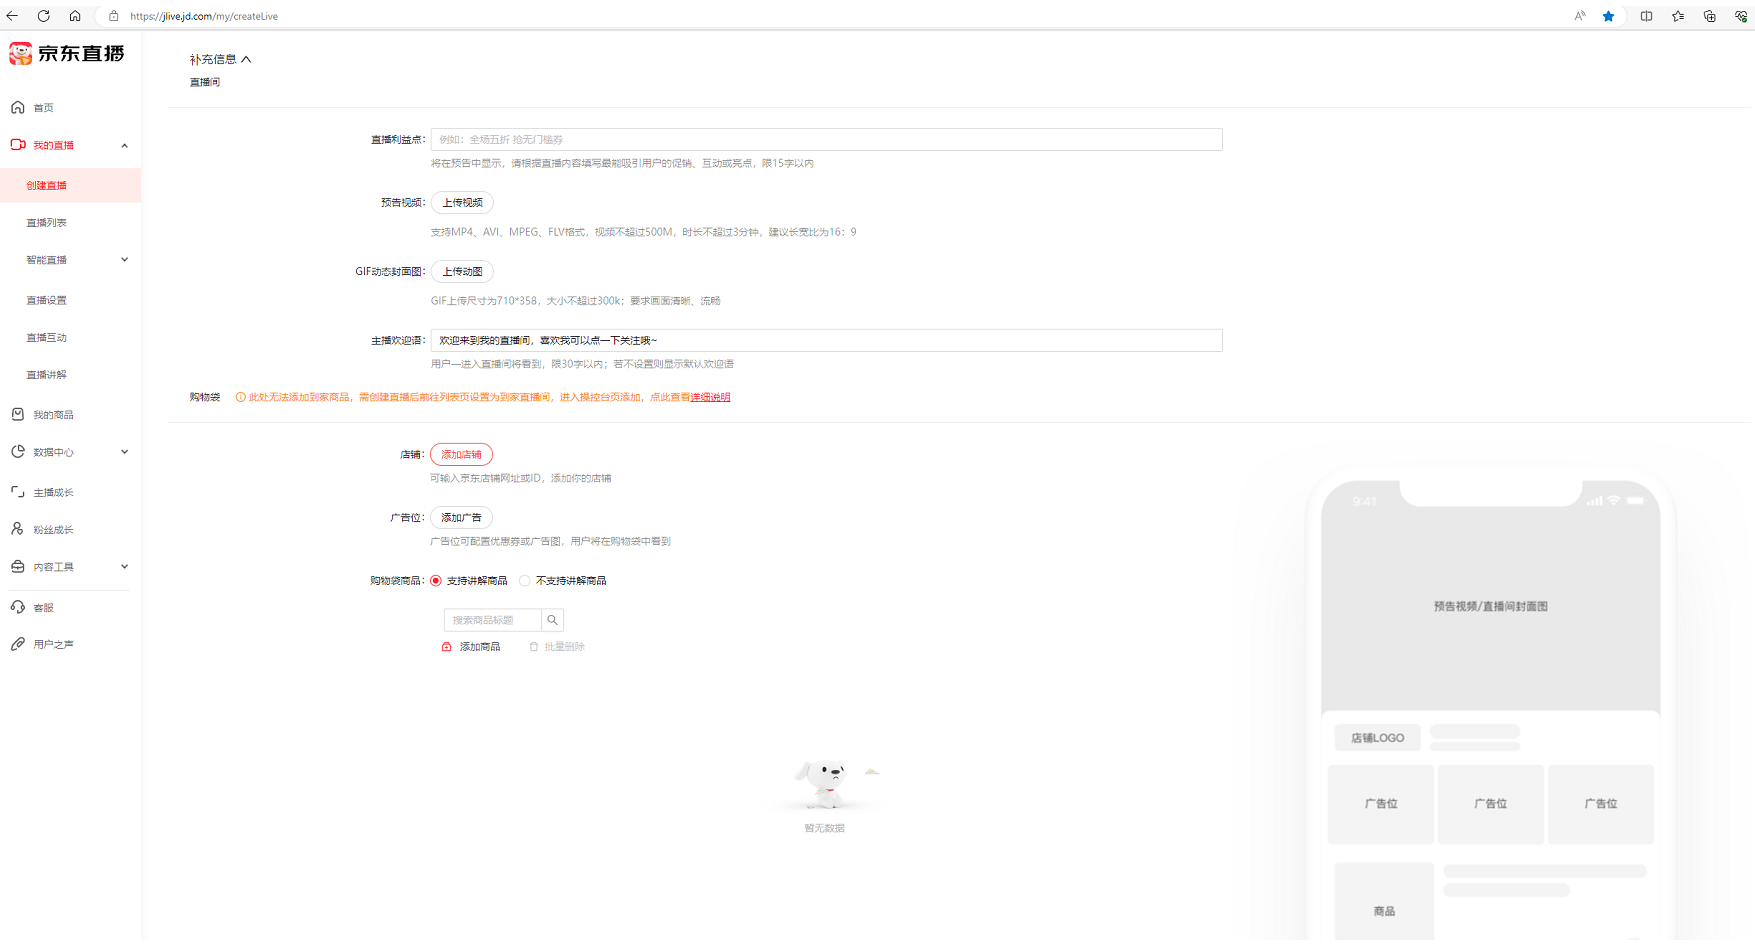
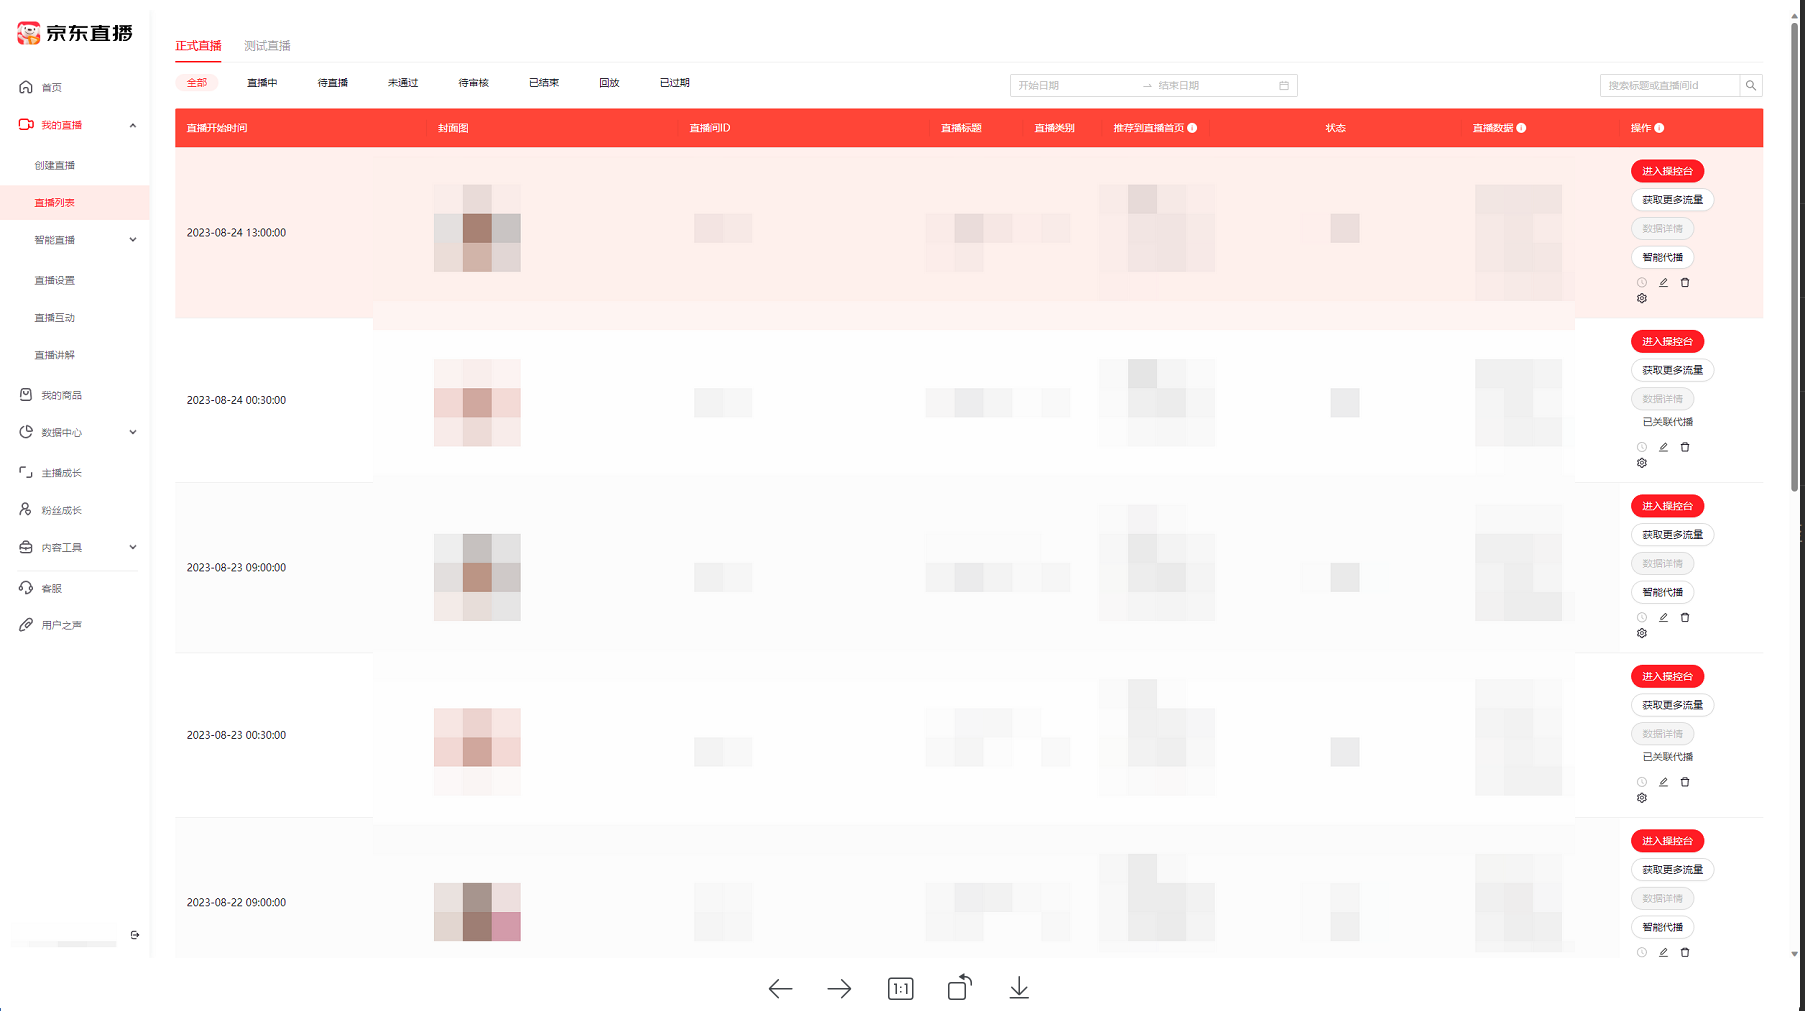
(3) Log in to the JD Live tool, select the previously created livestream room, and click Go to Livestream (if you choose Skip, then in the next step, click Select Livestream Room in the top-left corner and choose the room you want to go live in to start pushing the stream)
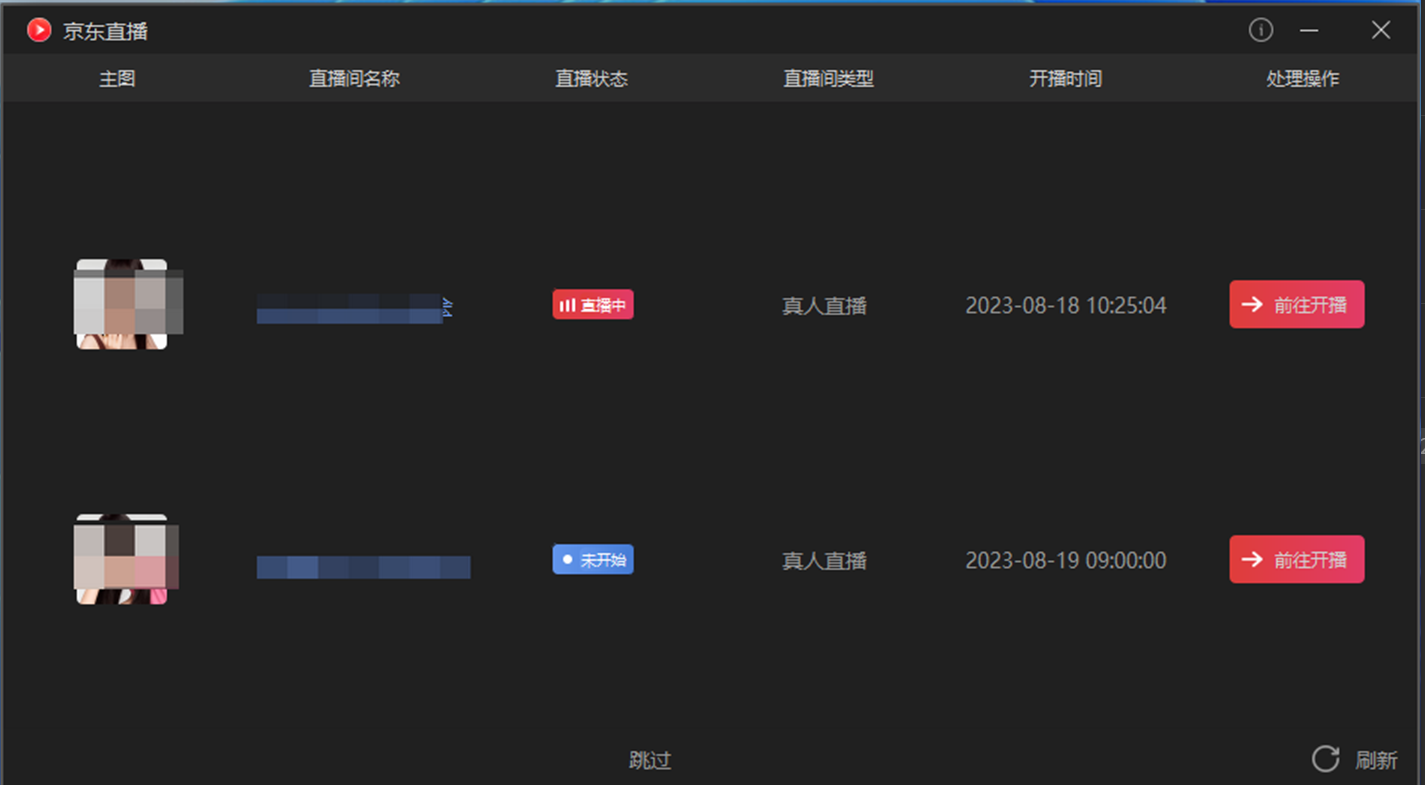
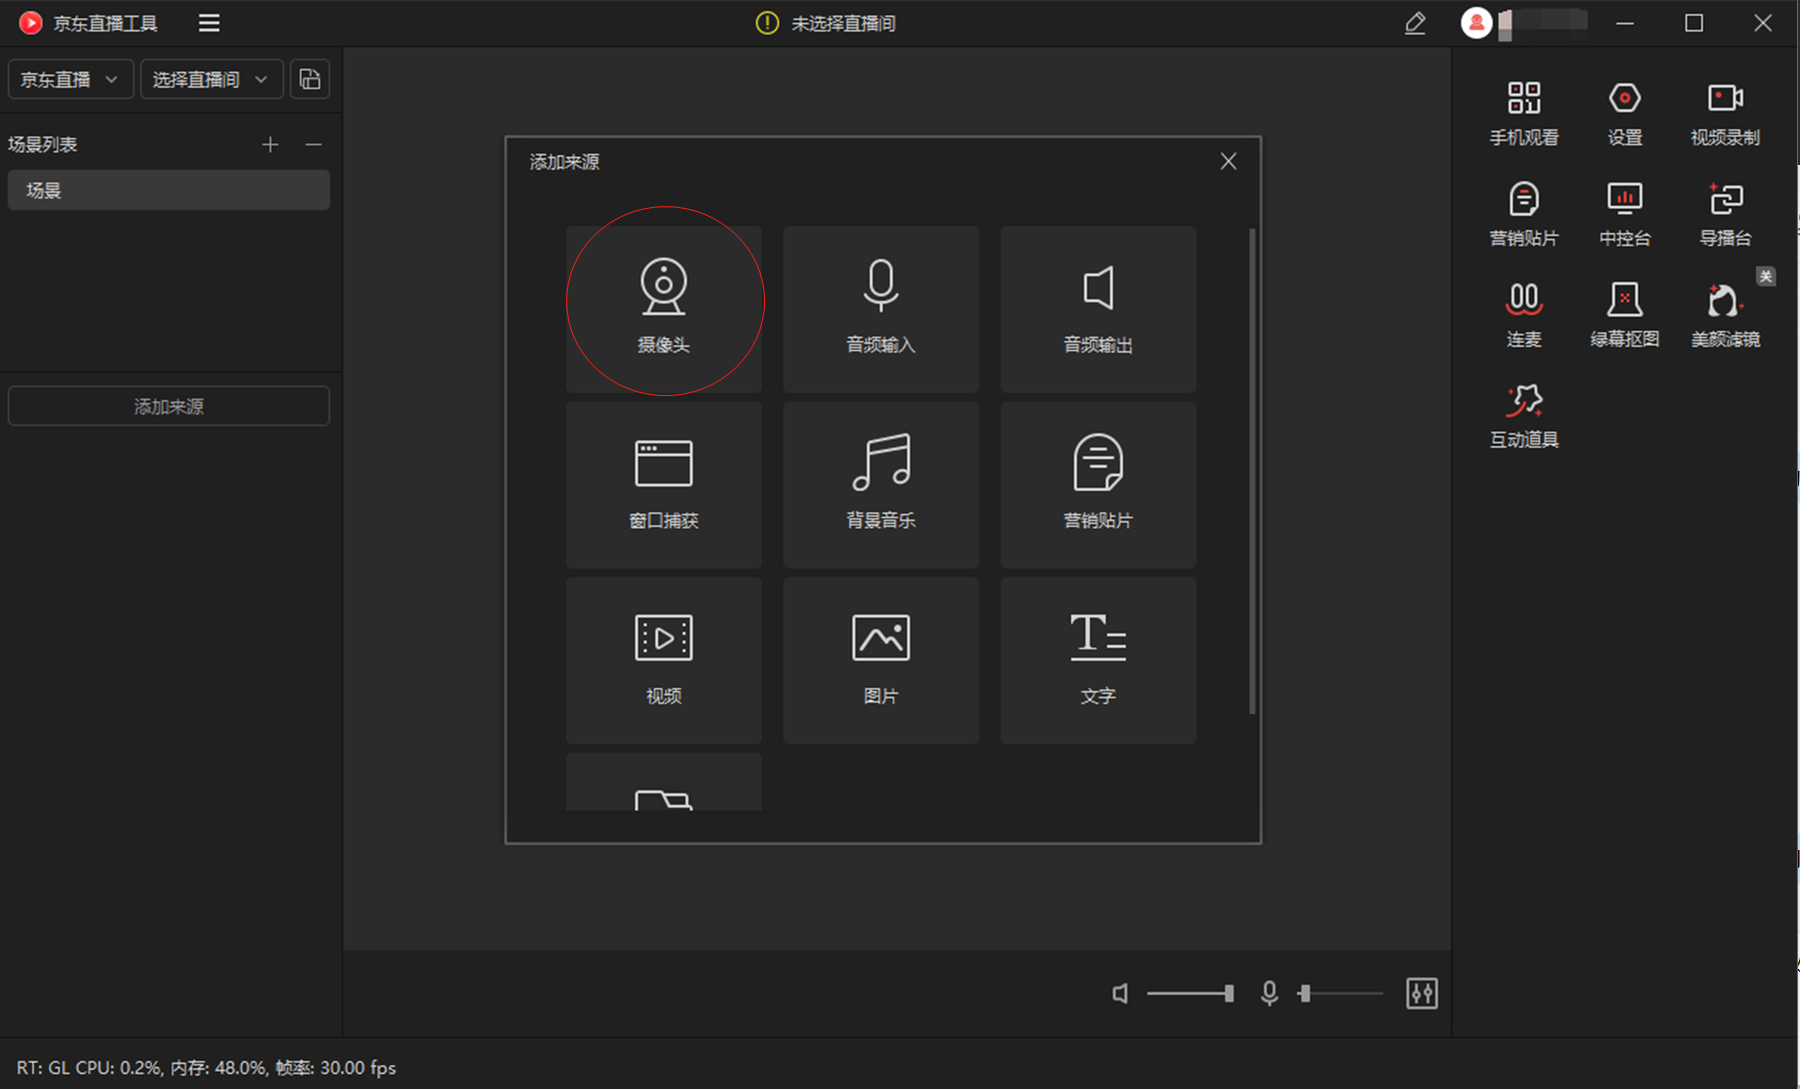
(4) Add a source to the scene, select Camera as the source, capture the livestream video provided by Syntopia Digital Human, and click Confirm. If the microphone is enabled, it will record the ambient sound or voices in the room, which will be pushed to the livestream room via the livestream tool, potentially resulting in noisy ambient sound or voices in the room — turn the microphone off or on based on your actual needs
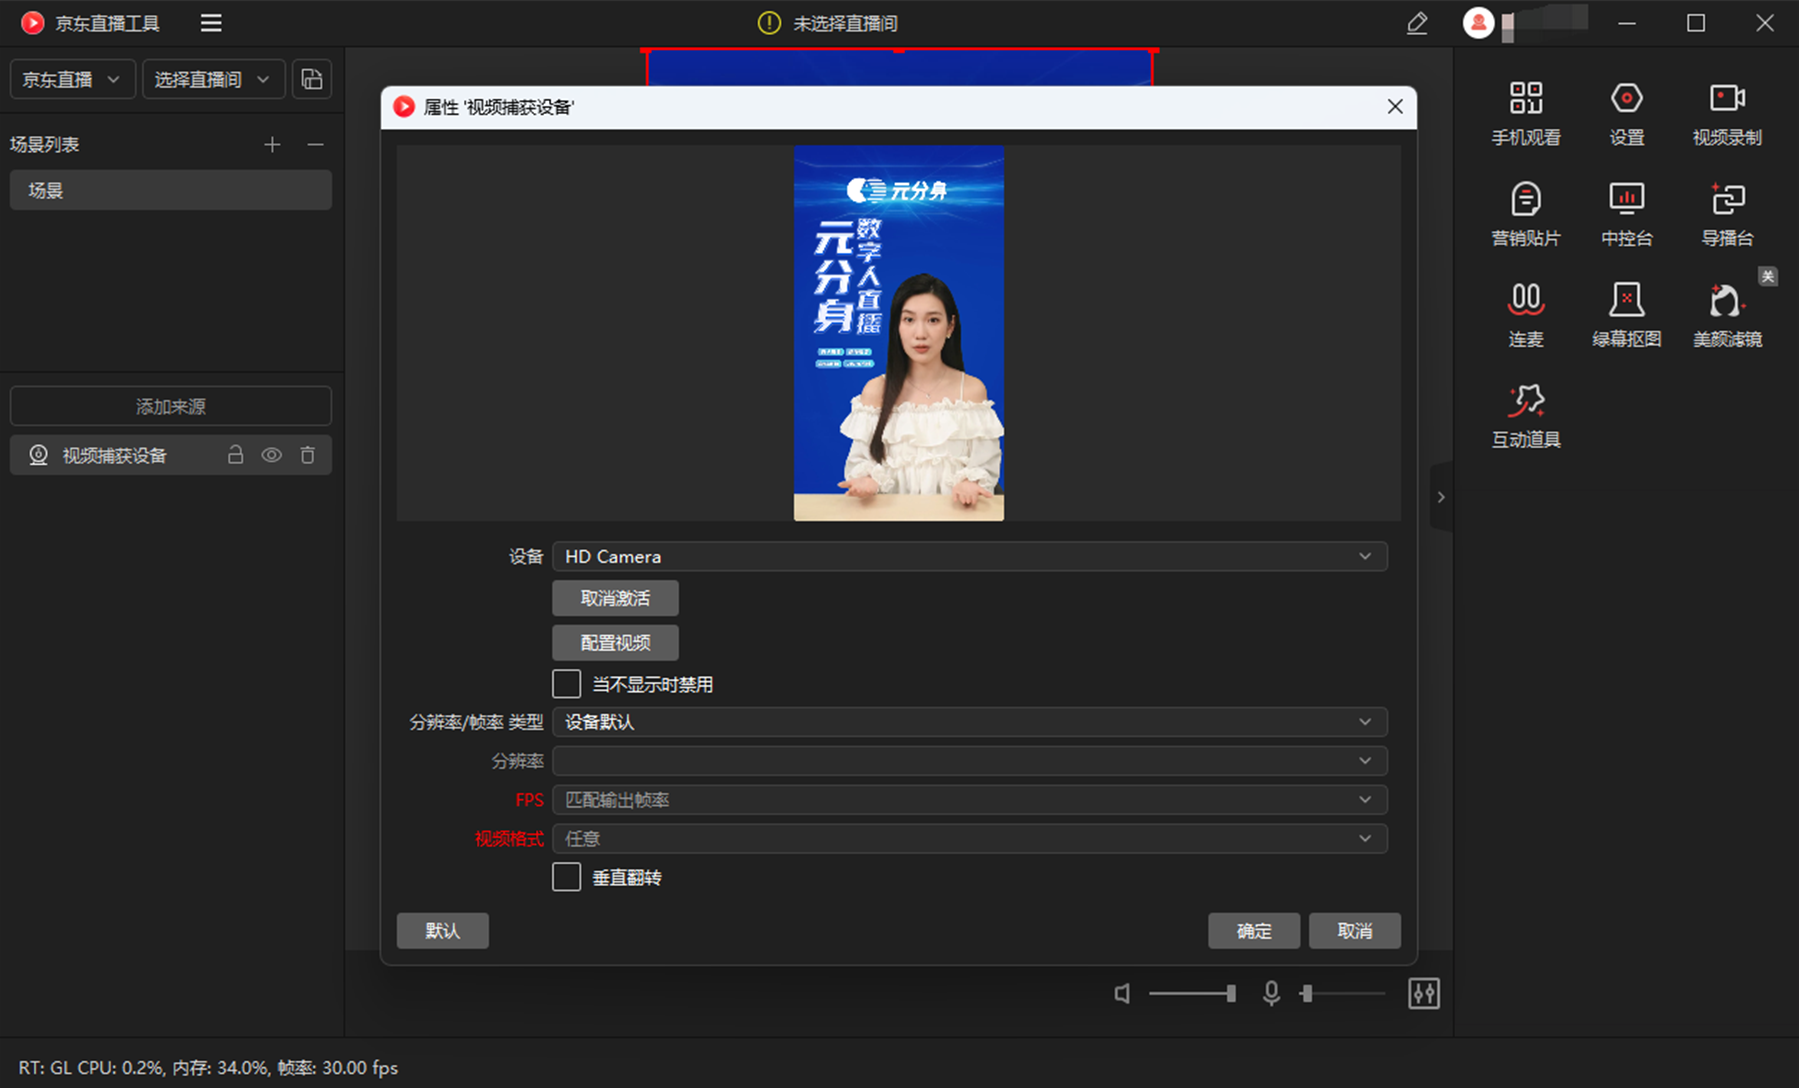
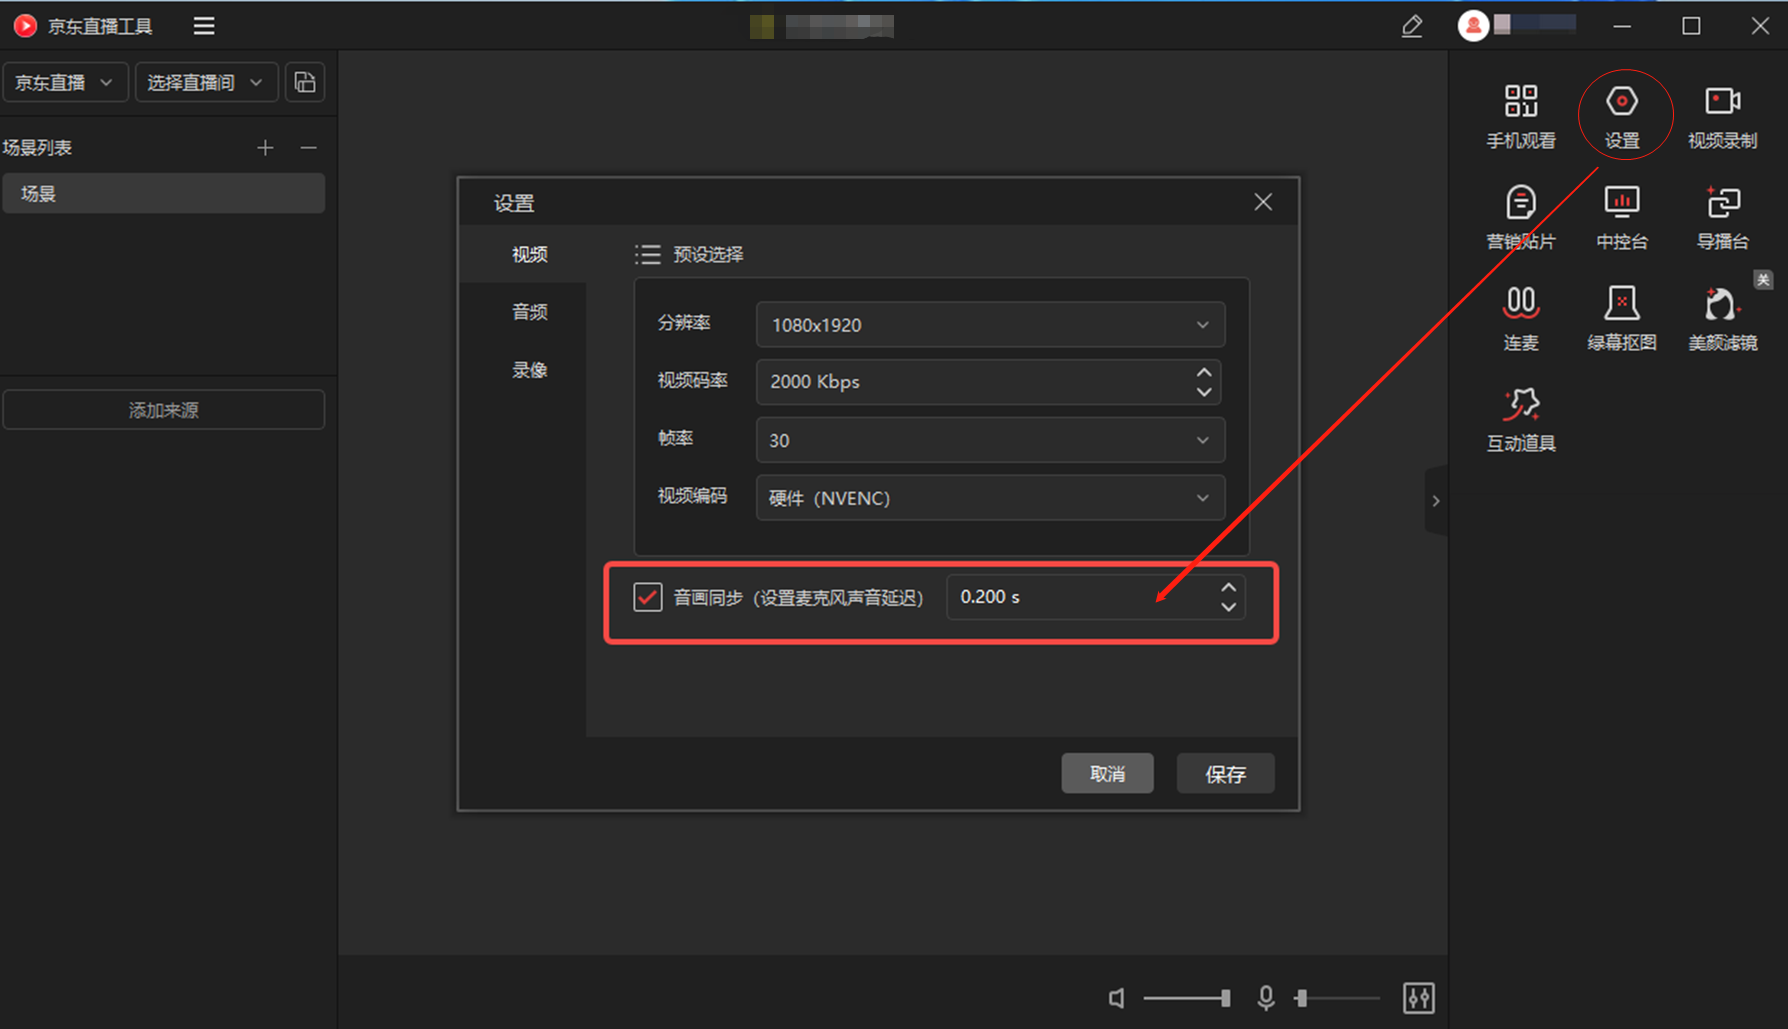
(4) After going live, because JD's audio and video are pushed as separate streams in the livestream tool, audio-video sync issues may occur. Use the fine-tuning settings in the top-right corner of the livestream tool to adjust the microphone audio — a 0.2s audio delay is recommended as a starting point; further observe whether audio and video in the room stay in sync, and adjust the microphone delay as needed
4.3.2 Going Live Using Window Capture (Not Recommended)
Because the JD Live tool's window capture feature has certain issues where the captured image can show a black screen (this is not limited to Syntopia Digital Human's window — capturing other windows can also produce a black screen), using window capture to go live is not currently recommended — using the virtual camera is recommended instead
4.4.1 Going Live Using the Virtual Camera
(1) Syntopia Digital Human's default livestream mode is Virtual Camera; click Local Livestream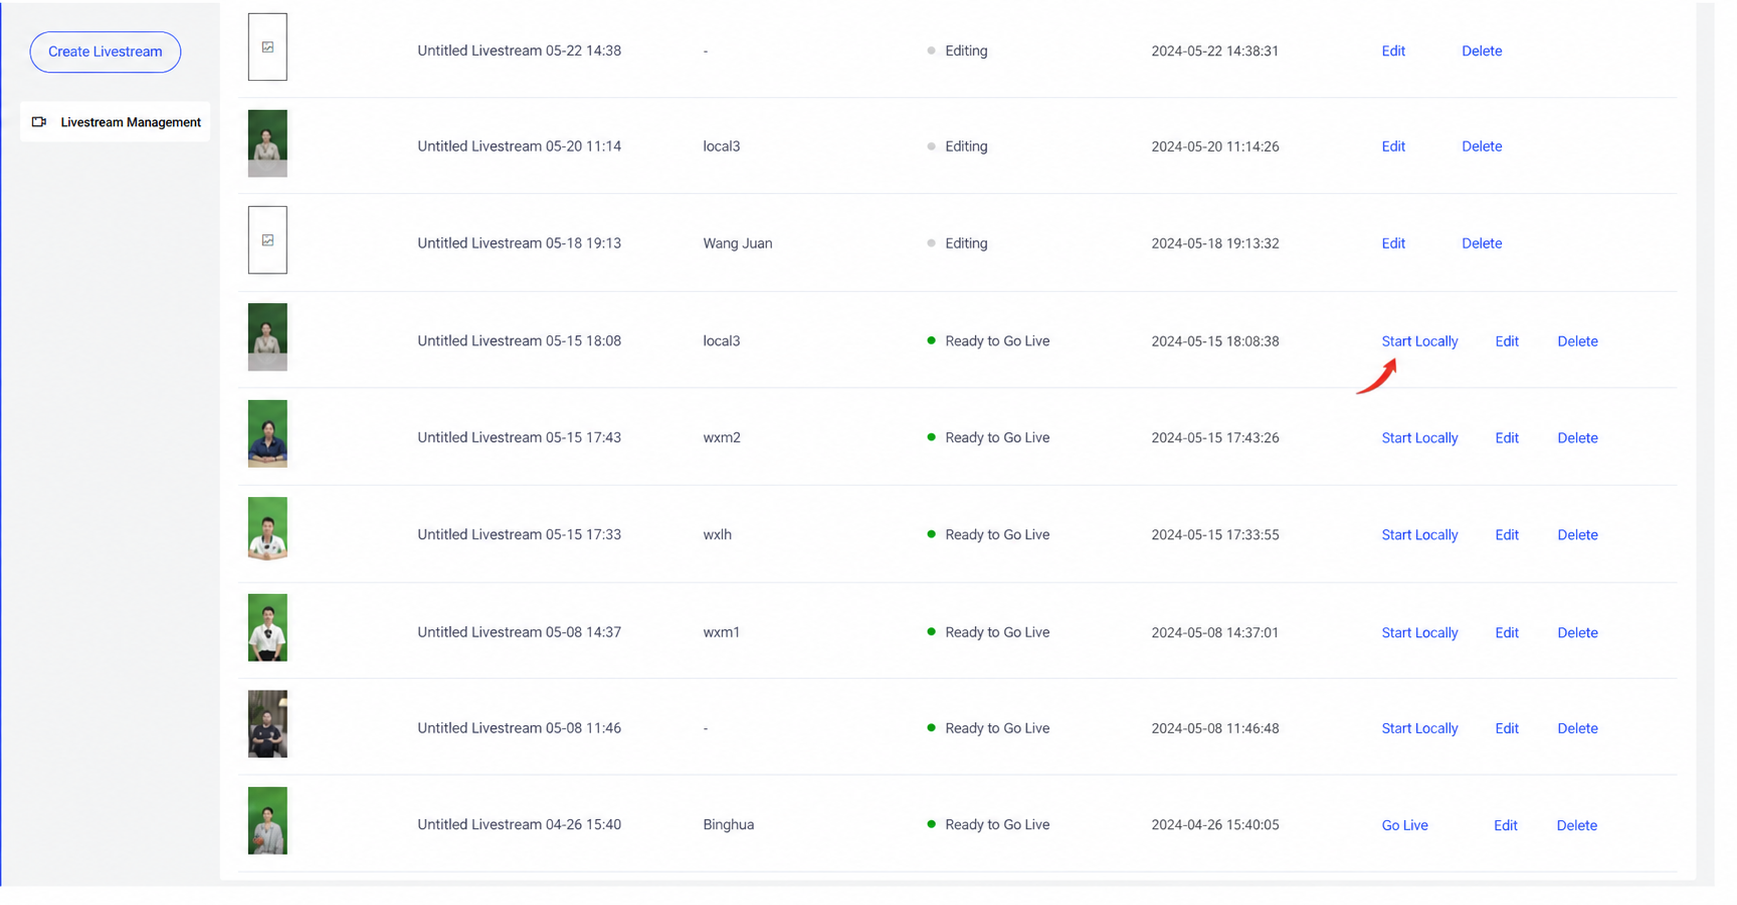
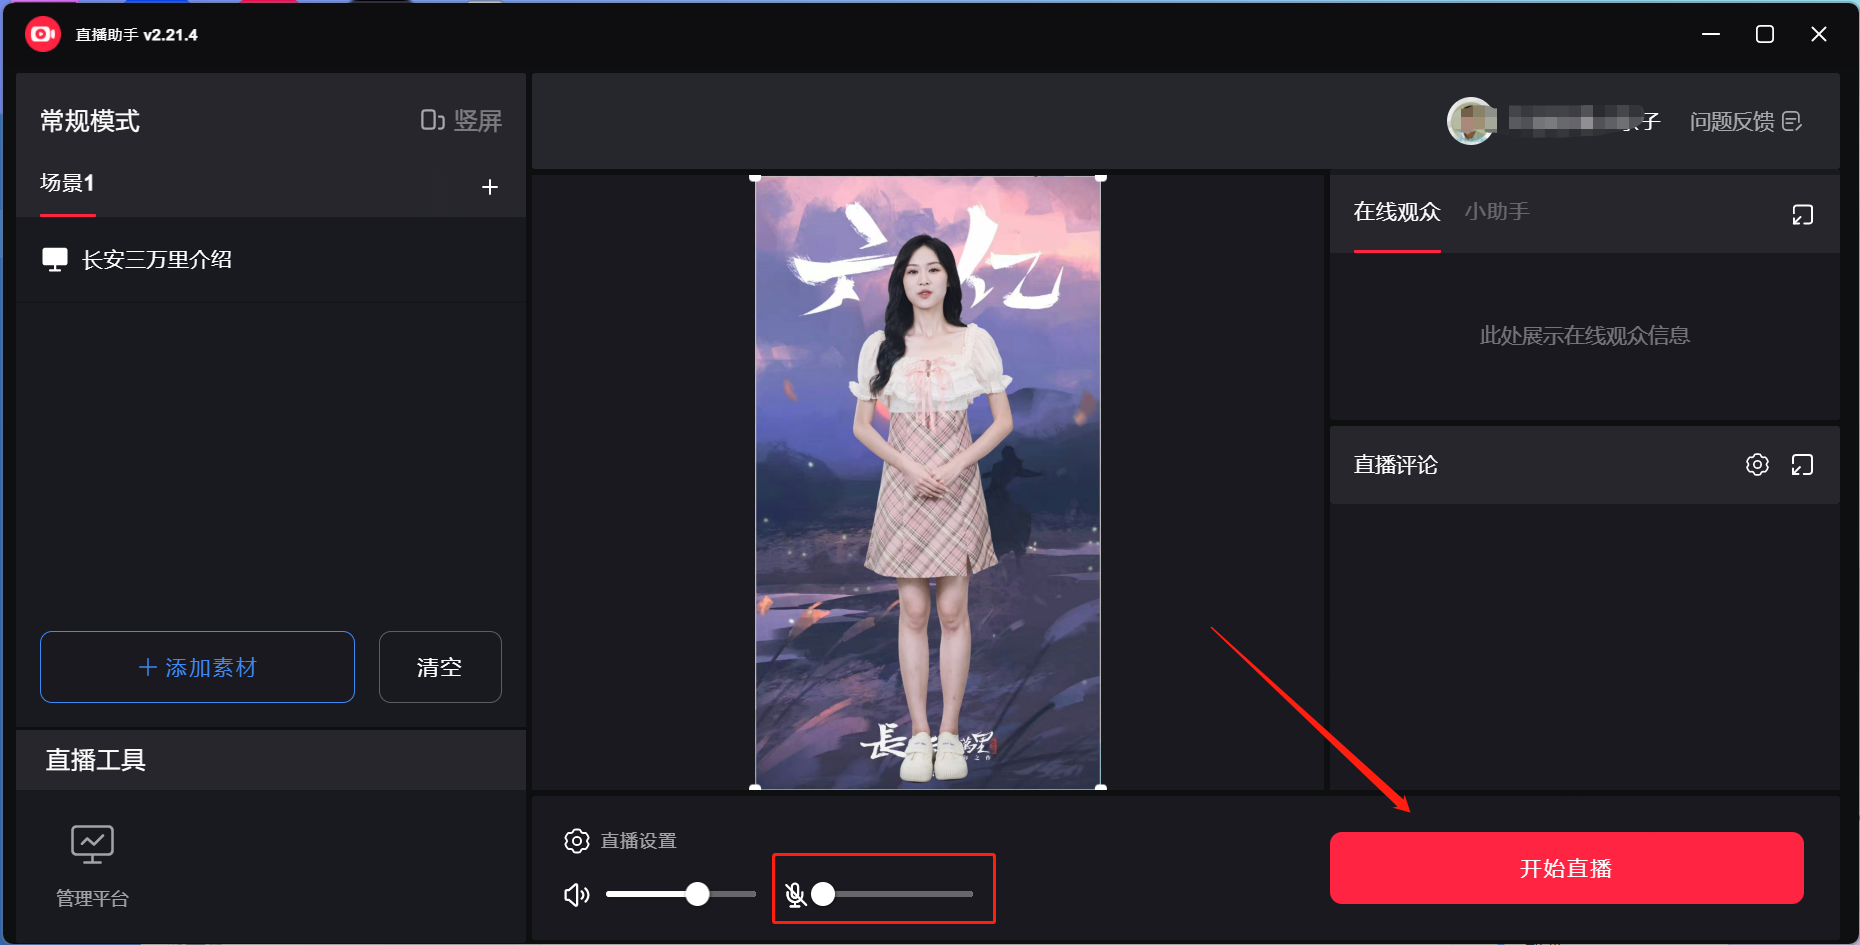
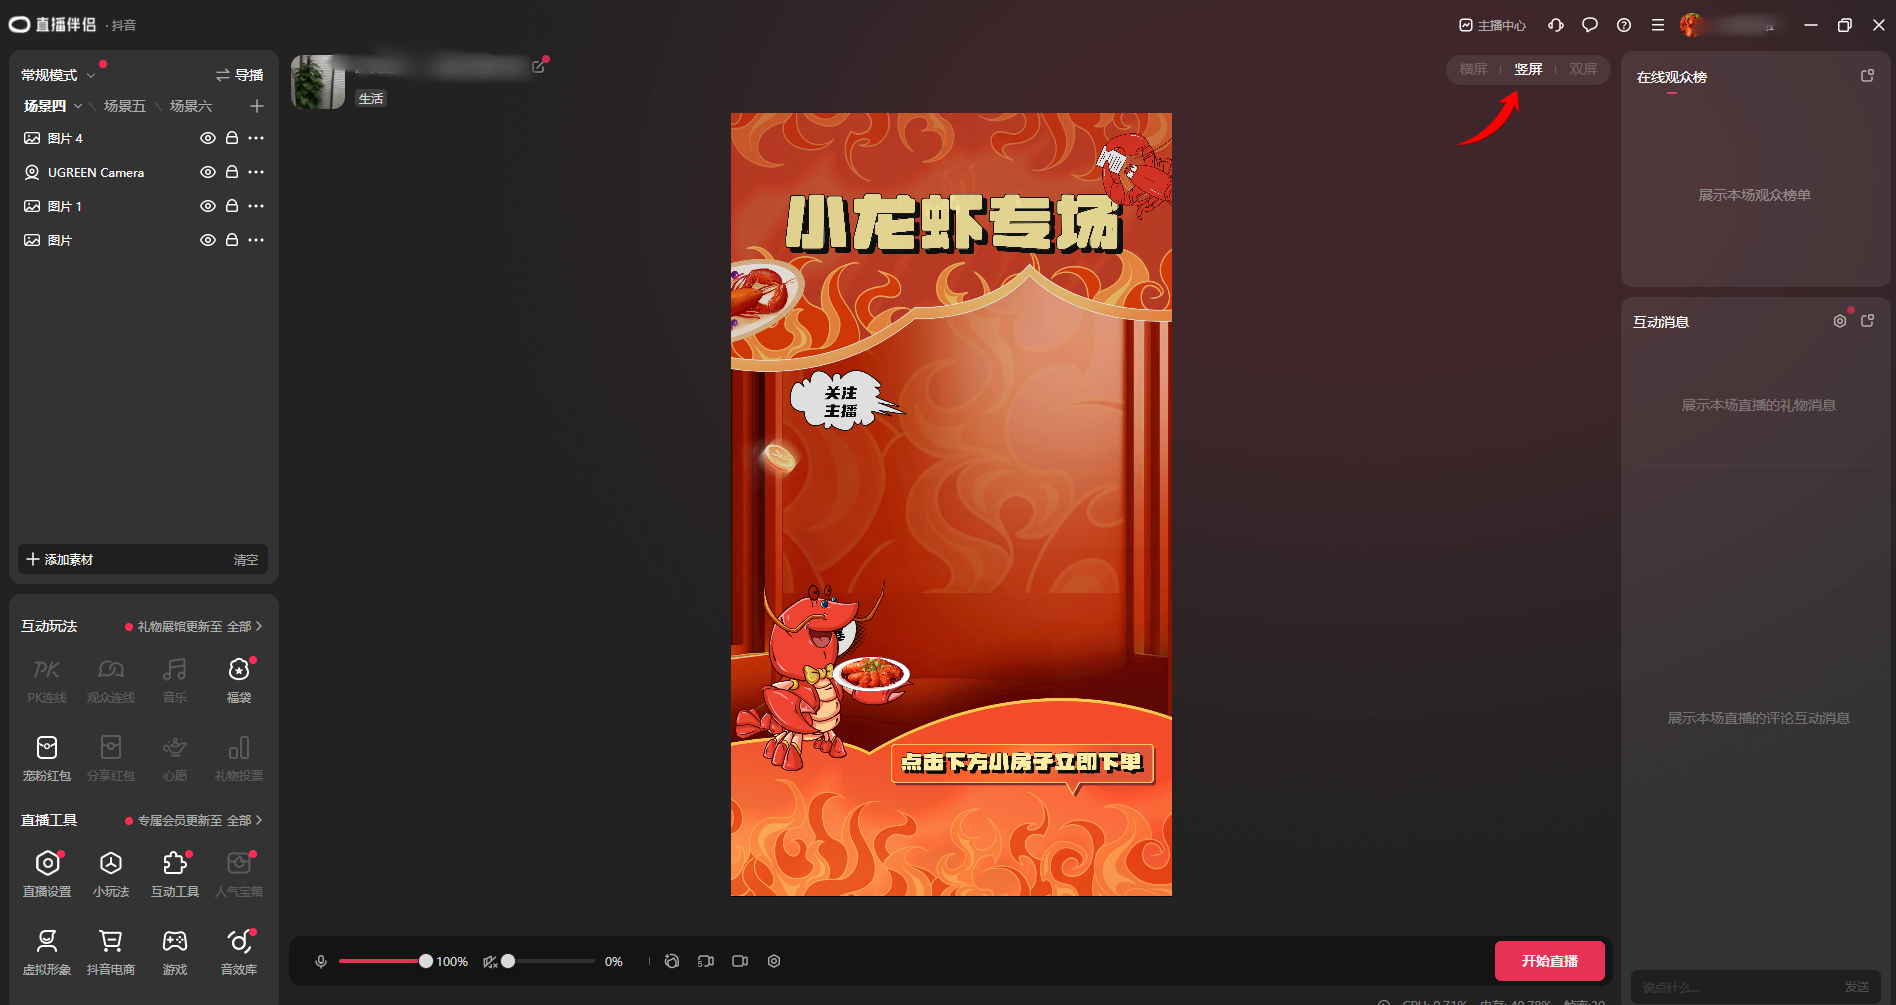
(2) Log in to Livestream Companion and switch to portrait mode — most livestreams use portrait; landscape can also be used, but you will need to design the layout yourself in Livestream Companion
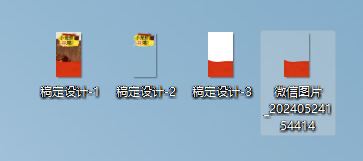
(3) Add the prepared livestream room assets to set up the scene
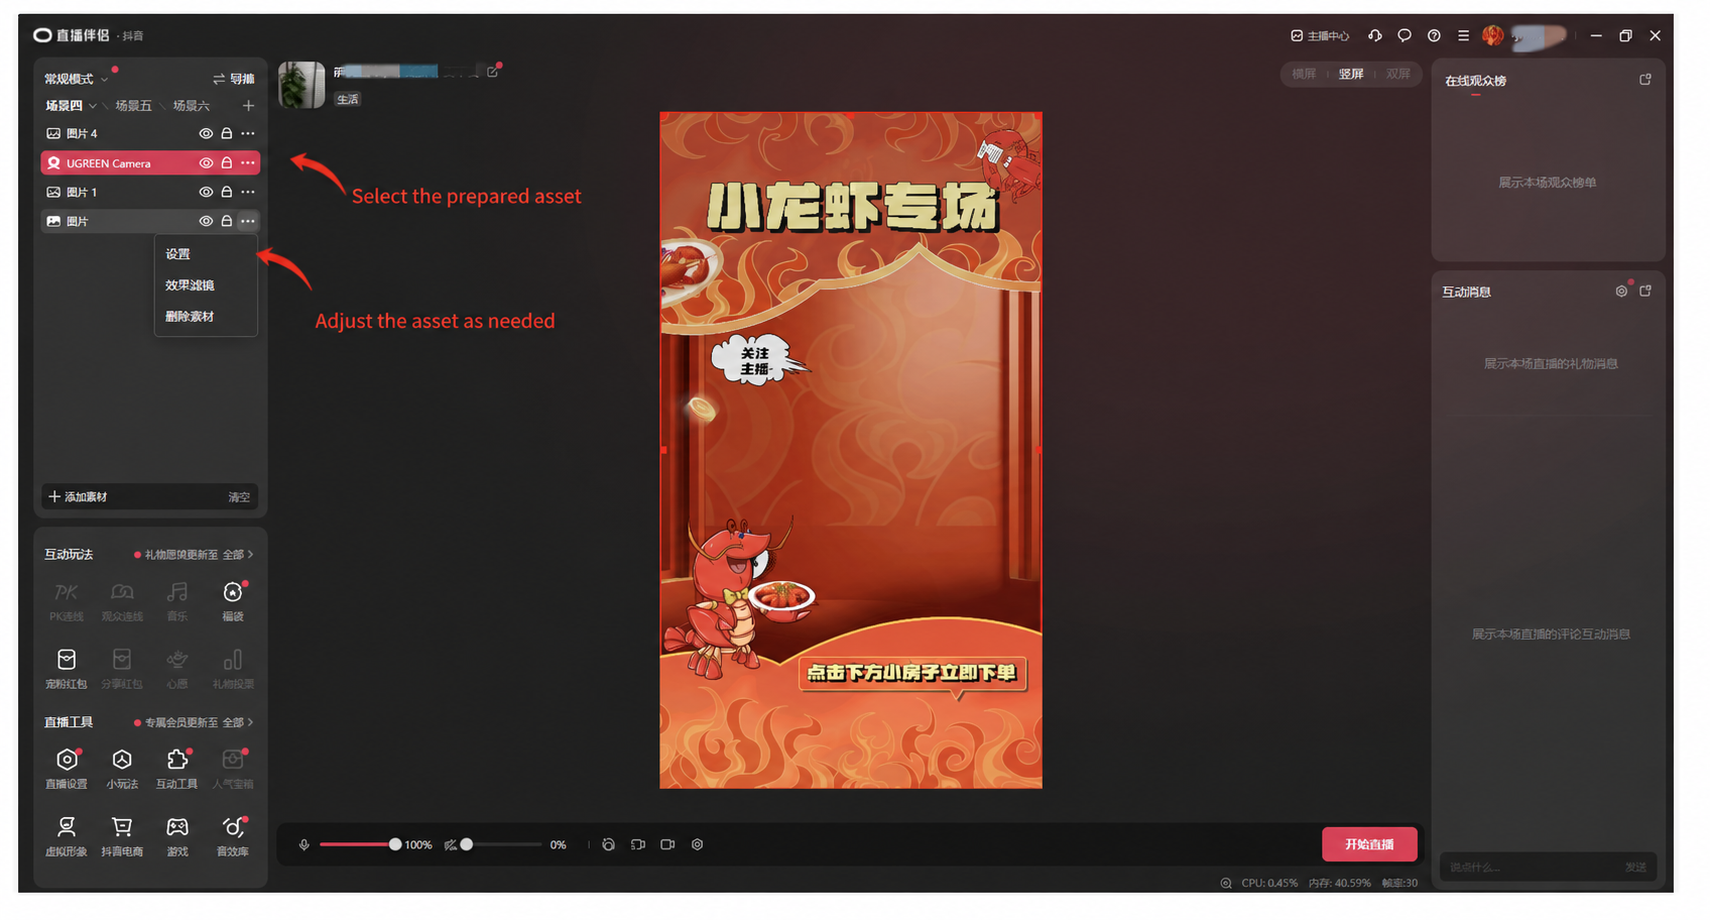
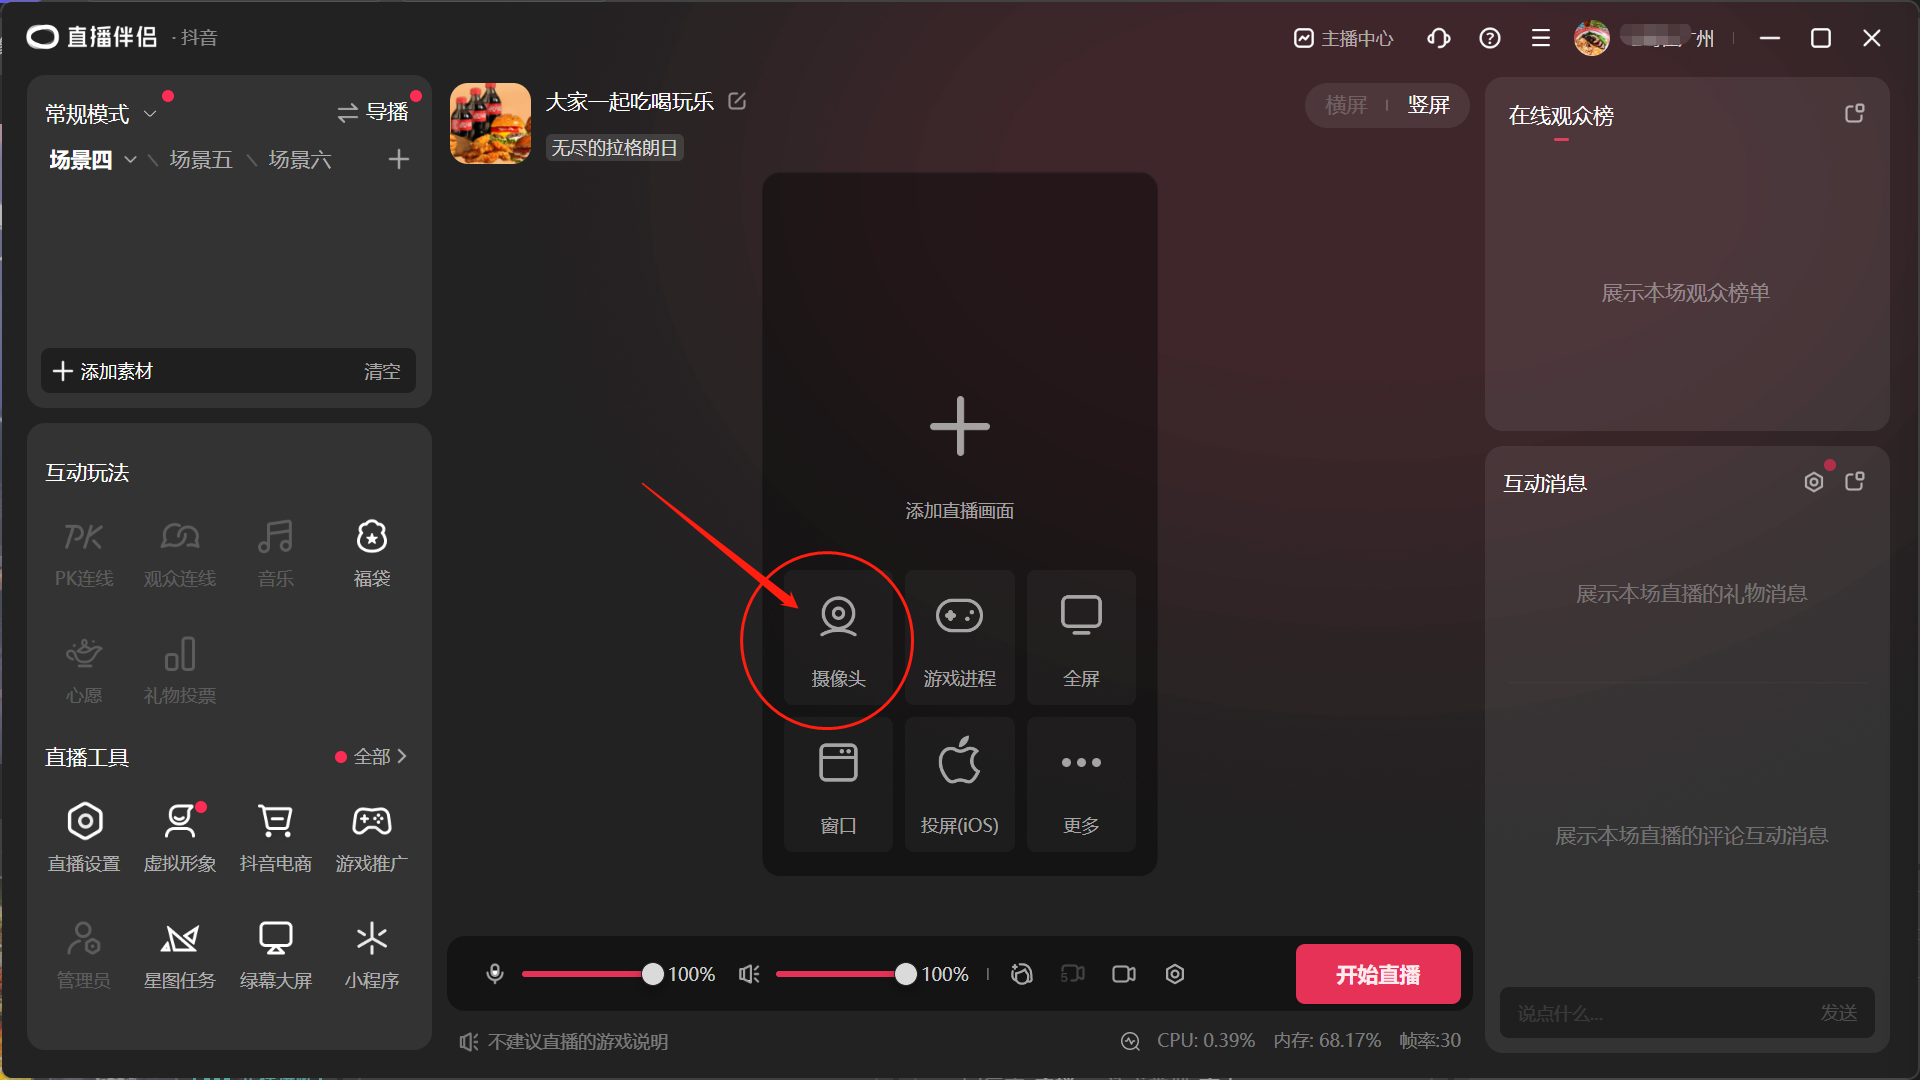
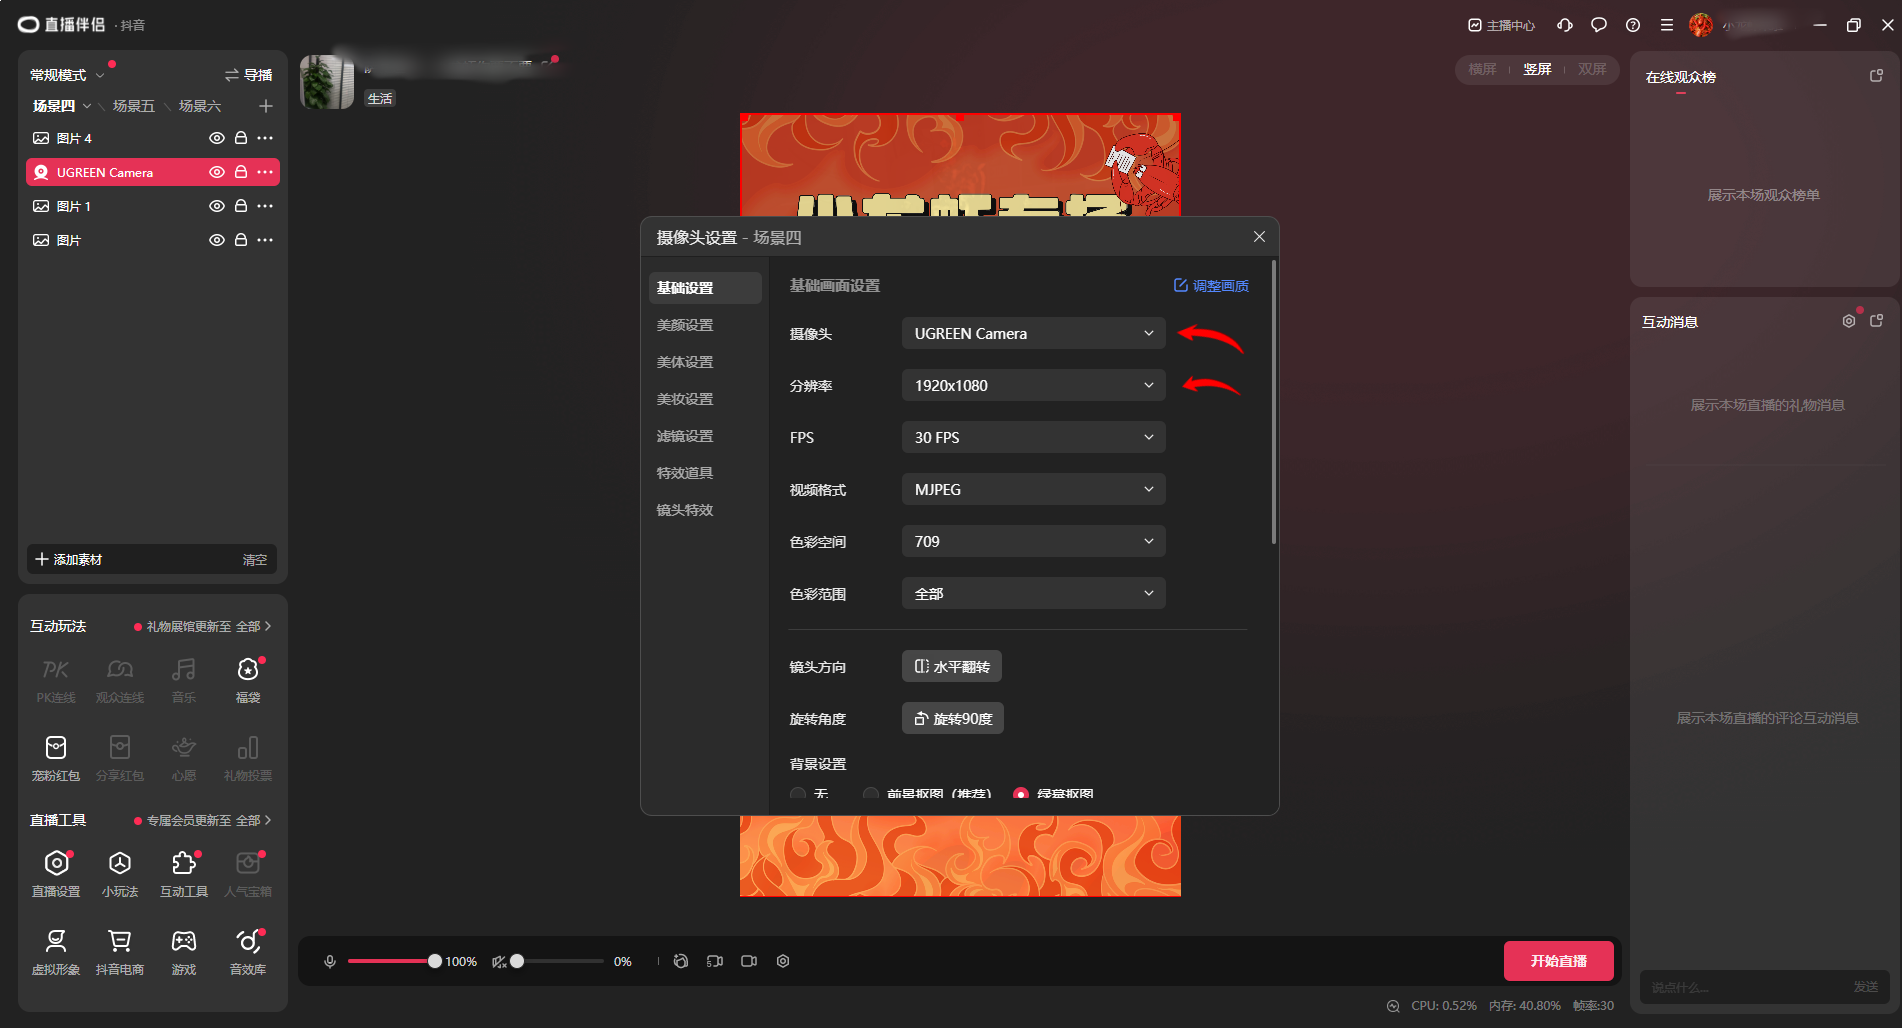
(4) Click Add Camera, find the livestream video provided by Syntopia Digital Human, select "UGREEN Camera," and set the resolution to 1080×1920
(5) Click Start Livestream and you're done. If the microphone is enabled, it will record the ambient sound or voices in the room, which will be pushed to the livestream room via the livestream tool, potentially resulting in noisy ambient sound or voices in the room — turn the microphone off or on based on your actual needs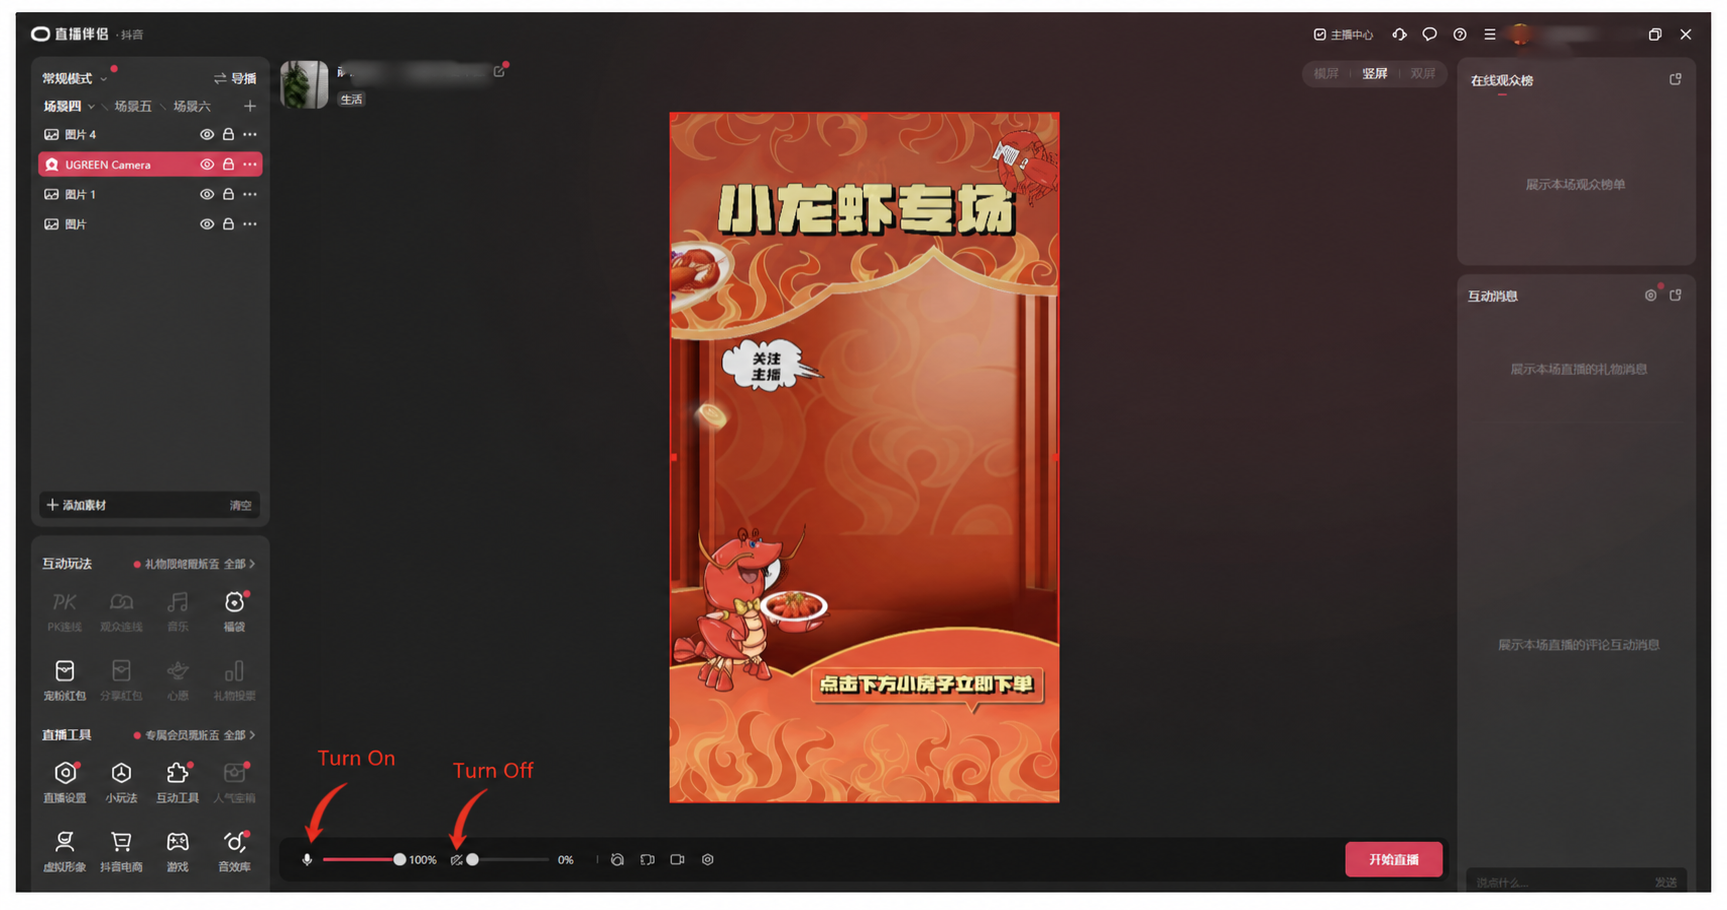
(6) For slider verification, a third-party slider verification tool can be used — a slider verification prompt will appear within an hour and must be completed within 60 seconds!
4.5.1 Going Live Using the Virtual Camera
(1) Syntopia Digital Human's default livestream mode is Virtual Camera; click Start Livestream to get the digital human's livestream video and audio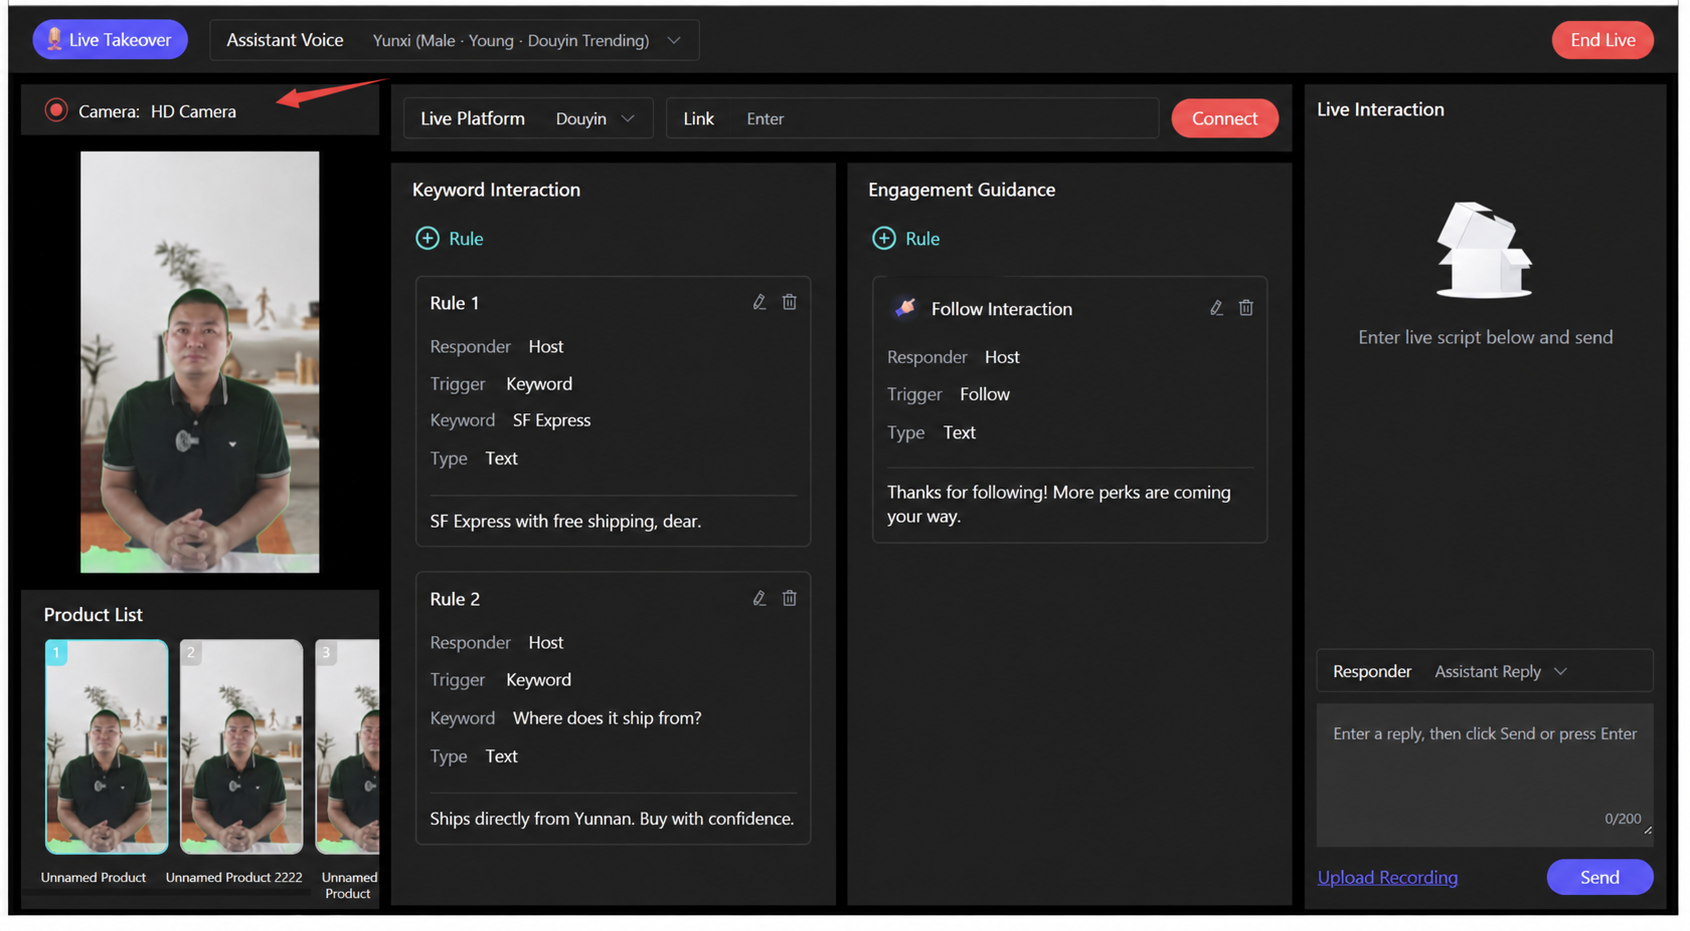
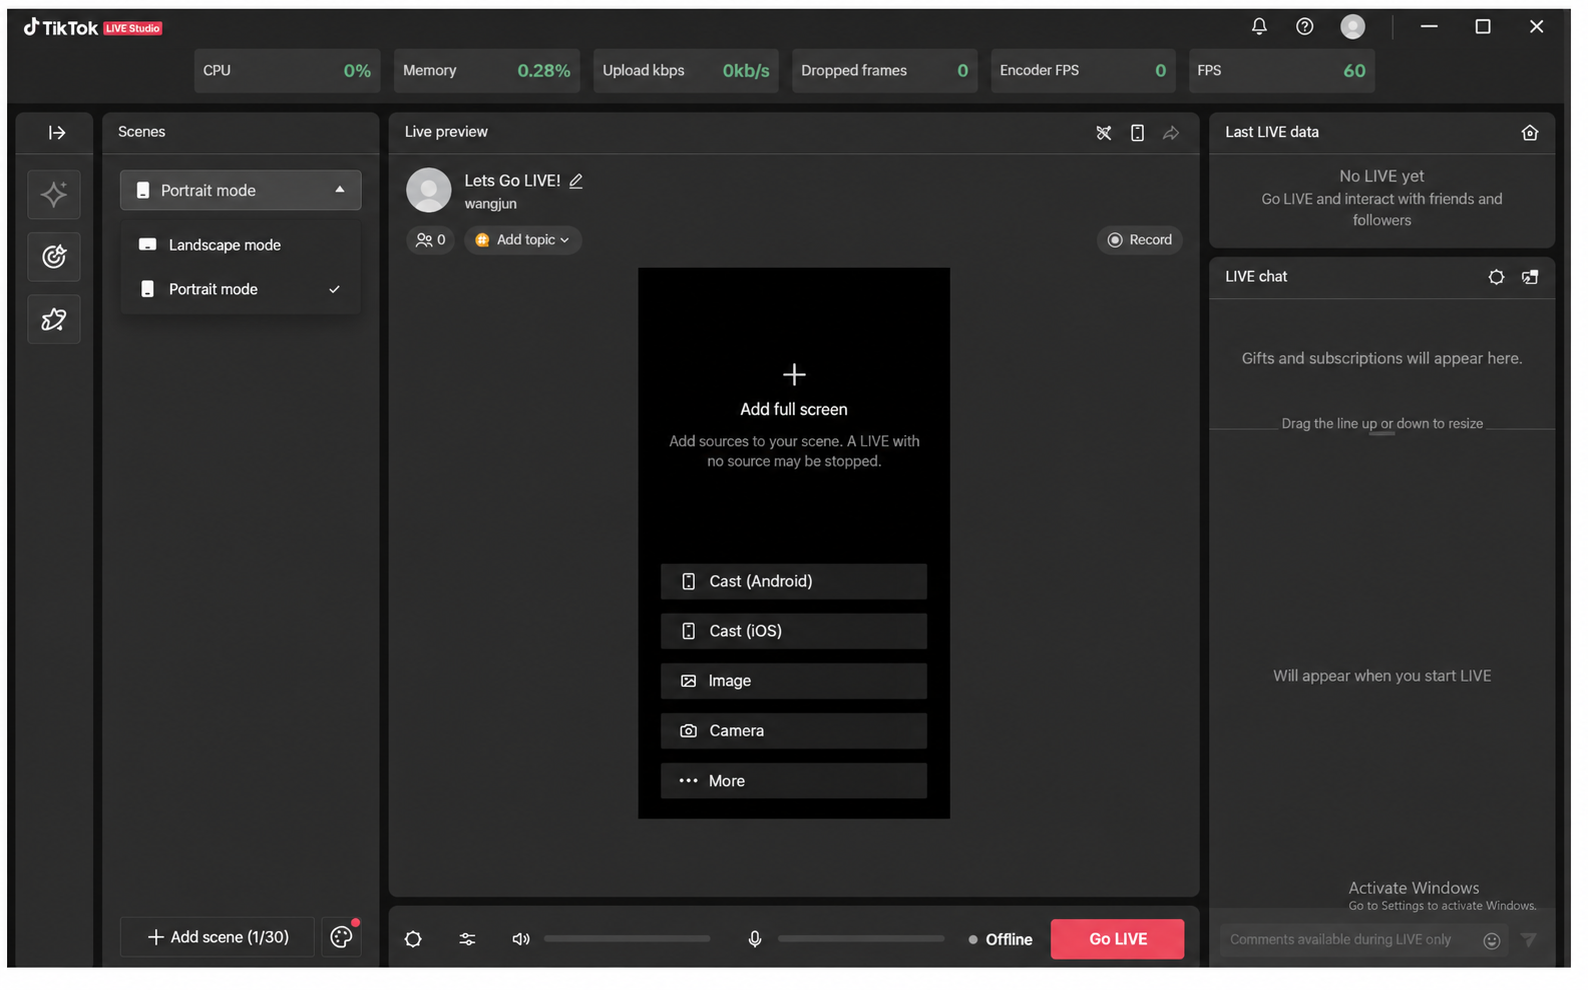
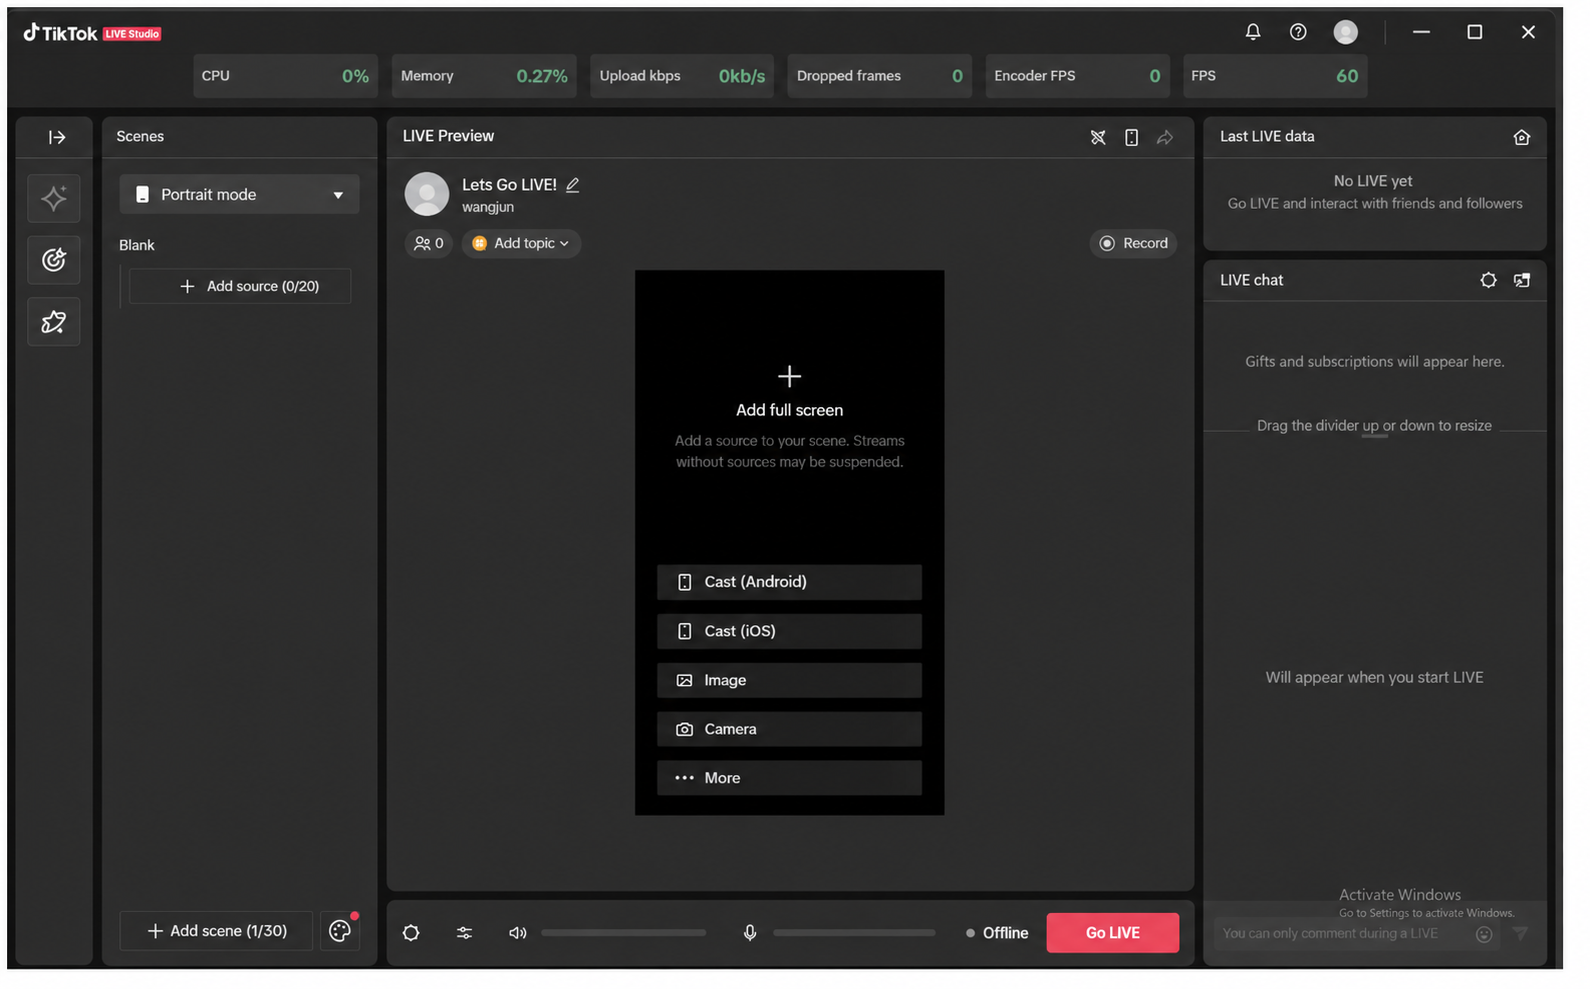
(2) Log in to the TikTok livestream assistant, TikTok LIVE Studio, set the scene to [Portrait Mode] as needed, and click Add Source
(3) Select Camera as the video source and click Add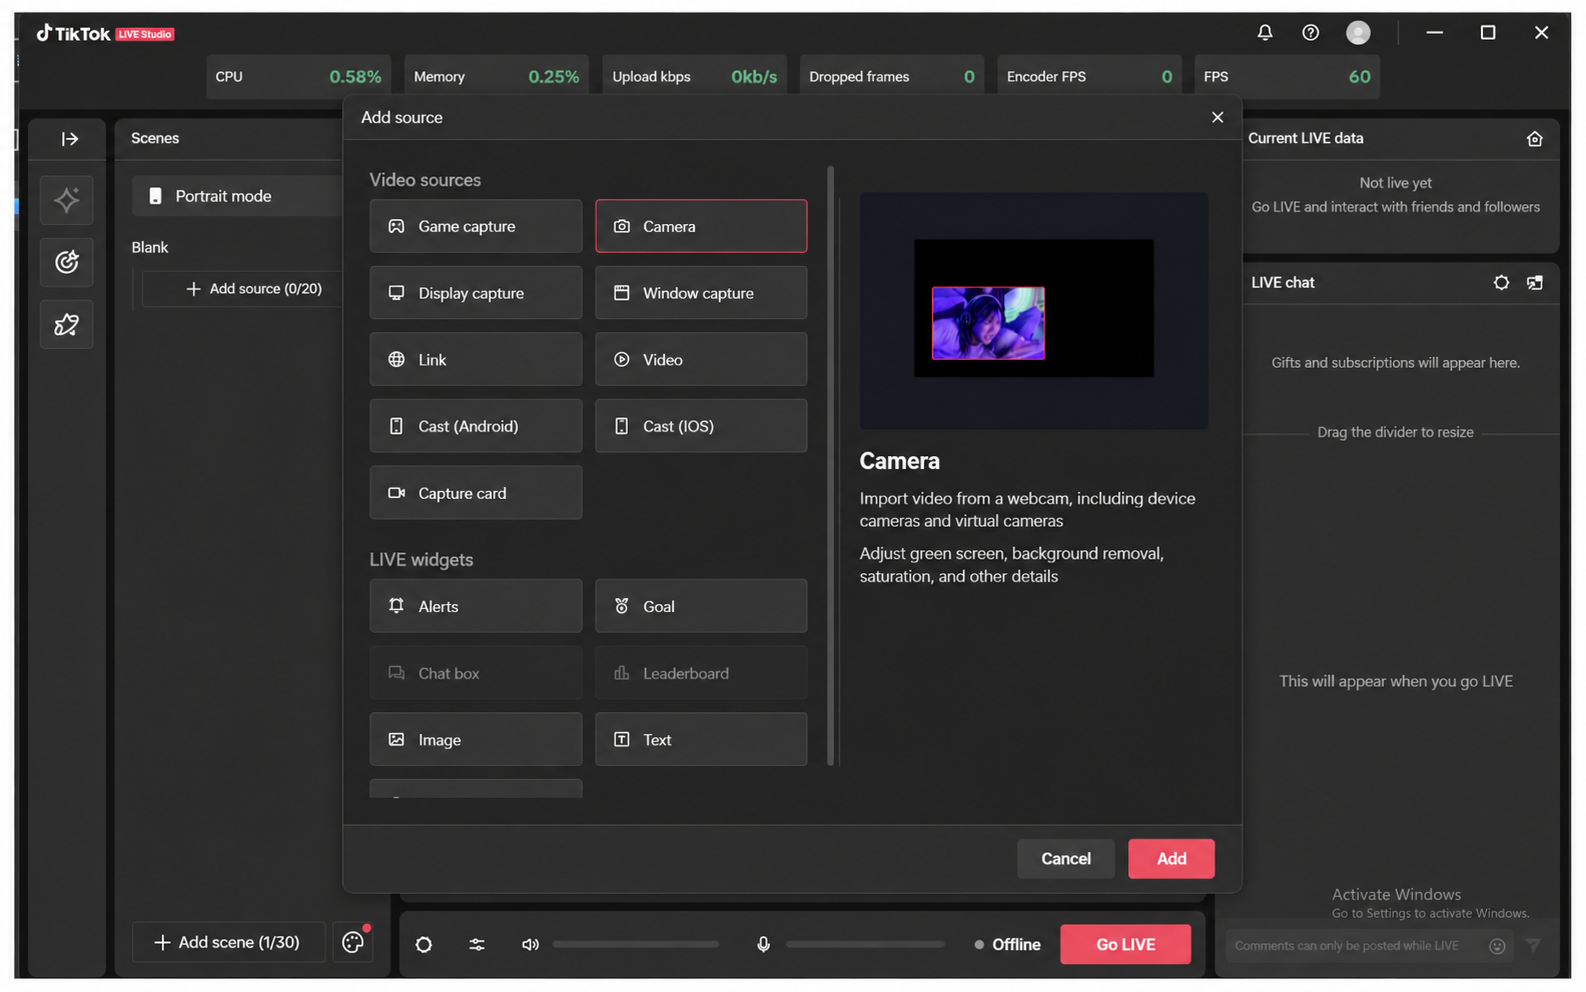
(4) In the camera settings, select 1080×1920 as the format, click Add Source — the video provided by Syntopia Digital Human will be successfully captured by the TikTok livestream tool — then click Start Live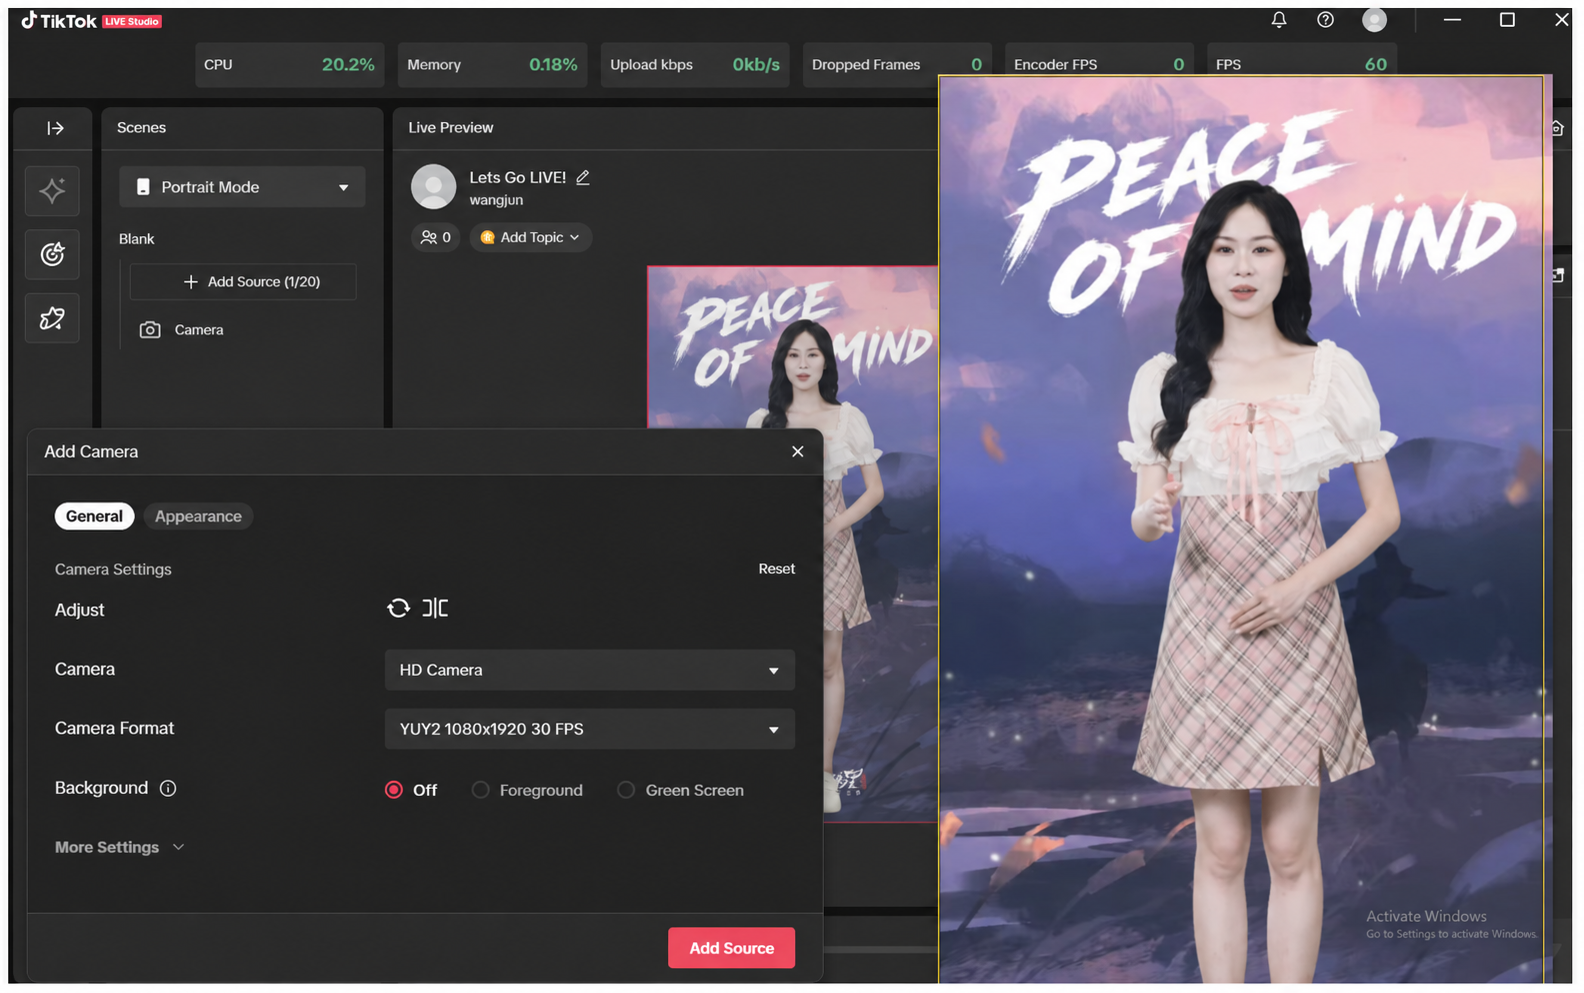
(5) If the microphone is enabled, it will record the ambient sound or voices in the room, which will be pushed to the livestream room via the livestream tool, potentially resulting in noisy ambient sound or voices in the room — turn the microphone off or on based on your actual needs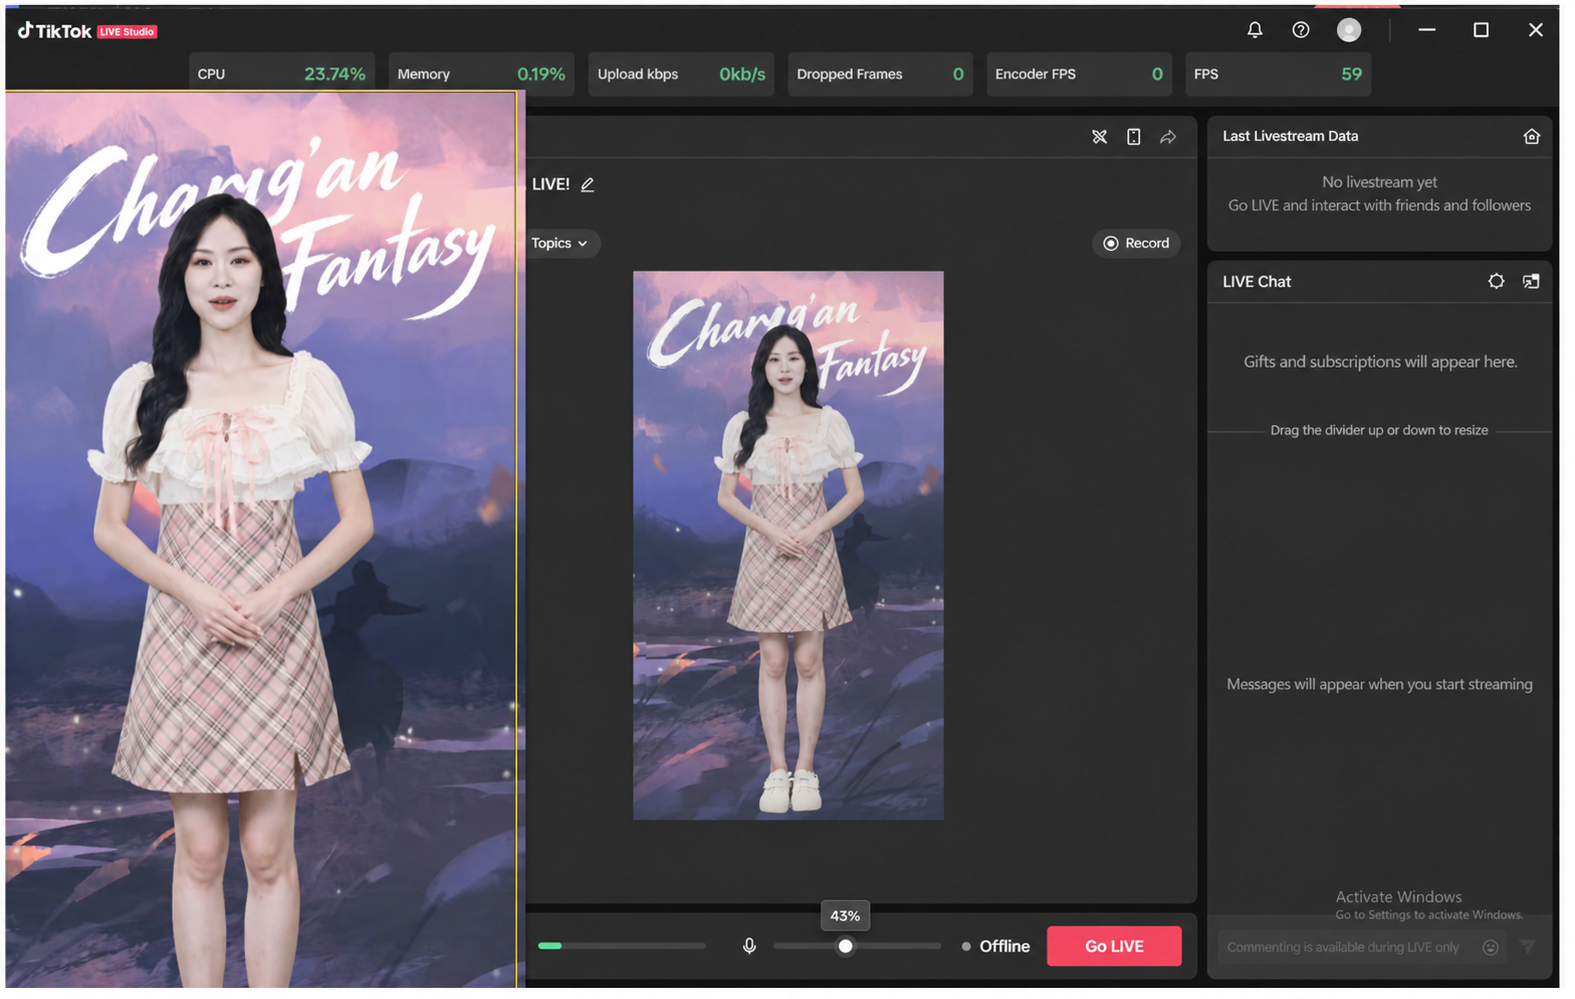
4.5.2 Going Live Using Window Capture
(1) Click Go Live in Syntopia Digital Human, and make sure the livestream window is brought to the front
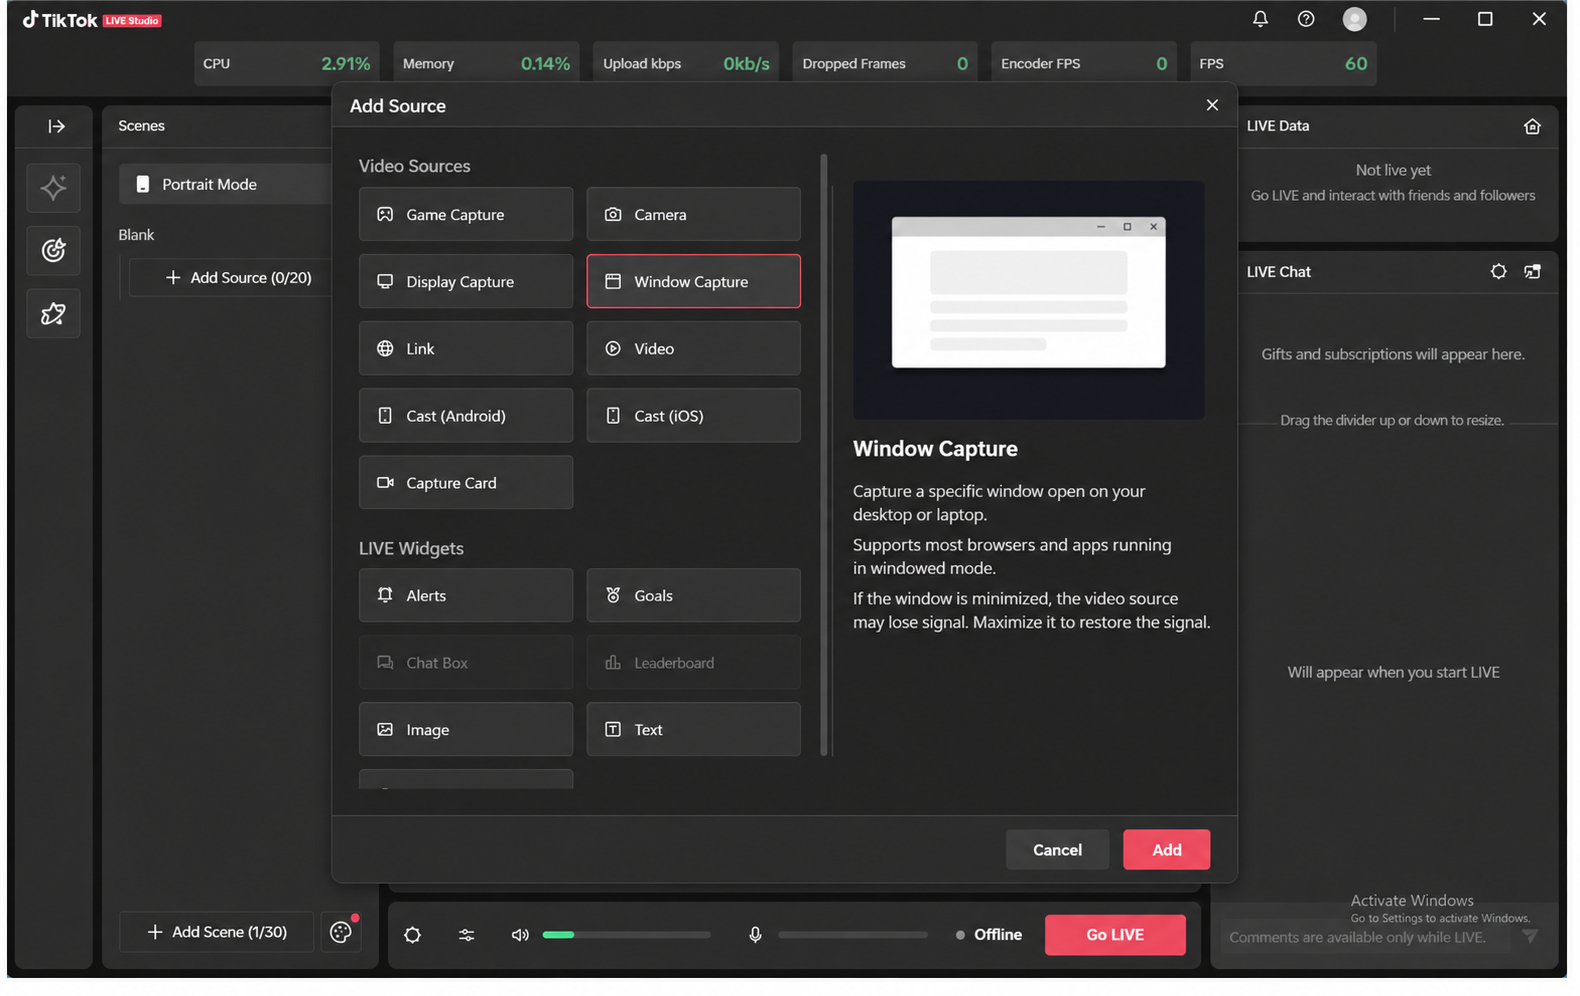
(2) In the TikTok LIVE Studio client, click Add Source, select Window Capture as the video source, and click Add
(3) A window capture selection box will pop up — select Syntopia Digital Human's livestream window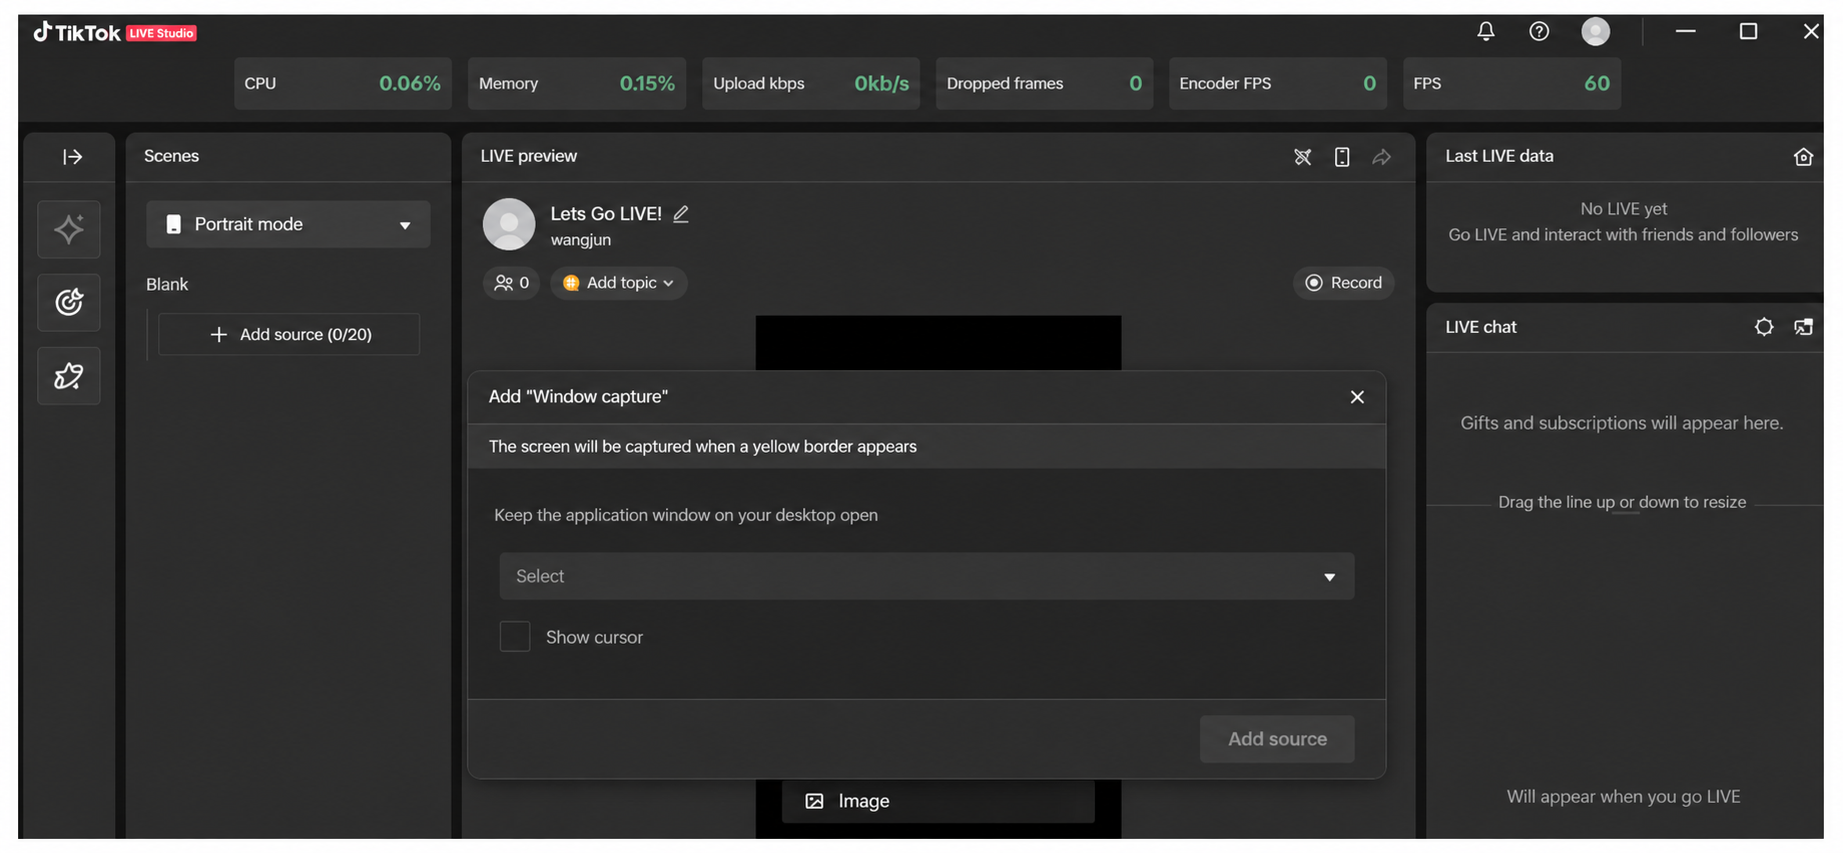
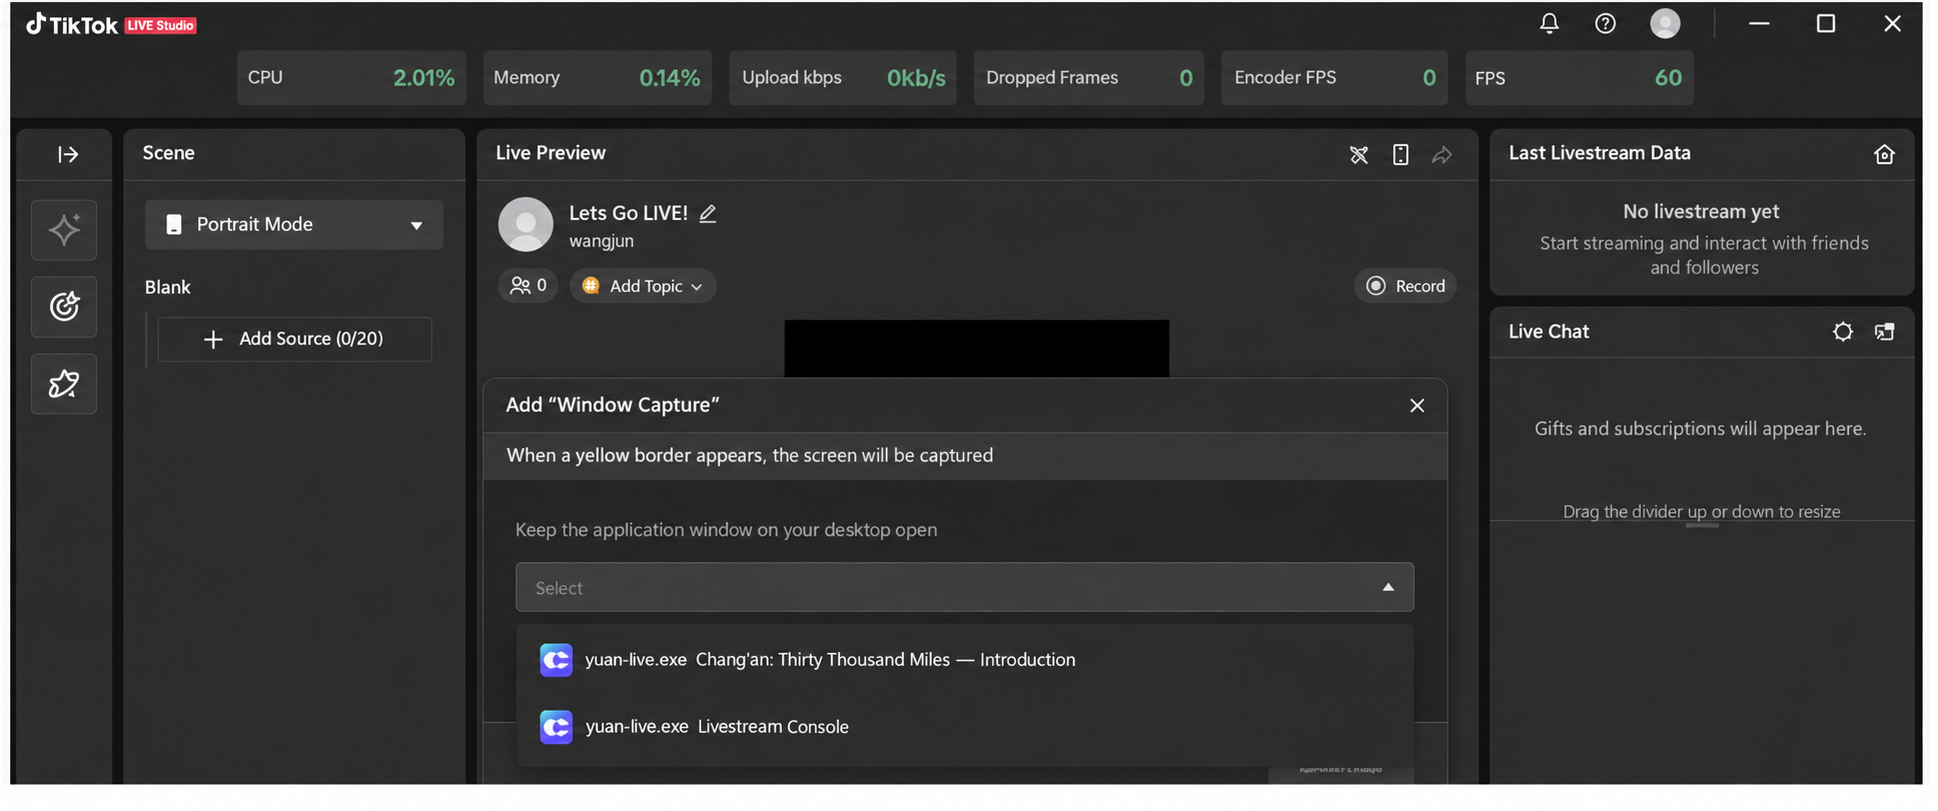
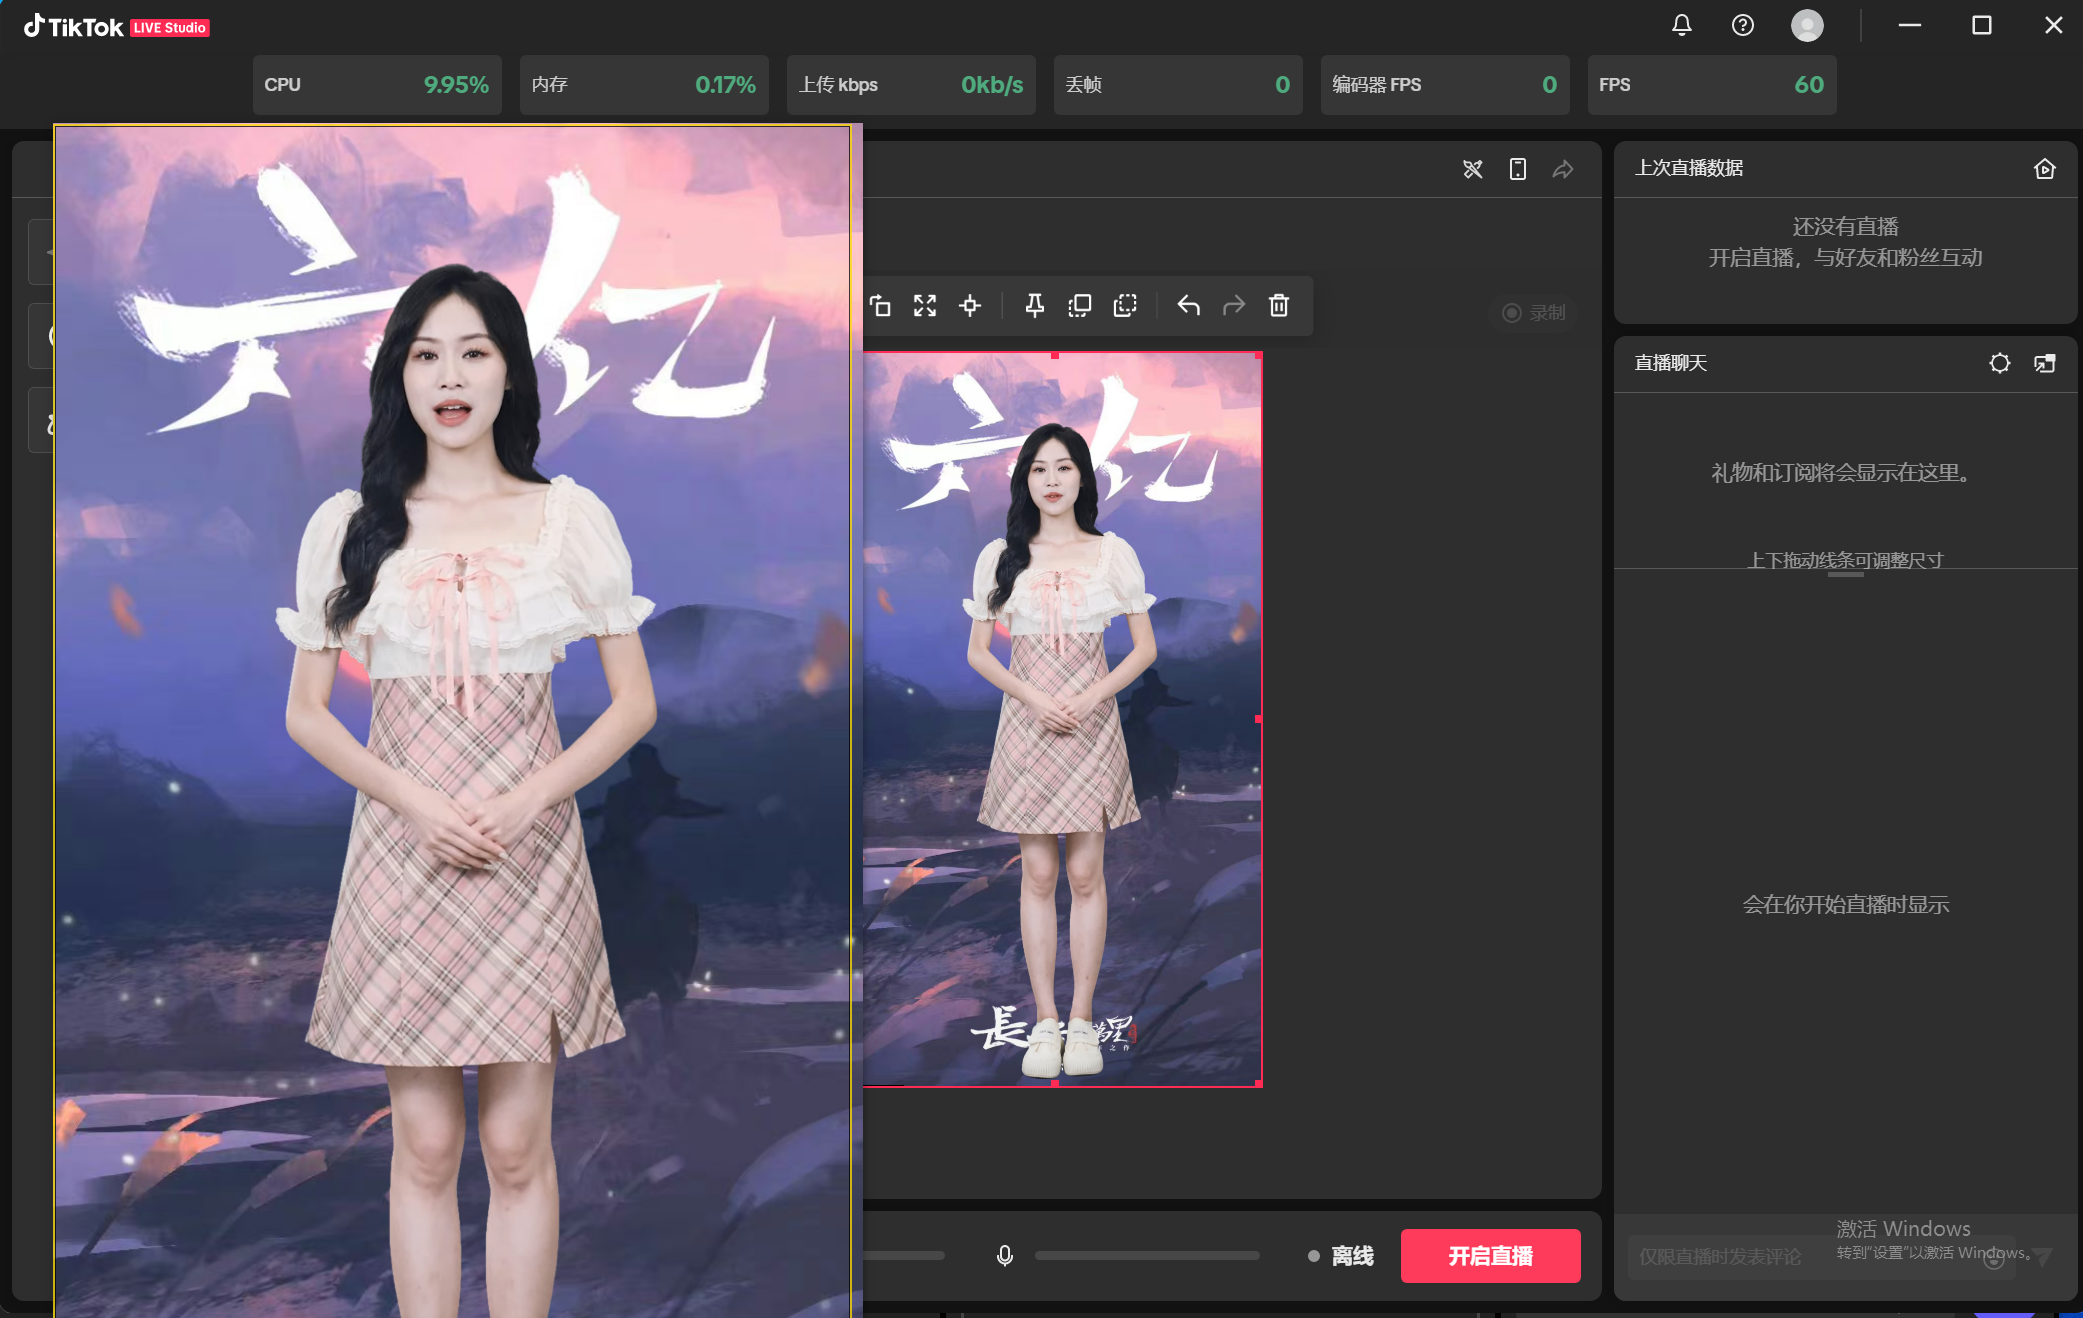
(4) Click Add Source, and the video provided by Syntopia Digital Human will be successfully captured by the TikTok livestream tool
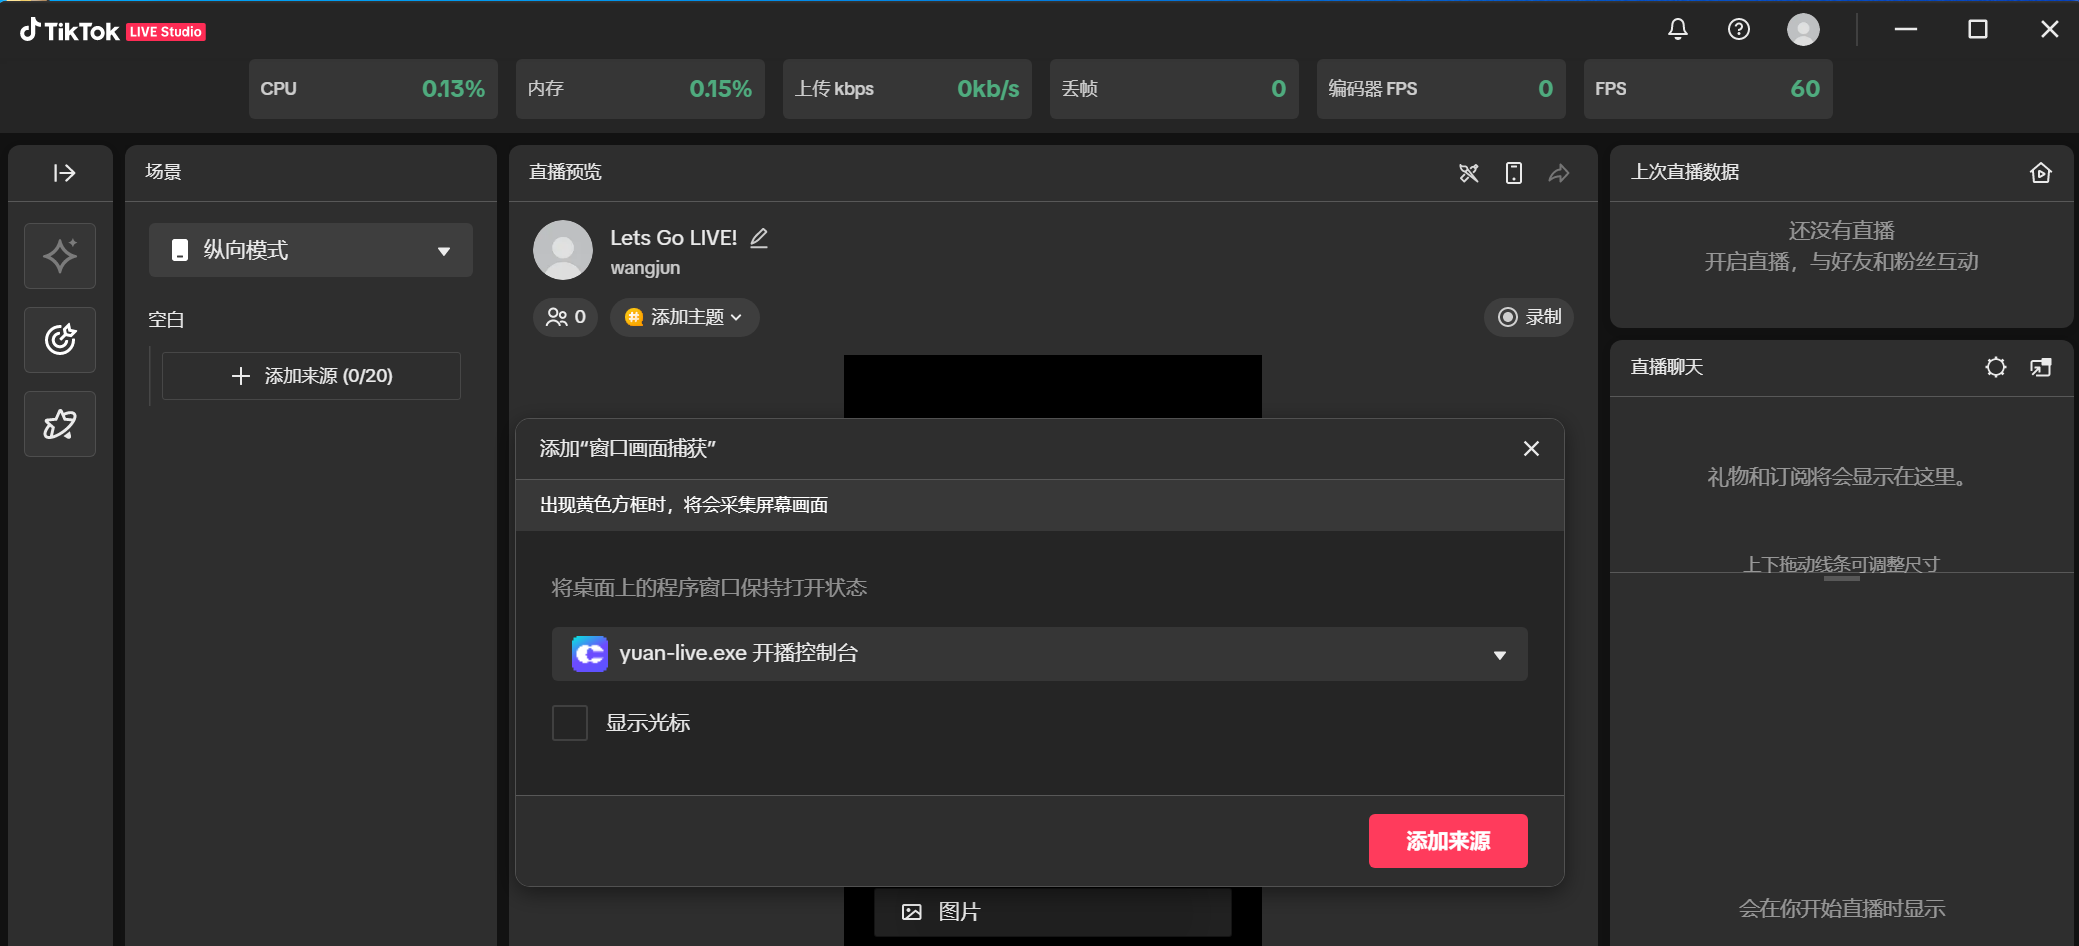
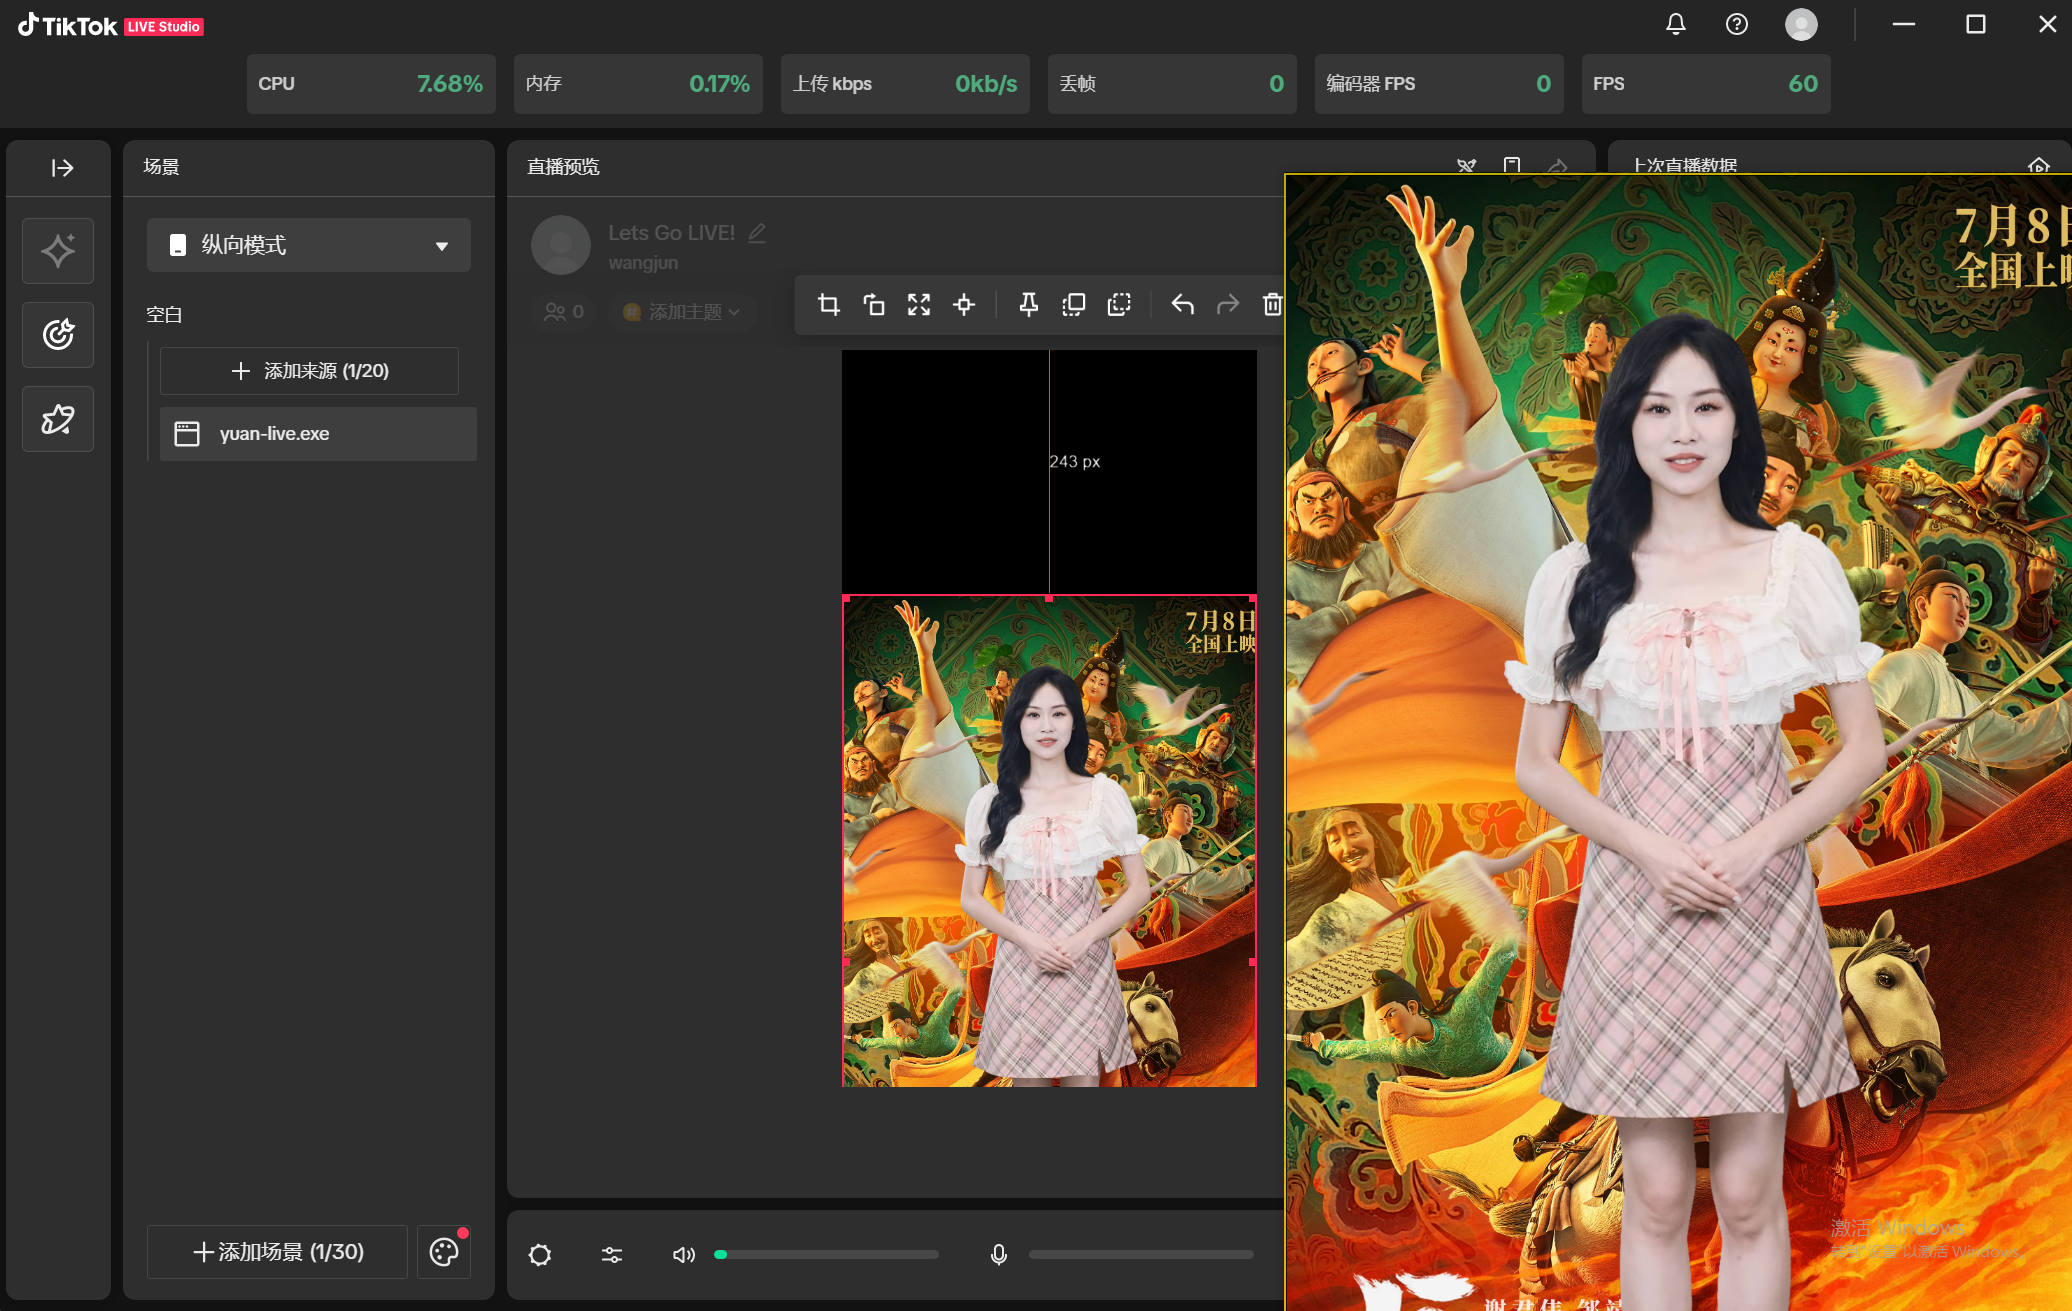
(5) Click Fill Screen to adjust how the image is displayed
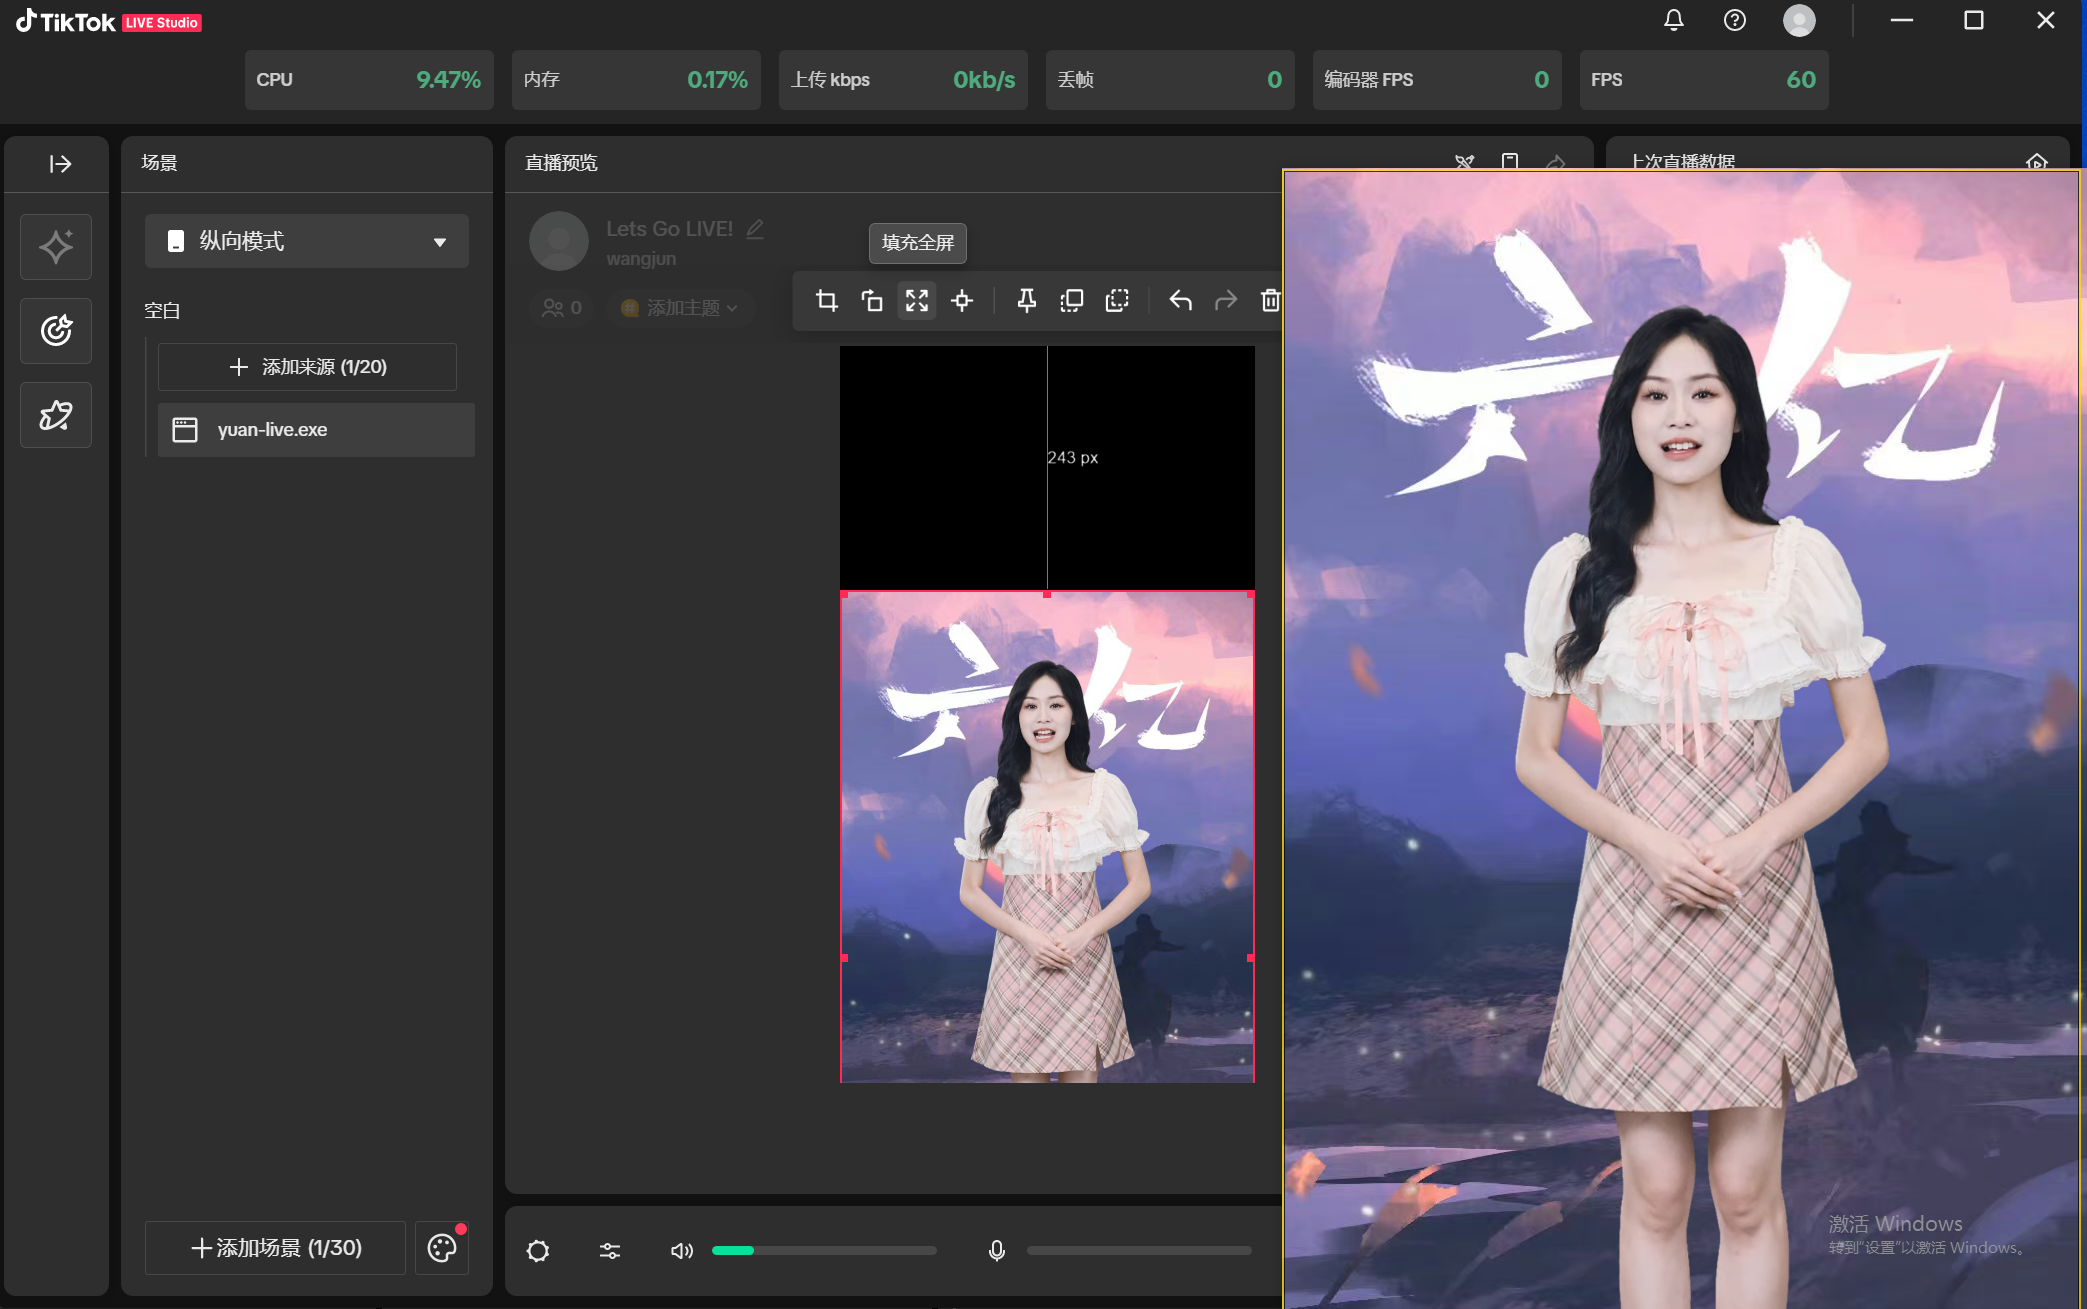
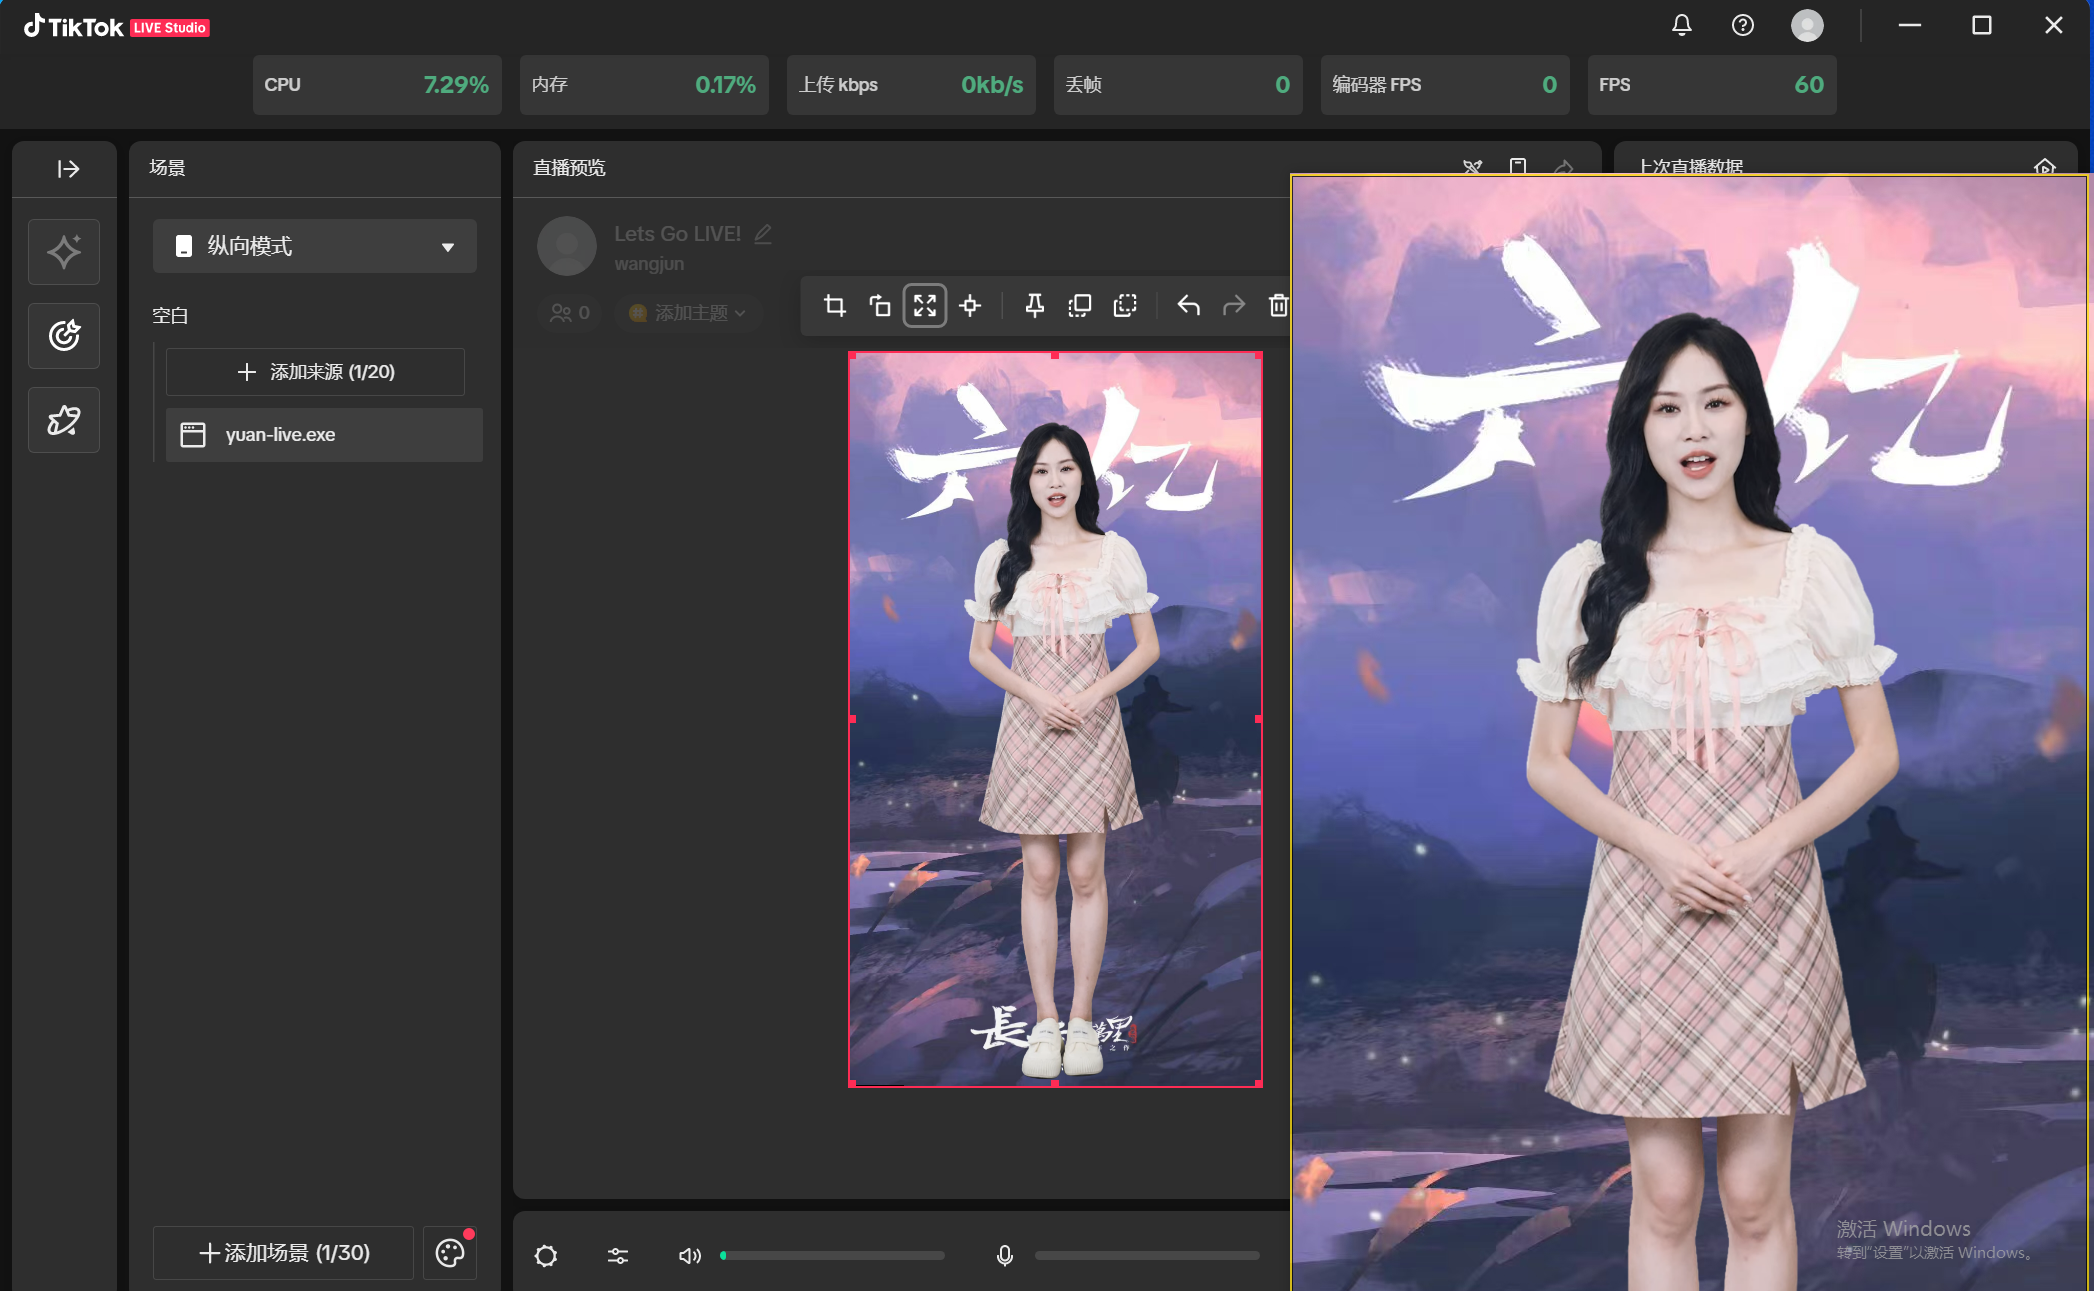
(6) If the microphone is enabled, it will record the ambient sound or voices in the room, which will be pushed to the livestream room via the livestream tool, potentially resulting in noisy ambient sound or voices in the room — turn the microphone off or on based on your actual needs. Once adjustments are complete, click Go Live
4.6 Going Live on Xiaohongshu (RED)
4.6.1 Going Live Using the Virtual Camera
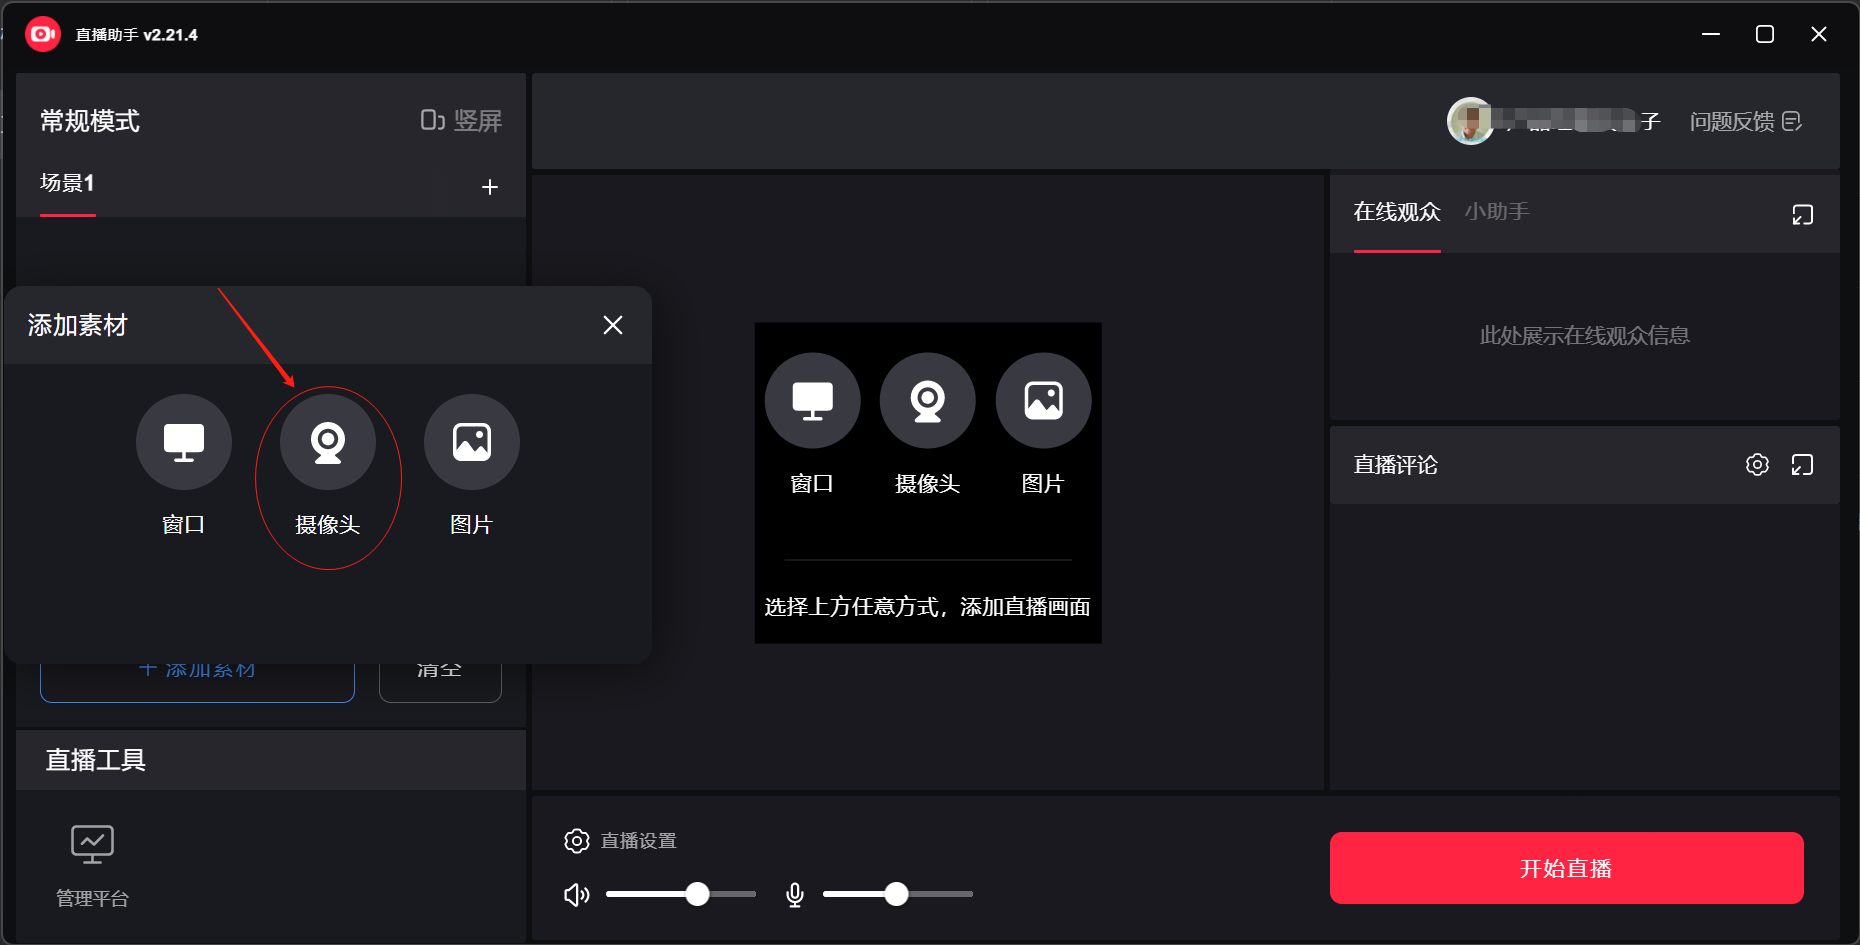
(1) In the Syntopia Digital Human client, the default livestream method is [Virtual Camera] — go live, then open the Xiaohongshu Livestream Assistant, log in, click Add Assets, then click Add Camera
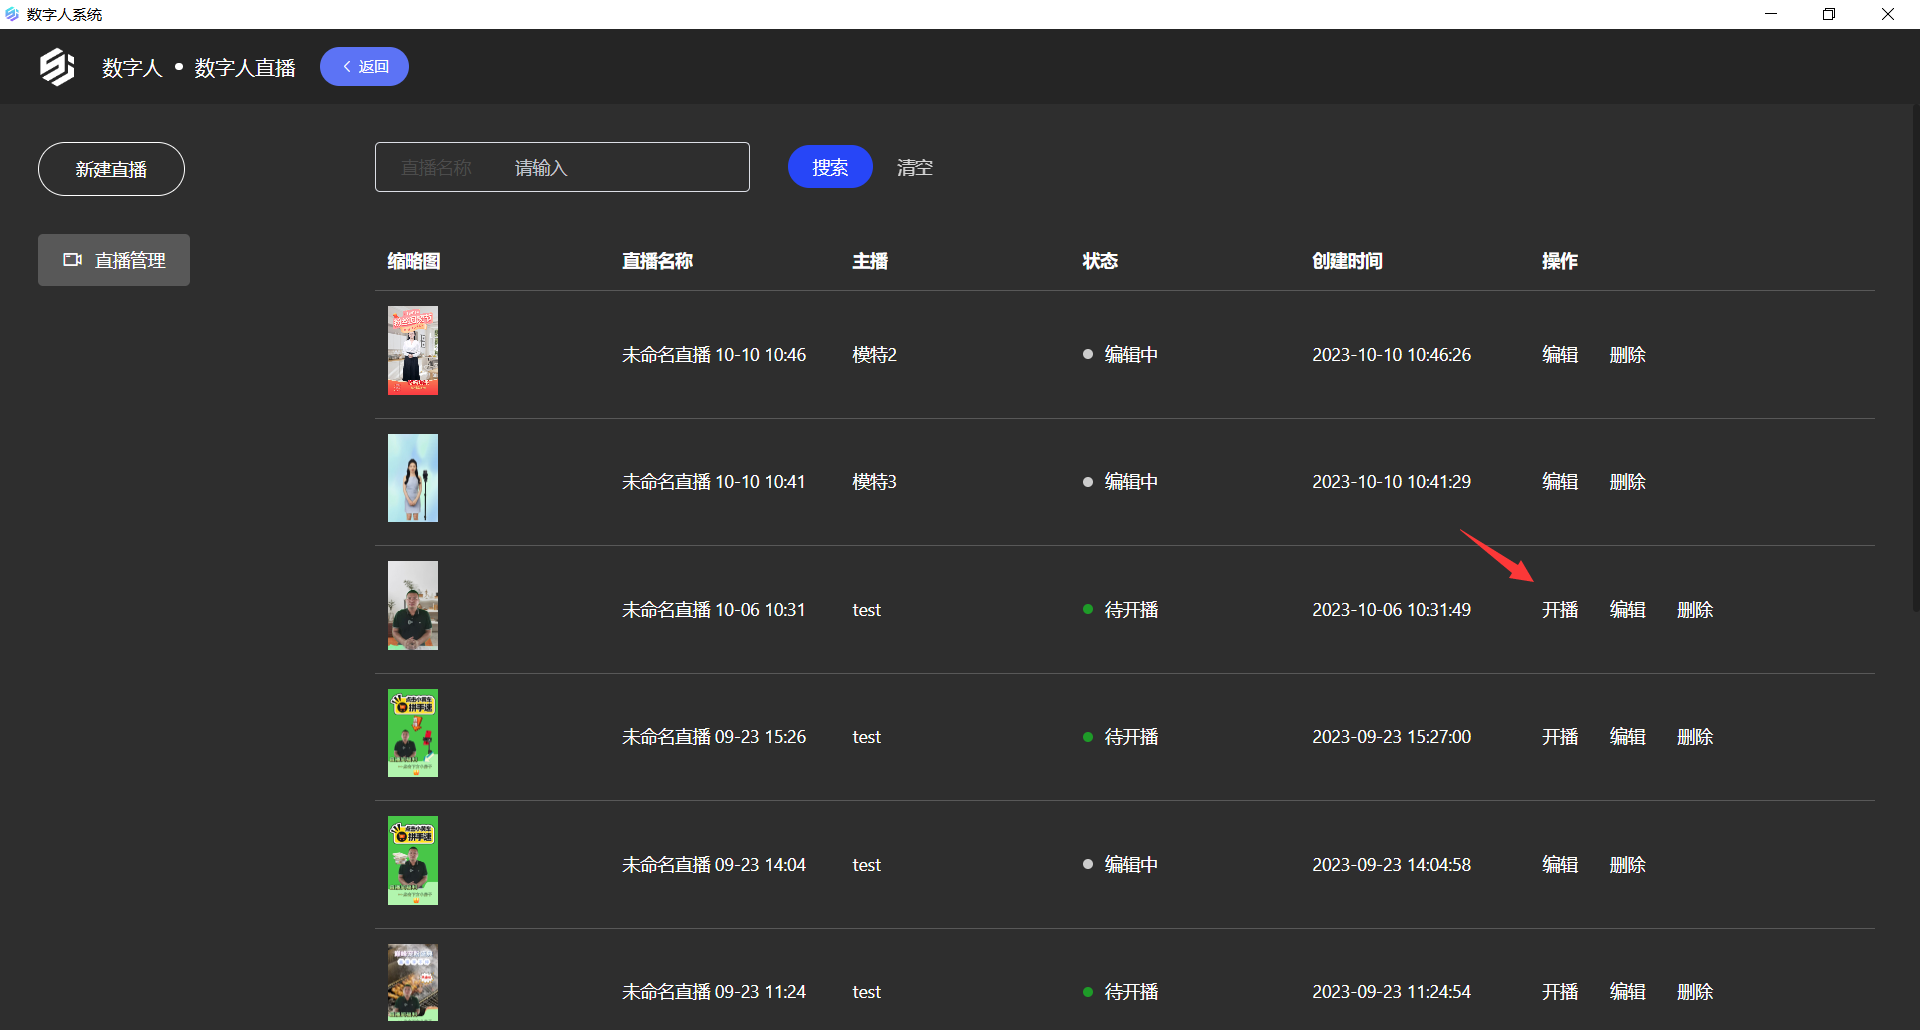
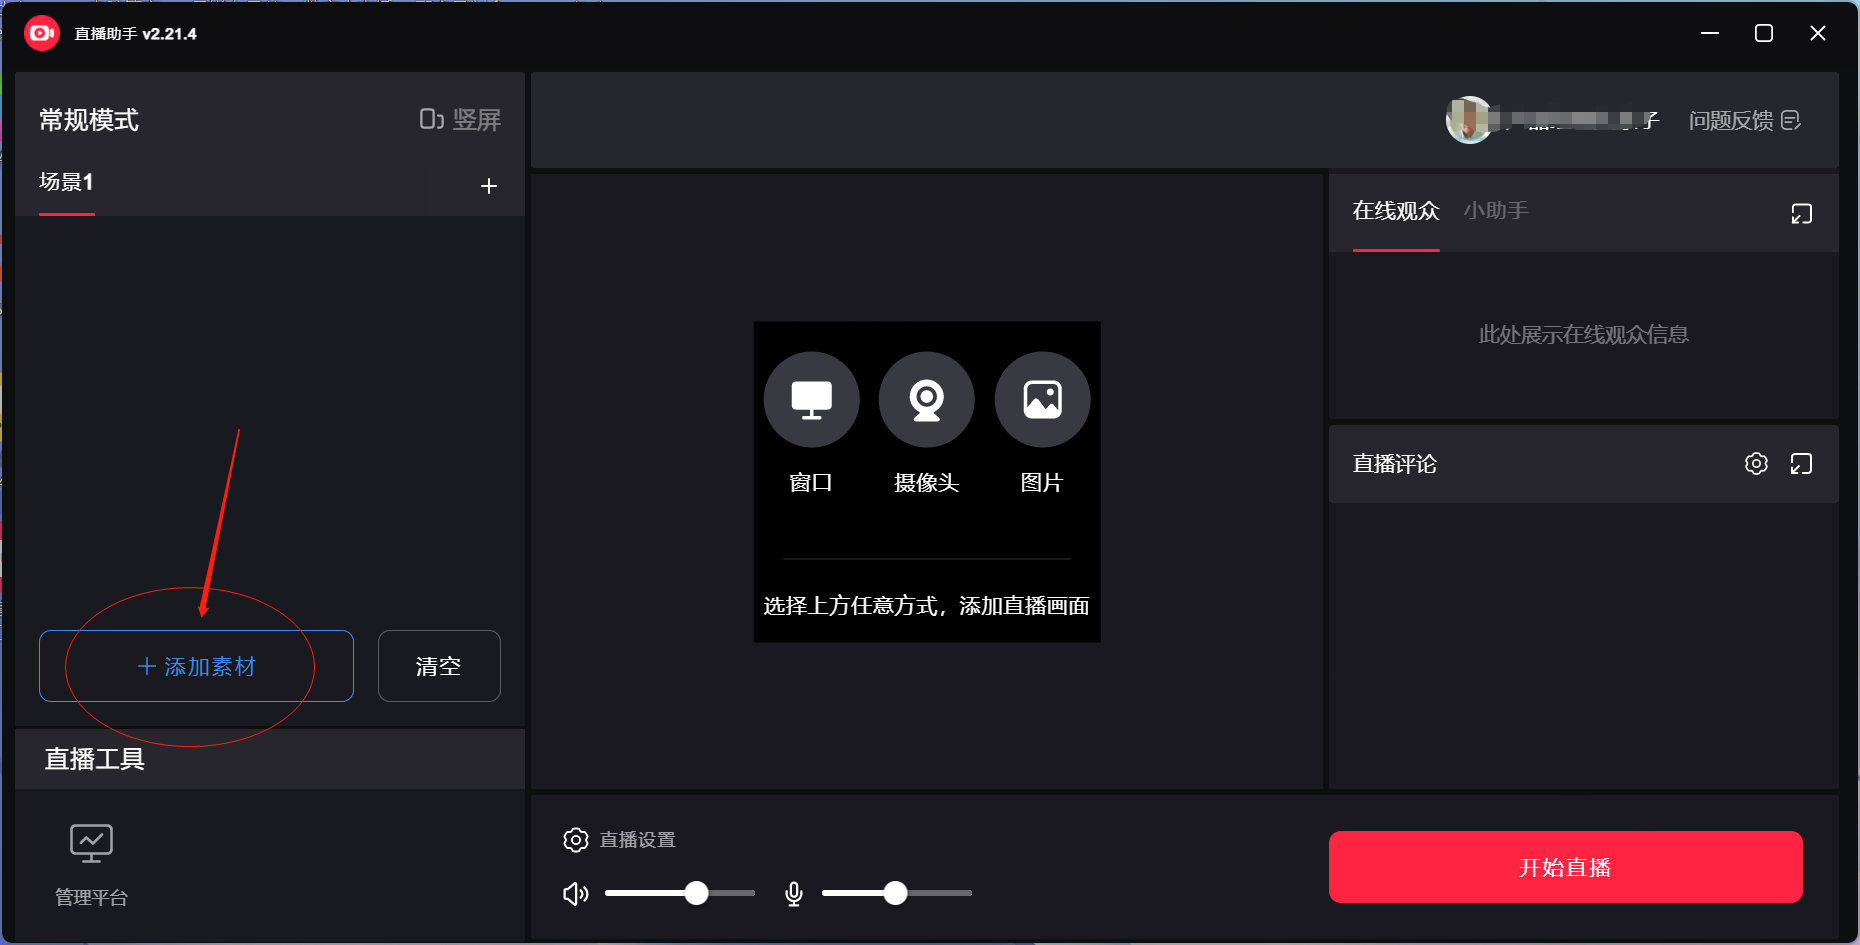
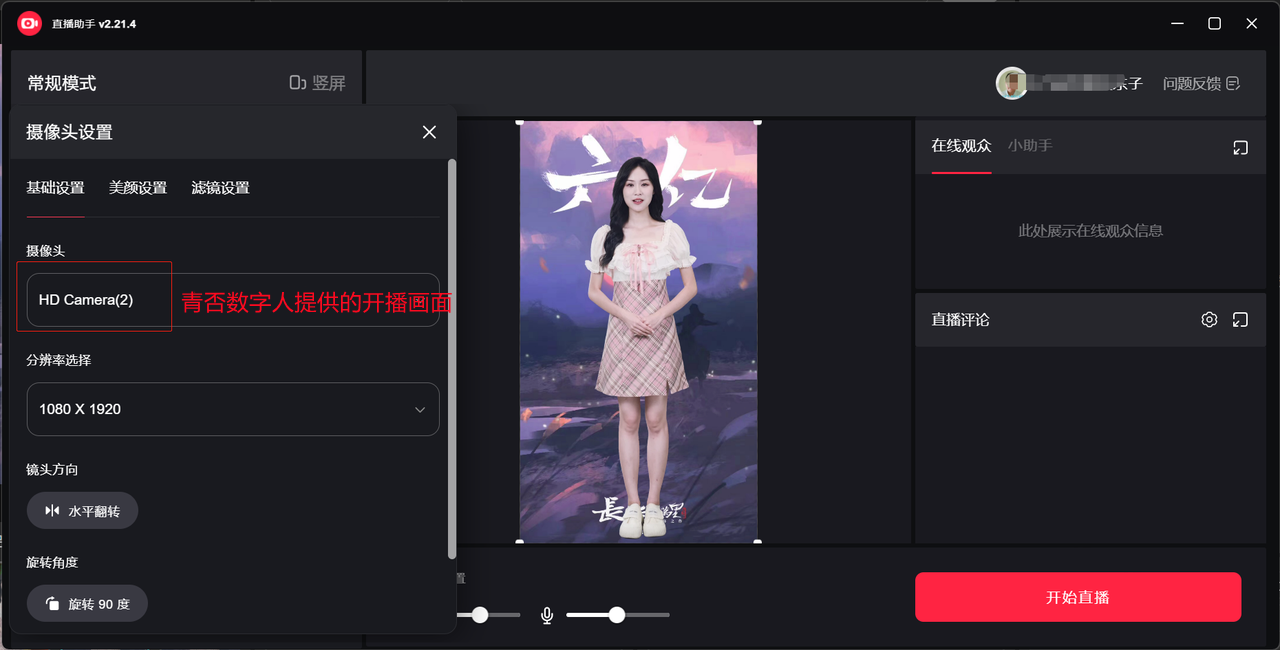
(2) In the camera options, find Syntopia Digital Human's livestream video, and select 1080×1920 as the resolution
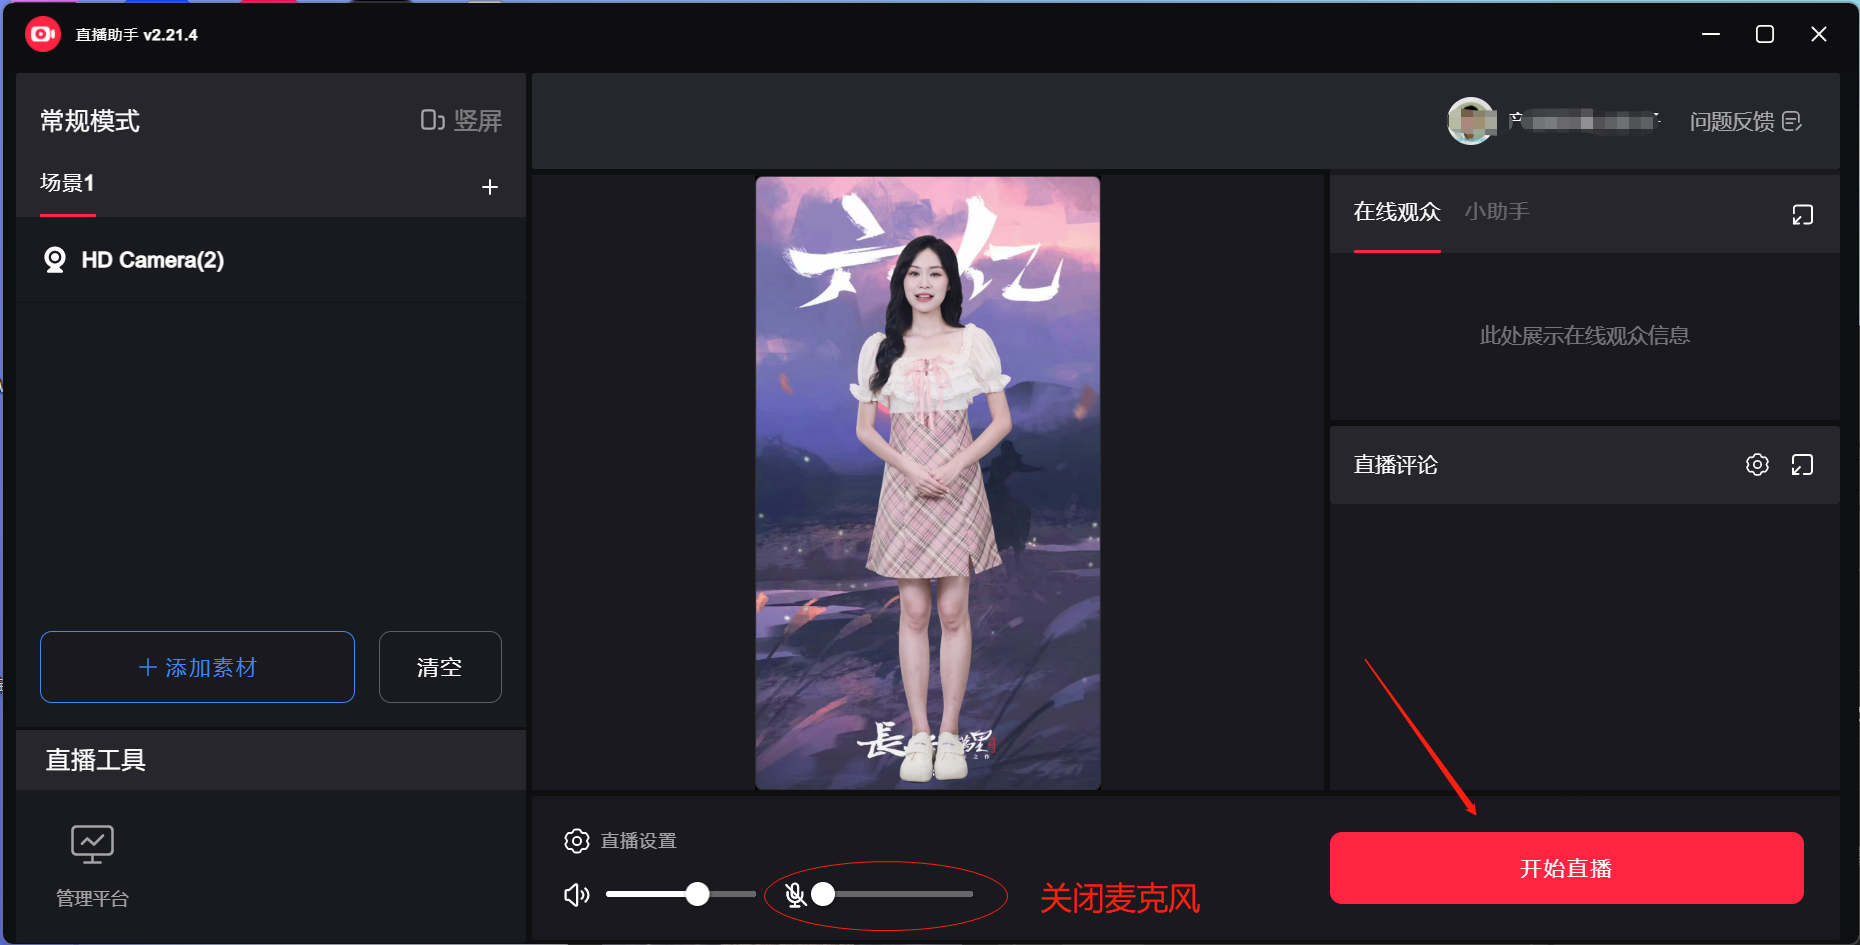
(3) Turn off the microphone and click Start Livestream
4.6.2 Going Live Using Window Capture
(1) Click Go Live in Syntopia Digital Human, and make sure the livestream window is brought to the front
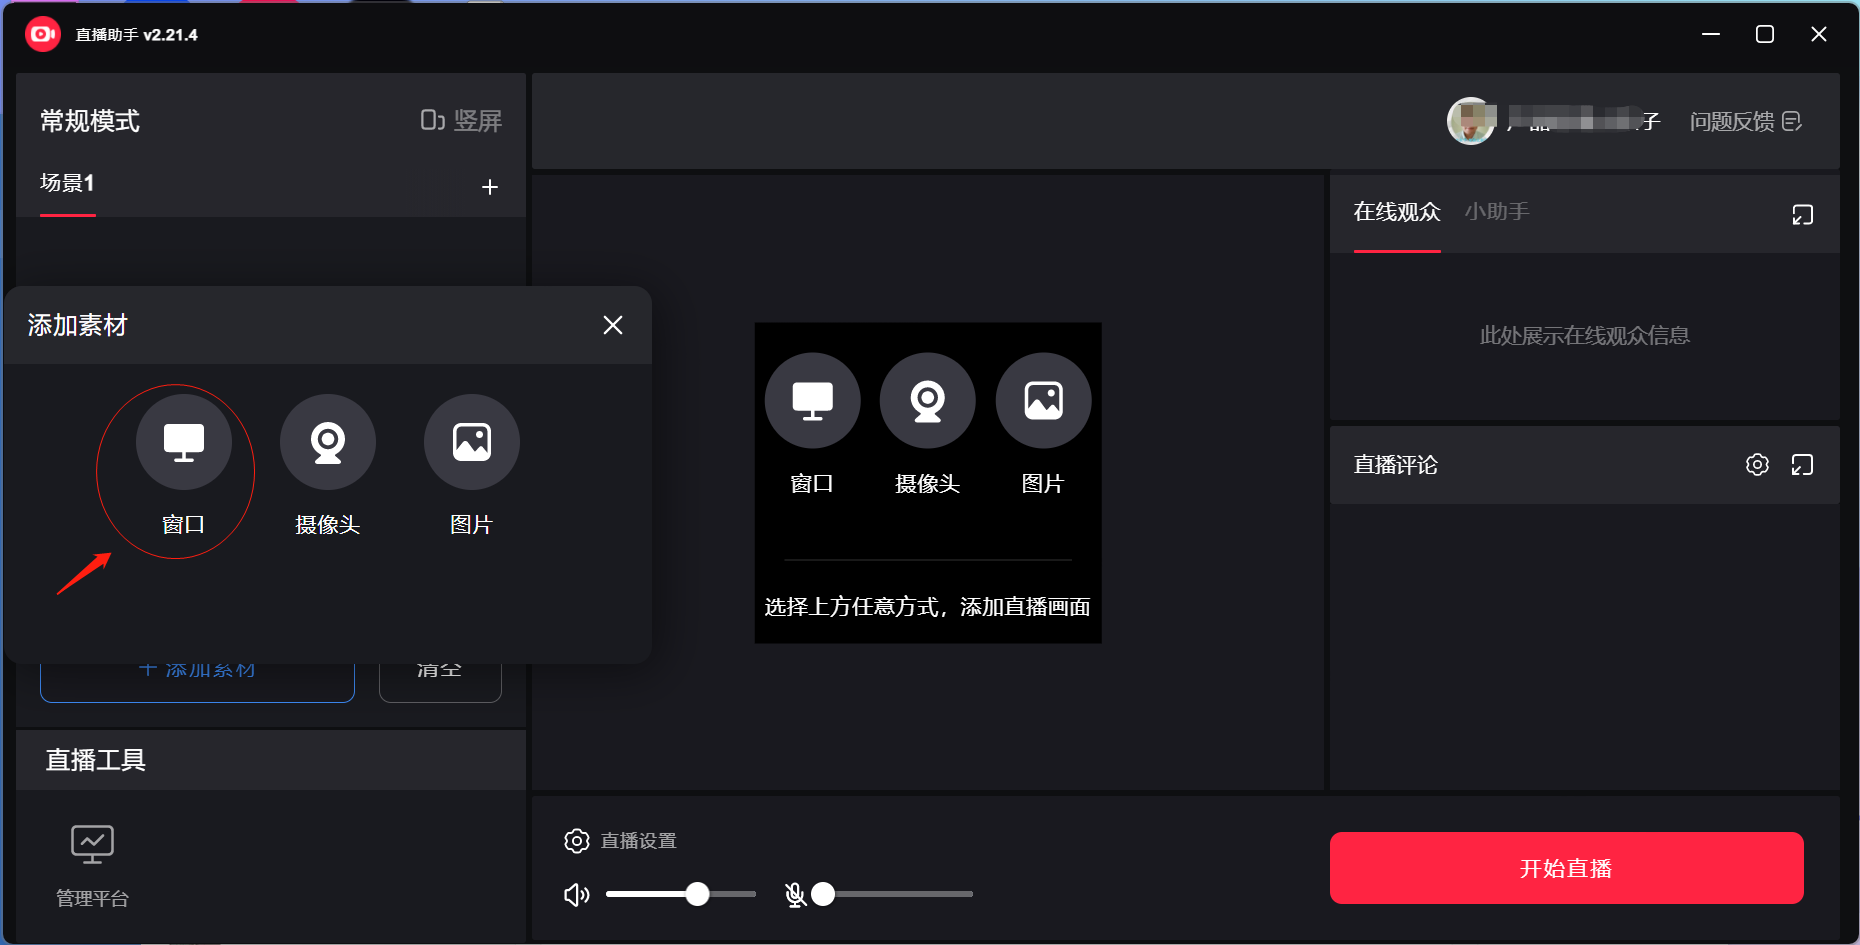
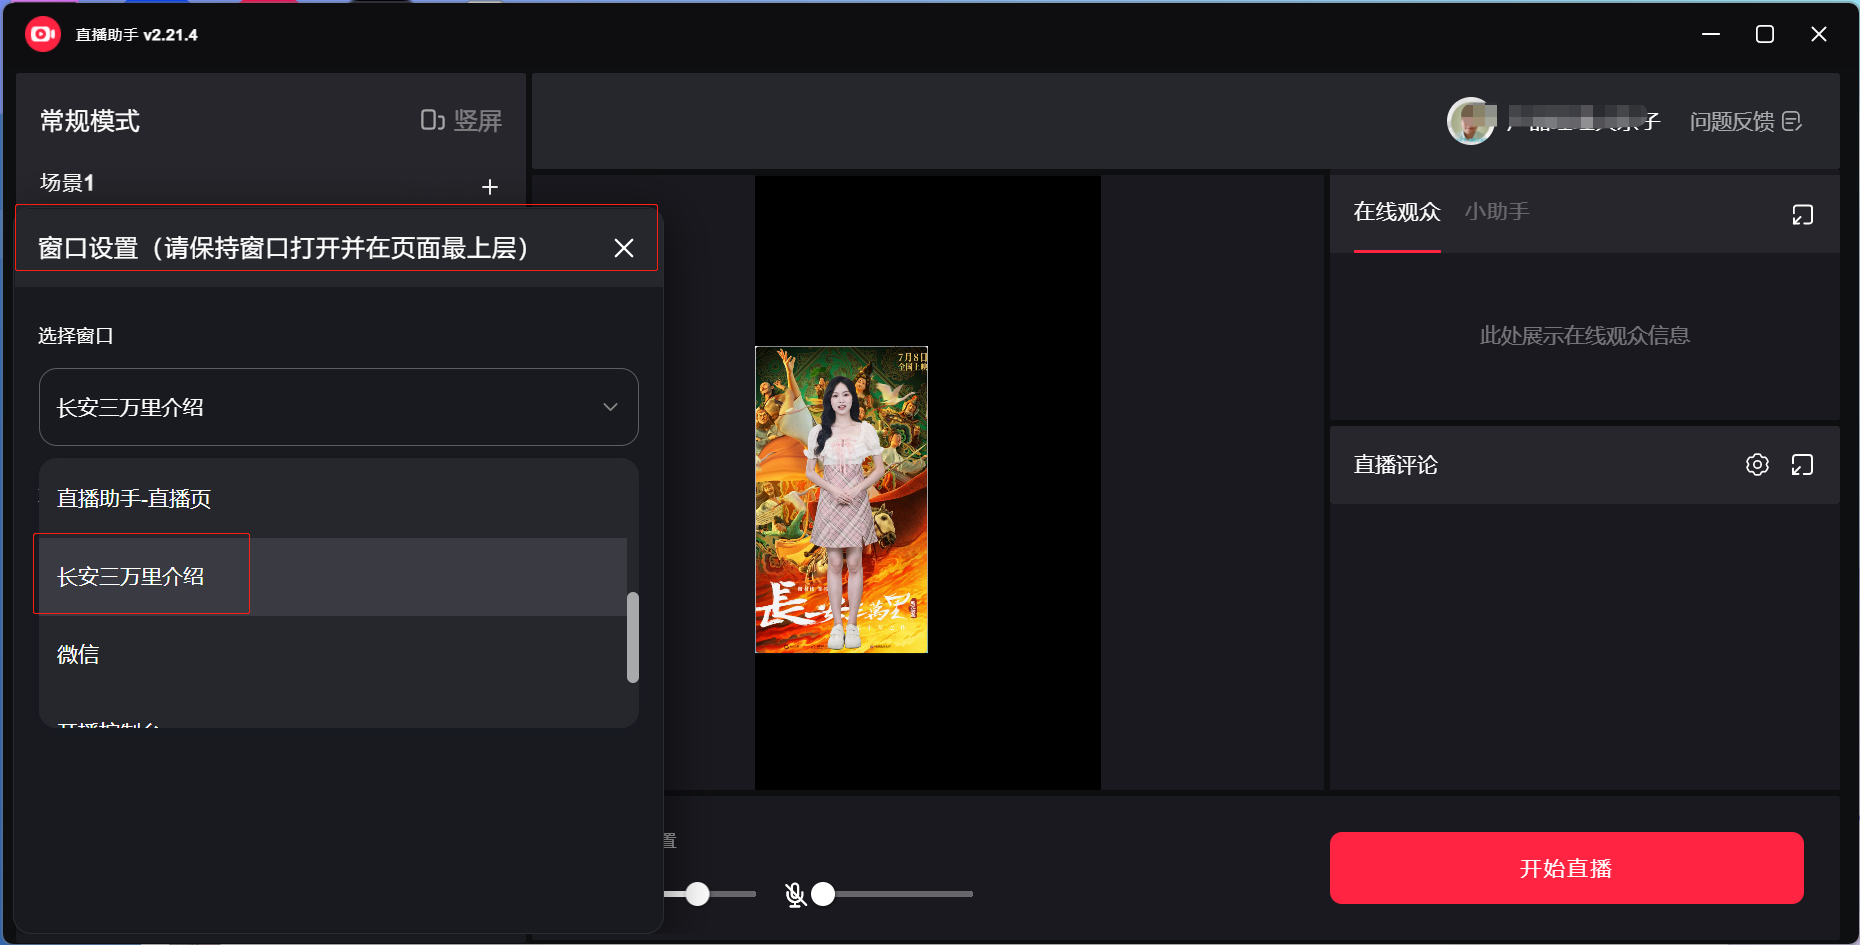
(2) Open the Xiaohongshu Livestream Assistant, click Add Assets, click Window, and find the livestream video provided by Syntopia Digital Human — note that the livestream window must be brought to the front, otherwise the captured image may appear as a gray screen
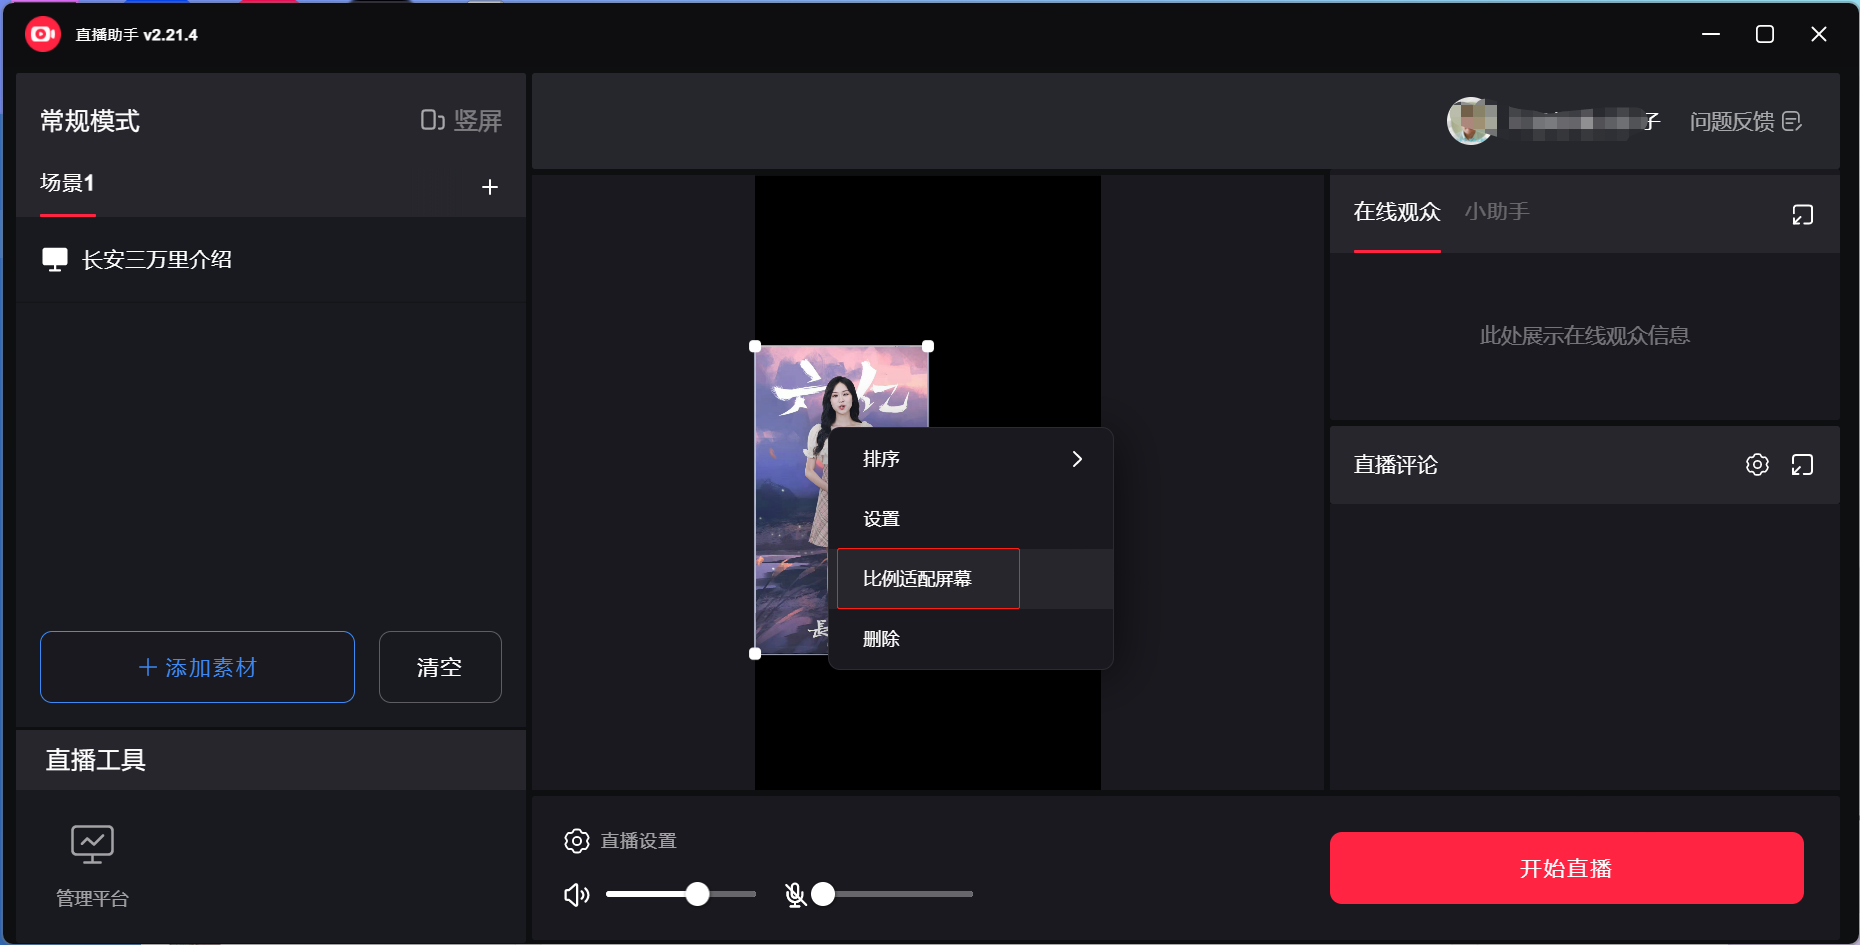
(2) Right-click the captured image and click Fit to Screen
(3) Turn off the microphone and click Start Livestream